

I swear, the moment I figured out how to get that perfect, slightly charred look on my vegetables without spending an hour wrestling a wok, my weeknight dinners changed completely. You know that texture—the way the beans snap but have those dark, beautiful blistered spots? That’s the secret to incredible chinese green beans with garlic sauce. When I was still working my marketing gig, I used to stare out the window, promising myself I’d recreate takeout magic at home. That intense burst of heat transforms simple green beans into something extraordinary. Trust me, this recipe is faster than delivery and infinitely fresher. If you want to know more about why I left that corporate world behind to focus on finding this exact kind of joy, check out our story here.
- Why You Will Love These chinese green beans with garlic sauce
- Essential Ingredients for Authentic chinese green beans with garlic sauce
- Mastering the Wok: How to Prepare chinese green beans with garlic sauce
- Tips for Success with Your chinese green beans with garlic sauce
- Pairing Suggestions for these chinese side dishes
- Storage and Reheating Instructions for garlic green beans
- Frequently Asked Questions about Dry Fried chinese green beans
- Estimated Nutritional Breakdown for chinese green beans with garlic sauce
- Share Your Seventh Flavour Creations
Why You Will Love These chinese green beans with garlic sauce
When I test recipes for the site, I always ask myself: Is this worth dropping everything for? With these garlic green beans, the answer is a resounding yes. They ditch the mushy steamed texture you get everywhere else. It’s all about speed, flavor, and that amazing textural contrast.
- Speed Demon: Seriously, you are looking at 10 minutes of prep and 10 minutes of cooking. That’s it! You can have something worthy of a high-end Chinese restaurant on the table faster than waiting for the delivery app to update. If you need more lightning-fast meals, check out my go-to guide for quick weeknight dinners.
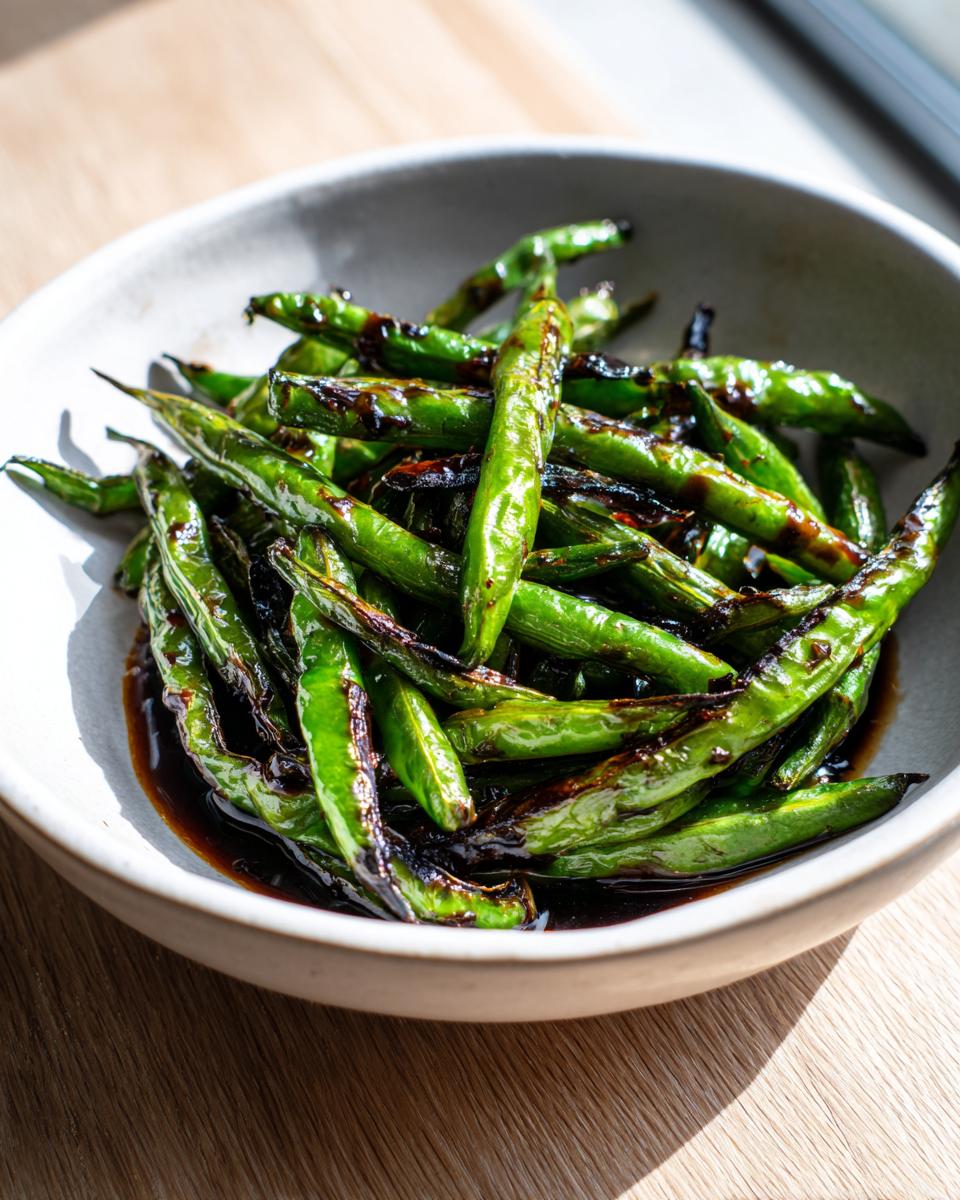
- That Texture You Crave: We are going for blistered green beans here—tender when you bite through, but with that lovely, slightly wrinkled char on the outside that tells you the high heat did its job.
- Punchy & Bright Flavor: The sauce is simplicity itself, but the heavy-hitting garlic and ginger combination cuts right through. It’s savory and lively, making it the perfect counterpoint to richer main courses.
- Foolproof Execution: You don’t need fancy skills, just a very hot pan. I designed this so even if you usually burn water, you’ll nail the **wok fried green beans** look on your first try.
Essential Ingredients for Authentic chinese green beans with garlic sauce
Okay, don’t panic when you see the ingredient list. It’s short, which is the best part! High heat cooking relies on fresh, good-quality components since there’s nowhere for weak flavors to hide. We’re making a killer garlic sauce here that coats everything beautifully. Make sure everything is prepped before you even think about turning on the stove, because once that pan gets hot, things move FAST!
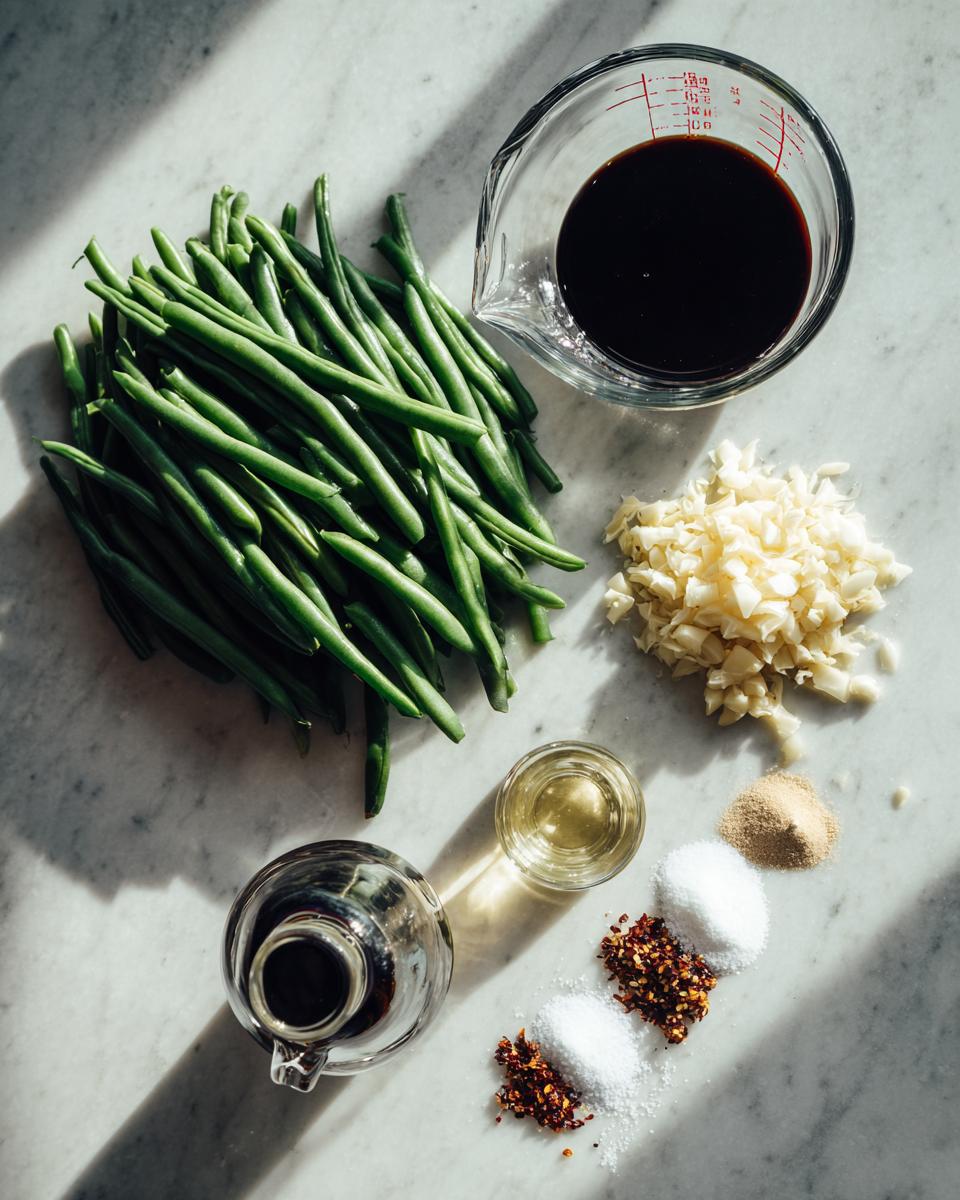
- 1 pound fresh green beans, ends trimmed (Make sure they are perfectly dry!)
- 3 tablespoons neutral oil (I prefer canola or vegetable—something with a high smoke point so it doesn’t burn up on me.)
- 4 cloves garlic, finely minced (Don’t try to substitute the fresh stuff here; it’s non-negotiable.)
- 1 teaspoon fresh ginger, grated (Just a little bit wakes everything up.)
- 1 tablespoon soy sauce (Low sodium is best so we can control the saltiness.)
- 1 teaspoon sugar (This balances the salt and soy—we need that little bit of sweetness.)
- 1/2 teaspoon toasted sesame oil (This goes in at the end for that signature nutty aroma.)
- Pinch of red pepper flakes (Optional, but if you want a little kick of heat, now is the time!)
Ingredient Notes and Substitutions
Since you might be missing one of these things, let’s talk swaps. If you’re keeping things gluten-free, using a high-quality tamari instead of soy sauce works perfectly in this recipe. Also, sometimes I want a deeper, earthier base to the sauce, especially if I’m serving this with something simple. If you feel that way, just mix 1 tablespoon of vegetable broth in with your sauce mixture—it adds a little richness without weighing down the final coating.
Mastering the Wok: How to Prepare chinese green beans with garlic sauce
This is where the magic happens, and honestly, it’s where most people struggle with their homemade versions. To get these to taste like they came right out of the takeout box, you need heat—serious heat! We are aiming for that wonderful dry fried green beans texture, which means we have to fight moisture every step of the way. Remember what I said in the intro? High heat is your best friend for achieving true blistered green beans. If you love learning techniques for crispy vegetables, you can see how I tackle a similar charring method in my post on garlic parmesan roasted broccoli.
Step 1: Preparing the Beans for Blistering
Listen up, because this is Aria’s number one rule when it comes to stir-fries: Your beans must be bone dry. After you wash them and trim those tough little ends off, spread them out on a clean kitchen towel and pat them down, or even let them air dry for 15 minutes. If there is any surface water, the pan’s temperature will crash, and you’ll just end up stewing your beans instead of getting that gorgeous char you want in your wok fried green beans.
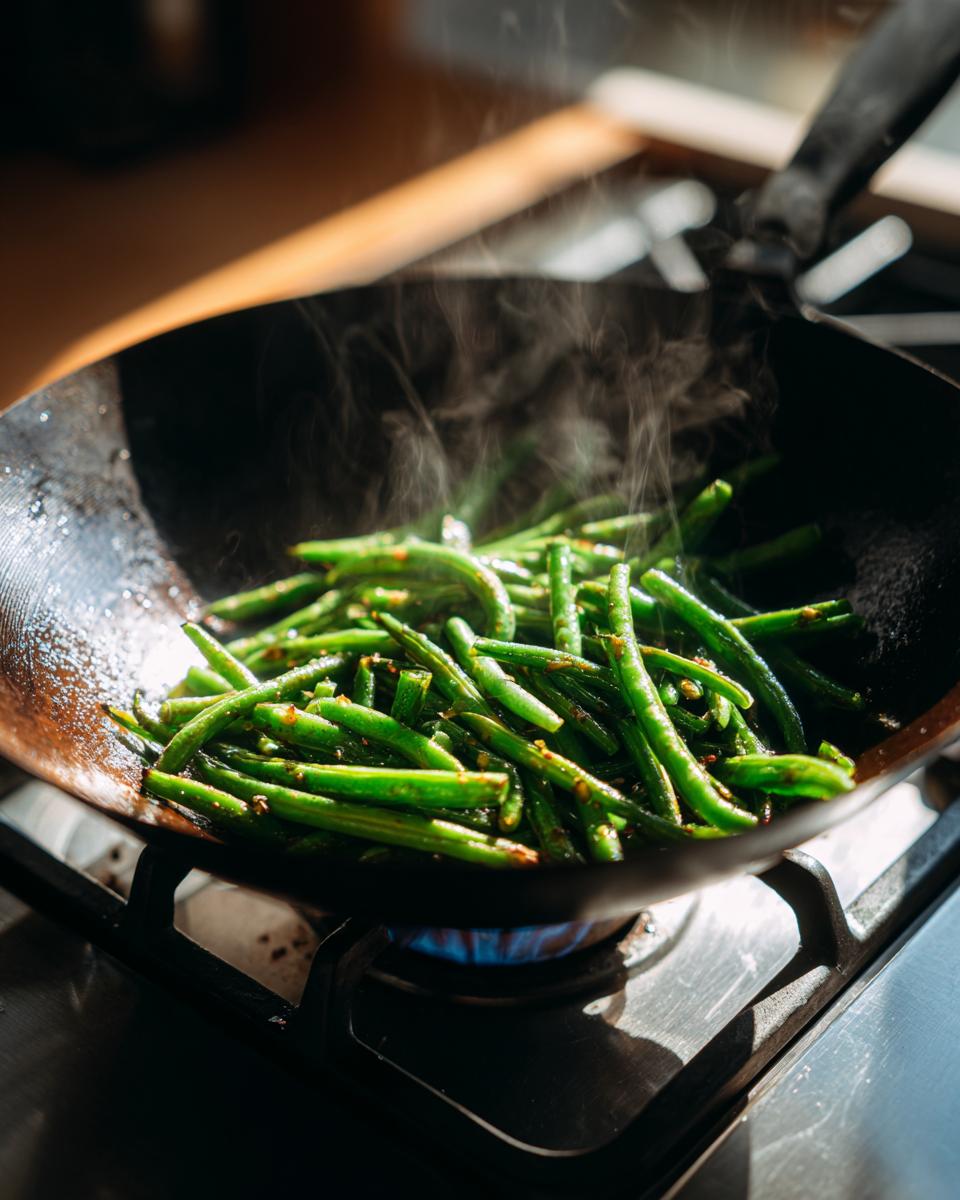
Step 2: Achieving the Perfect Blistered Green Beans
Get your wok or your biggest, heaviest skillet screaming hot. I mean shimmering hot oil hot! Add your 3 tablespoons of neutral oil. Once it’s ready, toss in the beans—try to spread them out as much as possible; crowding the pan kills the crisp factor. Here’s my secret: don’t touch them for the first 2 or 3 minutes. Let them sit right on that hot metal so they can start to char and wrinkle. After that initial char sets, then you can stir constantly for another 4 or 5 minutes until they are tender-crisp.
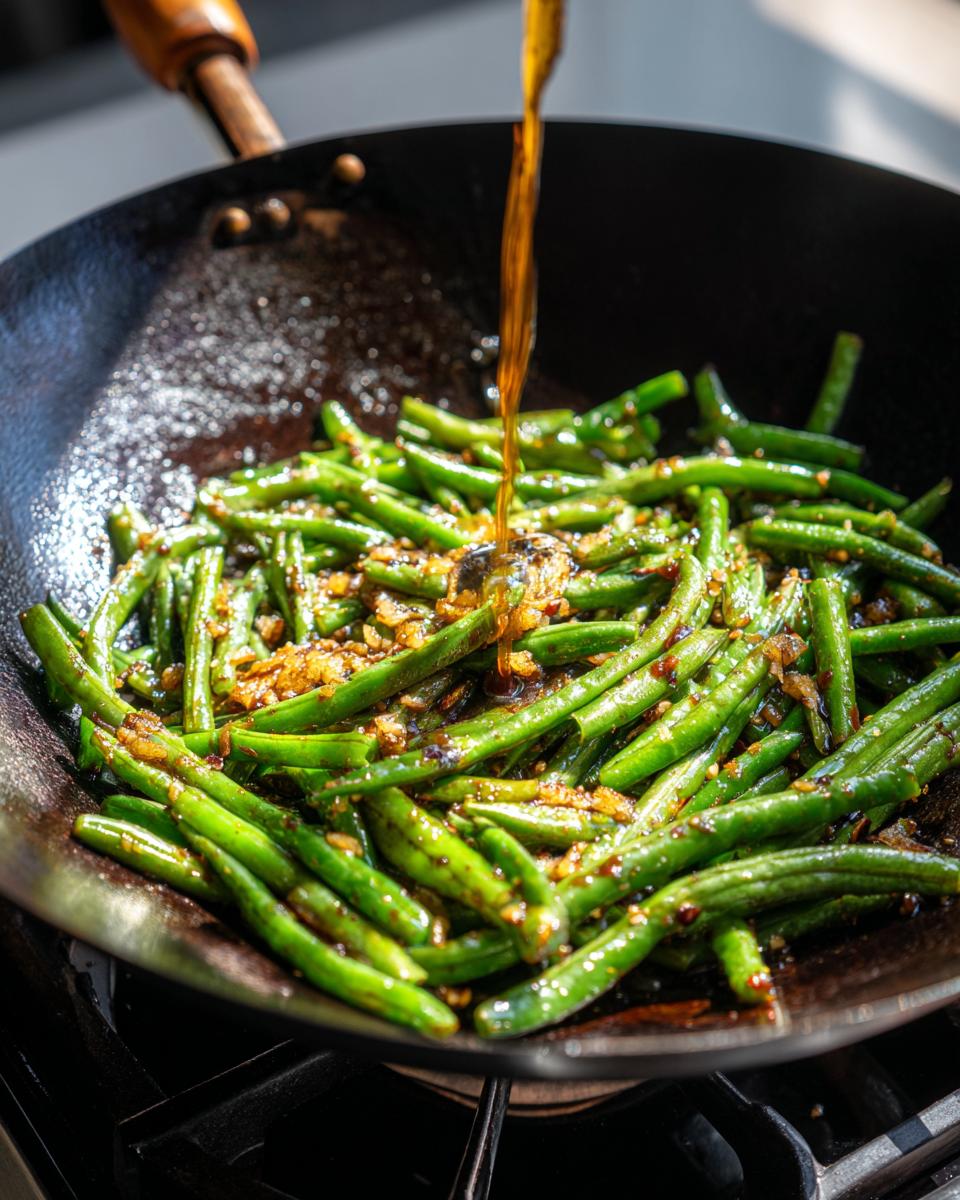
Step 3: Building the Savory garlic sauce Coating
Once the beans look perfectly blistered, push them all over to one side of the pan. Turn the heat down just a touch to medium. Add your garlic and ginger to the open space and let them get fragrant for about 30 seconds—watch them like a hawk so they don’t burn! Quickly toss the beans in with the aromatics. Now, mix your sauce ingredients together in that little bowl you prepared earlier, pour it all over the beans, and toss everything together super fast. Cook just until that sauce tightens up—maybe 30 seconds—and pull it off the heat immediately. Overcooking here ruins the snappy texture!
Tips for Success with Your chinese green beans with garlic sauce
I’ve made this dish probably a hundred times since I first perfected it, and I’ve learned a few little tricks to guarantee you get that takeout quality every single time. Don’t stress if your kitchen doesn’t have an industrial-strength wok; we can work around that!
My main tip for building confidence is remembering that high heat is your friend, but it forgives less. If you’re using a standard home skillet, you absolutely need to work in batches. Trying to cook a full pound of beans at once in a regular pan will cause a steam bath, and that’s how you lose that beautiful char. Cook half the beans, remove them, then cook the second half. It takes longer overall, but guarantees you get those gorgeous, blistered spots we’re aiming for.
Now, let’s talk about cranking up the flavor because sometimes you just need that extra *oomph*. If you enjoy a little more heat—and who doesn’t love a kick in their garlic green beans—you can actually add a quarter teaspoon of ground Sichuan peppercorns along with your ginger and garlic. That will give you a lovely, tingly heat that feels really authentic. If you want it deeper, try using dark soy sauce instead of regular soy sauce in your sauce mix; it won’t add much salt, but it gives the coating a gorgeous, mahogany color and a richer savoriness that you’ll recognize immediately.
And please, please, after you take the finished dish off the heat, taste it before you serve it. Does it need a drop more saltiness? A tiny sprinkle of sugar? This is your kitchen, and now that you know the core technique, you can tweak that simple sauce mixture until it tastes exactly like your favorite version of these fantastic chinese side dishes.
Pairing Suggestions for these chinese side dishes
Okay, you made your perfect batch of fiery, garlicky beans—now what? These chinese side dishes are so vibrant and punchy that they really demand a partner that can stand up to their flavor, but they are also wonderful at balancing out something rich or creamy. My goal is always a balanced plate that gives you variety in texture and taste.
If you’re going for a quick Friday night meal, these beans are the absolute best supporting actor. They love simple, straightforward main courses. Think about pairing them with a mild, savory protein. My go-to suggestion is crispy pan-seared tofu or maybe some simple steamed chicken breast seasoned only with white pepper and a dash of soy sauce. The clean flavor of the protein lets your blistered beans be the star!
For starch, you can’t go wrong with classic Jasmine rice, but I often like to mix things up. Try making a batch of simple, fluffy steamed broccoli and tossing it with that leftover drizzle of soy sauce from your bean prep. Or, if you’re feeling like something completely different for a change of pace, you could try something outside the usual takeout fare, like my comforting cheesy chicken and rice casserole—it sounds weird next to garlic green beans, I know, but the creamy starch is a fantastic contrast to the fiery snap of the beans!
Basically, anything that feels light or slightly rich works well. Just remember that these beans pack a flavor punch, so make sure your main event isn’t already competing with heavy sauces. It’s all about harmony at the dinner table!
Storage and Reheating Instructions for garlic green beans
I hope this recipe makes enough for seconds, because these garlic green beans taste fantastic the next day, but only if you store them right! Leftovers are inevitable when you cook something this good, but texture is everything when it comes to stir-fried veggies. If you treat them wrong, that beautiful blistered texture we worked so hard for turns soft and sad really fast.
When you’re done eating, let any leftovers cool down completely before you even think about putting them away. Then, pop them into a shallow, airtight container. You want to avoid deep containers because they trap moisture, and moisture is the enemy here. Pop that container into the fridge, and they should keep nicely for about three days. Honestly, they are usually gone by then because my husband snacks on them!
Now, reheating is critical for keeping that slight snap. My biggest piece of advice? Skip the microwave if you can manage it. Microwaving is fantastic for speed, but it essentially steams the beans all over again, and you lose that lovely char we built up. If you absolutely have to use a microwave, use it in 15-second bursts, stirring in between.
For the best results, especially if you want them to feel freshly made, use the stovetop. Get your largest skillet—honestly, the wok works best again—and heat it over medium-high heat before adding just a tiny splash of fresh oil. Toss the cold beans in and stir constantly for maybe two minutes. You aren’t trying to cook them again; you’re just warming them through and letting that heat bring back that lightly crisp exterior. That quick blast of dry heat revives the texture spectacularly, and you’re back to enjoying perfect garlic green beans in no time at all!
Frequently Asked Questions about Dry Fried chinese green beans
I get so many messages asking little tweaks and clarifications about this recipe—and I love hearing from you all! Since the technique is so dependent on high heat, it brings up a few common concerns. Here are the questions I get asked the most about making these dry fried chinese green beans absolutely perfect so they taste just like what you hope for when you order them out.
Can I make these chinese green beans vegan?
Yes, absolutely! This recipe is almost completely vegan as it stands. We’re using vegetable oil and no meat products whatsoever, making it one of my favorite simple vegan chinese sides. The only thing you need to check is your soy sauce. Most major brands are vegan, but if you’re buying a specialty sauce, just quickly check the ingredients list. Otherwise, you are good to go, my friend! It’s one of the simplest ways to bring vibrant flavor to a plant-based meal.
How do I get the beans truly charred and not soggy?
This is the million-dollar question, isn’t it? The key lies in two things: dryness and heat. First, I cannot stress enough how important it is to dry your beans thoroughly. Any water on the surface means steaming, not charring. Second? You need a ripping hot pan and patience. You must let those beans sit untouched in the hot oil for those first 2 to 3 minutes so the surface wrinkles and blacks slightly. If you start stirring immediately, you stop the blistering process before it even starts. Don’t be afraid of that high heat; that’s what gives you that incredible texture that makes these blistered green beans so addictive!
If you need a beginner’s guide to getting your kitchen confidence up in general, I have some great foundational resources ready for you, too, including some tips on starting the day right, which you can find here!
Estimated Nutritional Breakdown for chinese green beans with garlic sauce
When I put together these quick, flavor-packed meals for my family, I always try to keep things balanced since we eat them so often. While I’m not a nutritionist, I pull the standard estimations for this recipe so you can see what you’re working with in terms of macronutrients. Just like any recipe, these numbers depend on the exact brand of soy sauce or the specific size of your garlic cloves, so please treat these as a great guideline, not a hard rule!
This data is based on a recipe yield of four servings, meaning this is the estimated breakdown per person in your serving of chinese green beans with garlic sauce. We are keeping things light on fat and sugar, which helps keep the focus right where it should be: on that savory garlic flavor!
- Serving Size: 1 serving
- Calories: 120
- Fat: 8g (with only 1g saturated fat!)
- Carbohydrates: 10g
- Fiber: 4g
- Protein: 3g
- Sugar: 4g
- Sodium: 350mg (This is the one to watch if you are sensitive to salt; definitely use low-sodium soy sauce!)
We want eating well to feel joyful, not stressful! Know that because this dish relies heavily on whole vegetables and fresh aromatics, it comes packed with great fiber and very little cholesterol. It’s one of those wonderful recipes that tastes indulgent but keeps you feeling light and energized after you eat it. Remember, these are just estimates based on standard measurements, so they help you plan, but they don’t take away from the pure joy of eating perfect blistered green beans!
Share Your Seventh Flavour Creations
Well, that’s it! You now have the complete low-down on how to turn simple beans into the most exciting chinese green beans with garlic sauce you’ve ever made at home. Truly, my greatest joy here at Seventh Flavour is knowing that my kitchen experiments end up sparking creativity in yours. I put so much heart into these instructions, focusing on that high-heat technique, because I believe cooking should always feel rewarding.
Once you’ve gone through the steps—especially the part where you get that beautiful blistering—I really, really want to hear about it! Did you manage to nail that charred look on your first try? Did you end up adding more chili flakes than I suggested because you just love the heat?
Please take a moment to rate the recipe right below this section. Your feedback helps me know which recipes are truly connecting with you! And if you snapped a picture of your finished plate of garlic green beans, I would be over the moon if you shared it on social media and tagged us. Seeing those dishes pop up is what fuels my passion and reminds me why connecting through good food is so important. If you ever have a burning question or want to share a story about how this recipe fit into your dinner plans, don’t hesitate to reach out to me personally on the contact page. Happy cooking, and thank you for bringing a little bit of Seventh Flavour into your home!
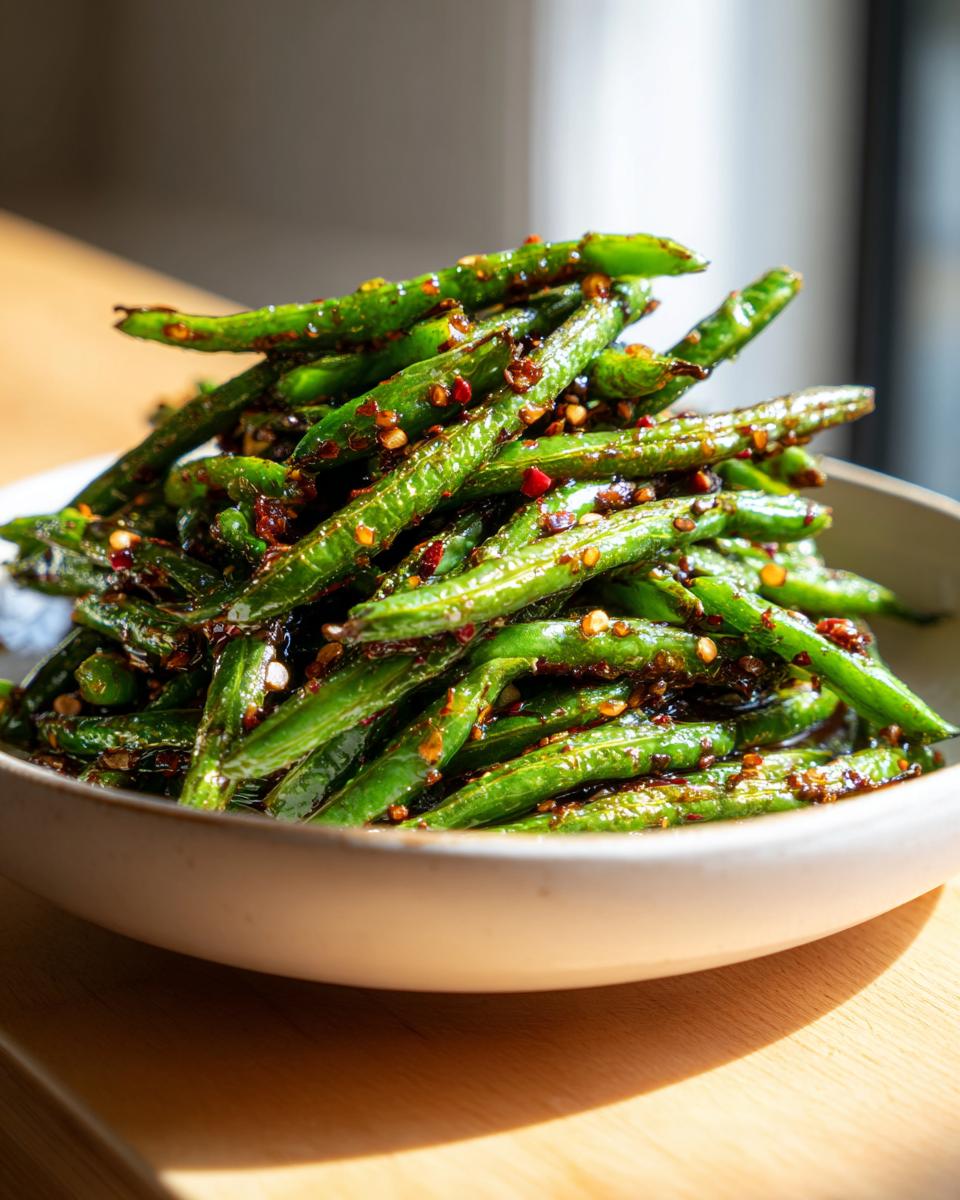
PrintChinese Green Beans with Garlic Sauce (Dry Fried Style)

Make restaurant-style garlic green beans at home. This recipe uses high heat to blister the green beans before tossing them in a savory, punchy garlic soy sauce.
- Prep Time: 10 min
- Cook Time: 10 min
- Total Time: 20 min
- Yield: 4 servings 1x
- Category: Side Dish
- Method: Stir-Frying
- Cuisine: Chinese
- Diet: Vegetarian
Ingredients
- 1 pound fresh green beans, trimmed
- 3 tablespoons neutral oil (like canola or vegetable)
- 4 cloves garlic, minced
- 1 teaspoon fresh ginger, grated
- 1 tablespoon soy sauce (or tamari for gluten-free)
- 1 teaspoon sugar
- 1/2 teaspoon toasted sesame oil
- Pinch of red pepper flakes (optional)
Instructions
- Wash and thoroughly dry the green beans. Moisture prevents proper blistering.
- Heat a wok or large skillet over high heat until very hot. Add the neutral oil.
- Add the green beans to the hot pan in a single layer if possible. Cook without stirring for 2 to 3 minutes to allow them to char slightly.
- Stir the beans and continue cooking until they are tender-crisp and have visible blistered spots, about 5 to 7 minutes total.
- Push the beans to one side of the pan. Reduce the heat to medium. Add the minced garlic and grated ginger to the empty space in the pan. Cook for about 30 seconds until fragrant, being careful not to burn the garlic.
- Toss the beans with the garlic and ginger.
- In a small bowl, mix the soy sauce, sugar, sesame oil, and red pepper flakes (if using).
- Pour the sauce mixture over the beans. Toss quickly to coat everything evenly. Cook for 30 seconds until the sauce thickens slightly.
- Remove from heat immediately and serve your wok fried green beans hot.
Notes
- For a deeper flavor, substitute 1 tablespoon of vegetable broth for 1 teaspoon of the soy sauce.
- If you do not have a wok, use the largest, heaviest skillet you own and work in batches to maintain high heat.
- These garlic green beans pair well with fried rice or simple steamed chicken.
Nutrition
- Serving Size: 1 serving
- Calories: 120
- Sugar: 4
- Sodium: 350
- Fat: 8
- Saturated Fat: 1
- Unsaturated Fat: 7
- Trans Fat: 0
- Carbohydrates: 10
- Fiber: 4
- Protein: 3
- Cholesterol: 0