
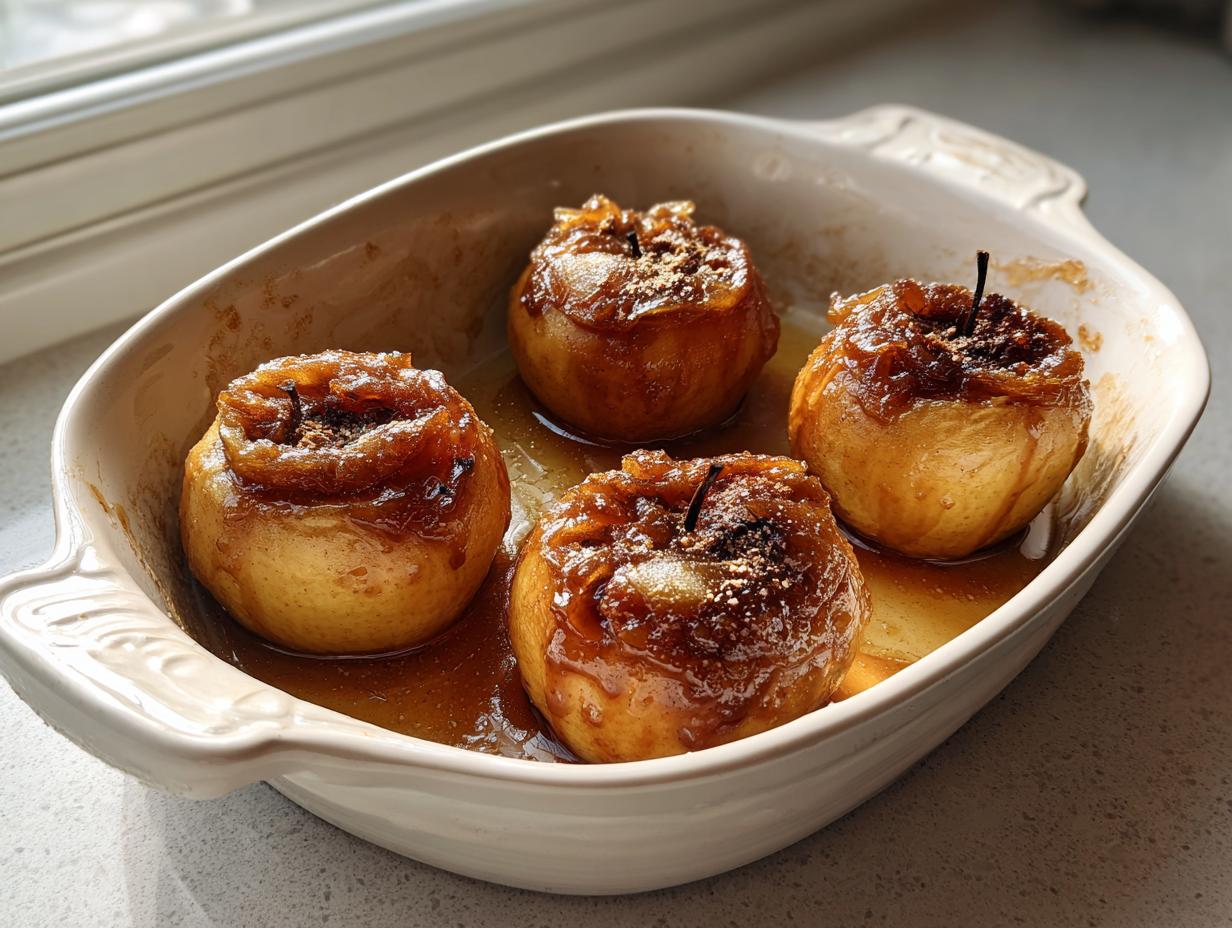
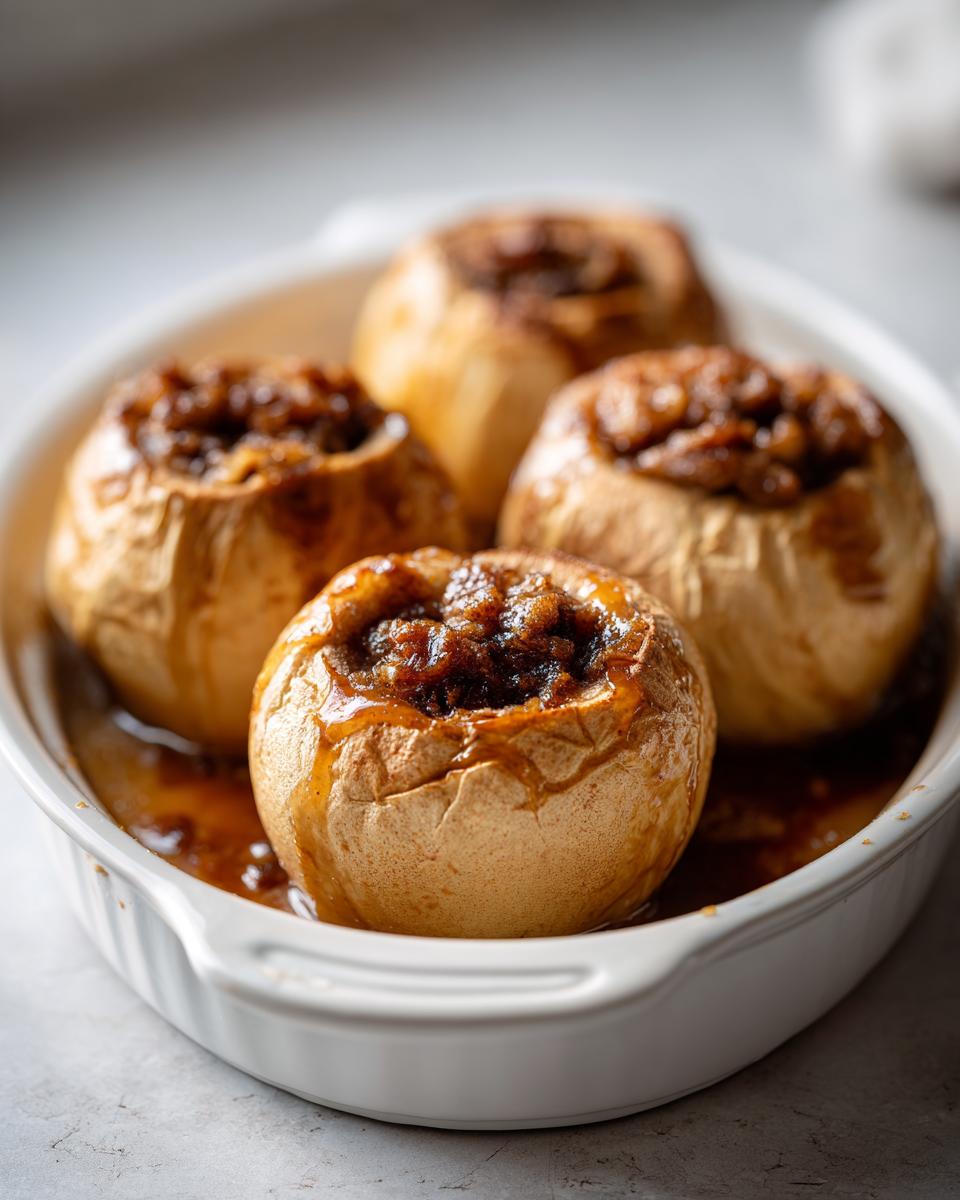
When the air gets crisp—you know, that perfect moment deep in fall or heading into winter—my soul craves something warm and fragrant, something that smells exactly like comfort. That’s why I’m so excited to share these Simple Stuffed Baked Apples with Cinnamon Brown Sugar with you today. Honestly, these are the easiest yet most rewarding baked apples you’ll ever make. They bake up perfectly tender with almost zero active fuss, which is exactly what I aim for in my Seventh Flavour recipes. If you are looking for more simple sweetness, you should absolutely check out my list of easy dessert recipes. Believe me when I say that after years of testing in my own kitchen, Aria Sterling has perfected the timing so you can count on a delicious result every single time. Pull out your oven dish; this cozy treat is coming together fast!
- Why You Will Love These Simple Stuffed Baked Apples
- Ingredients for Perfect Baked Apples
- Essential Equipment for Making Baked Apples
- How to Prepare Tender Baked Apples Step-by-Step
- Tips for the Best Baked Apples Success
- Serving Suggestions for Your Homemade Apple Dessert
- Storage and Reheating Instructions for Leftover Baked Apples
- Frequently Asked Questions About Baked Apples
- Finding Your Seventh Flavour in These Baked Apples
Why You Will Love These Simple Stuffed Baked Apples
I promise you, these aren’t just apples! They hit every single note you want when you’re craving something cozy and satisfying. I developed this version specifically to be utterly foolproof, which is why I think they are the best baked apples out there.
- Prep Time is a Breeze: Seriously, it’s only about 10 minutes of active work before they go into the oven. It’s such a quick apple recipe for a weeknight treat.
- Pure Comfort Flavor: That classic combination of rich brown sugar bubbling with warm cinnamon and nutmeg? Wow, it’s nostalgic. It smells like the very best of fall baking.
- Incredibly Tender Texture: We bake these apples until they are fork-tender, meaning the fruit almost melts in your mouth, but they still hold their shape perfectly.
- Perfect for Any Meal: Use them as a delightful, slightly healthier dessert, or serve them alongside your morning oatmeal for an easy apple side dish.
- Minimal Ingredients Required: You likely have everything needed already in your pantry. No searching around for obscure spices here!
- Family Friendly Appeal: Kids adore scooping out the caramelized brown sugar filling. It’s such a wholesome fruit dessert that gets everyone excited about eating fruit.
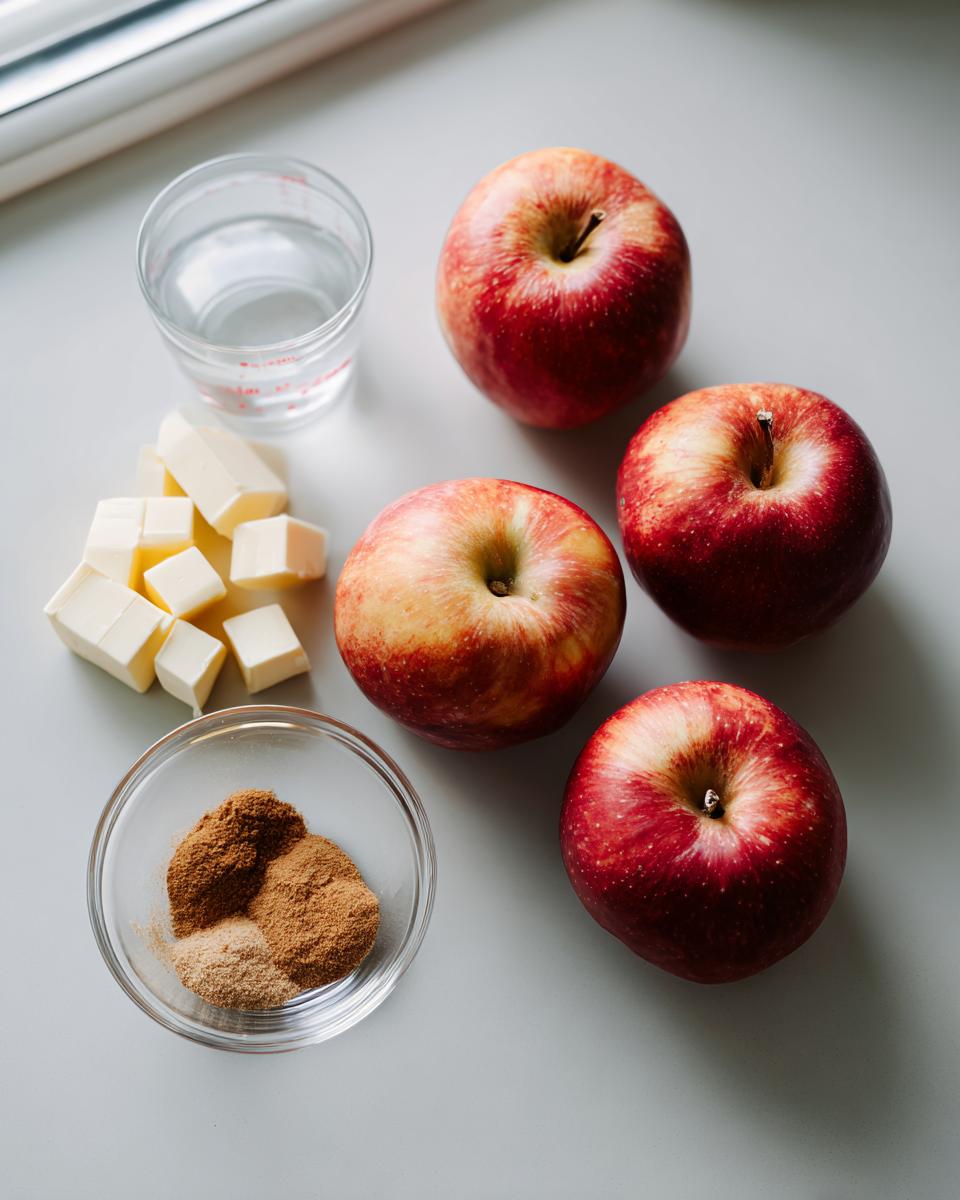
Ingredients for Perfect Baked Apples
The beauty of these baked apples is how short the list is! You don’t need 20 different things to make something that tastes like it simmered all day. Clarity is key here, so make sure you grab your ingredients just as I’ve written them. I always use firm apples, like Honeycrisp, because they hold up best to the heat. Trust me, getting the butter sized correctly makes a difference in how that topping melts!
- 4 medium baking apples (I like Honeycrisp or Gala—that firm texture is important!)
- 1/4 cup packed brown sugar (don’t use white sugar, you need the molasses!)
- 1 teaspoon ground cinnamon
- 1/4 teaspoon ground nutmeg
- 2 tablespoons unsalted butter, cut into small pieces
- 1/4 cup water
Essential Equipment for Making Baked Apples
You don’t need a massive kitchen setup for this. Seriously, I developed this entire recipe using things I always have on hand. Having the right, simple tools just makes the whole process smoother, less messy, and ensures you get that lovely, tender result. Since we aren’t dealing with apples slices, we just need the basics for holding and baking the fruit.
Here’s the short list of what you’ll want ready before you even start peeling or scraping:
- A small baking dish, maybe 8×8 or a similar size, just large enough to fit your four apples snugly. We need that water close around them to build steam!
- A sturdy mixing bowl for whipping up that amazing cinnamon brown sugar filling.
- A melon baller or a small, sharp spoon. This is your secret weapon for coring. The melon baller gives you the neatest little center cavity, but any small scraper spoon works in a pinch. Just be careful!
- A measuring spoon set, because getting that nutmeg and cinnamon ratio right is key to the flavor profile.
How to Prepare Tender Baked Apples Step-by-Step
Getting these fantastic baked apples perfect every time is all about managing the heat and respecting the structure of the fruit. It’s an incredibly straightforward process, but I always tell people to follow these steps exactly, especially the coring part. If you’re planning to serve these warm—maybe alongside some of my easy breakfast recipes on a weekend—getting the timing right is everything! Let’s get this cozy comfort food underway.
Prepping the Oven and Apples for Baked Apples
First things first, crank that oven up to 375 degrees Fahrenheit (190 Celsius) and make sure you lightly grease whatever baking dish you picked out. Now, for the apples. You need to wash them, of course, but the real trick is the coring. You’re making a little pocket for that sweet brown sugar filling. Use your melon baller or that tiny spoon and scoop right down the center, but stop before you cut right through the bottom! You have to leave about a half-inch border so none of that delicious gooey butter melts straight into the pan bottom. We want it staying right inside the apple!
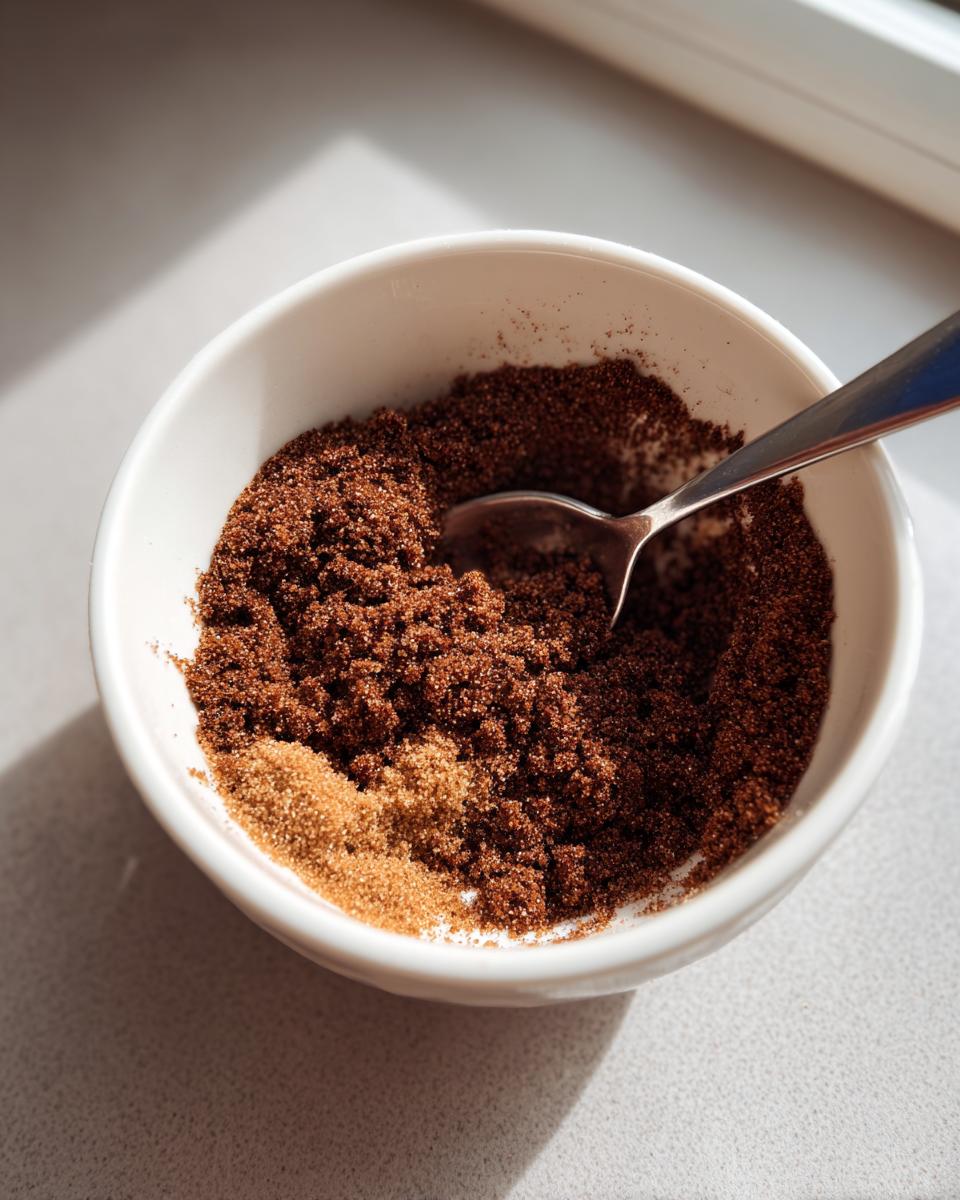
Creating the Cinnamon Brown Sugar Filling for Baked Apples
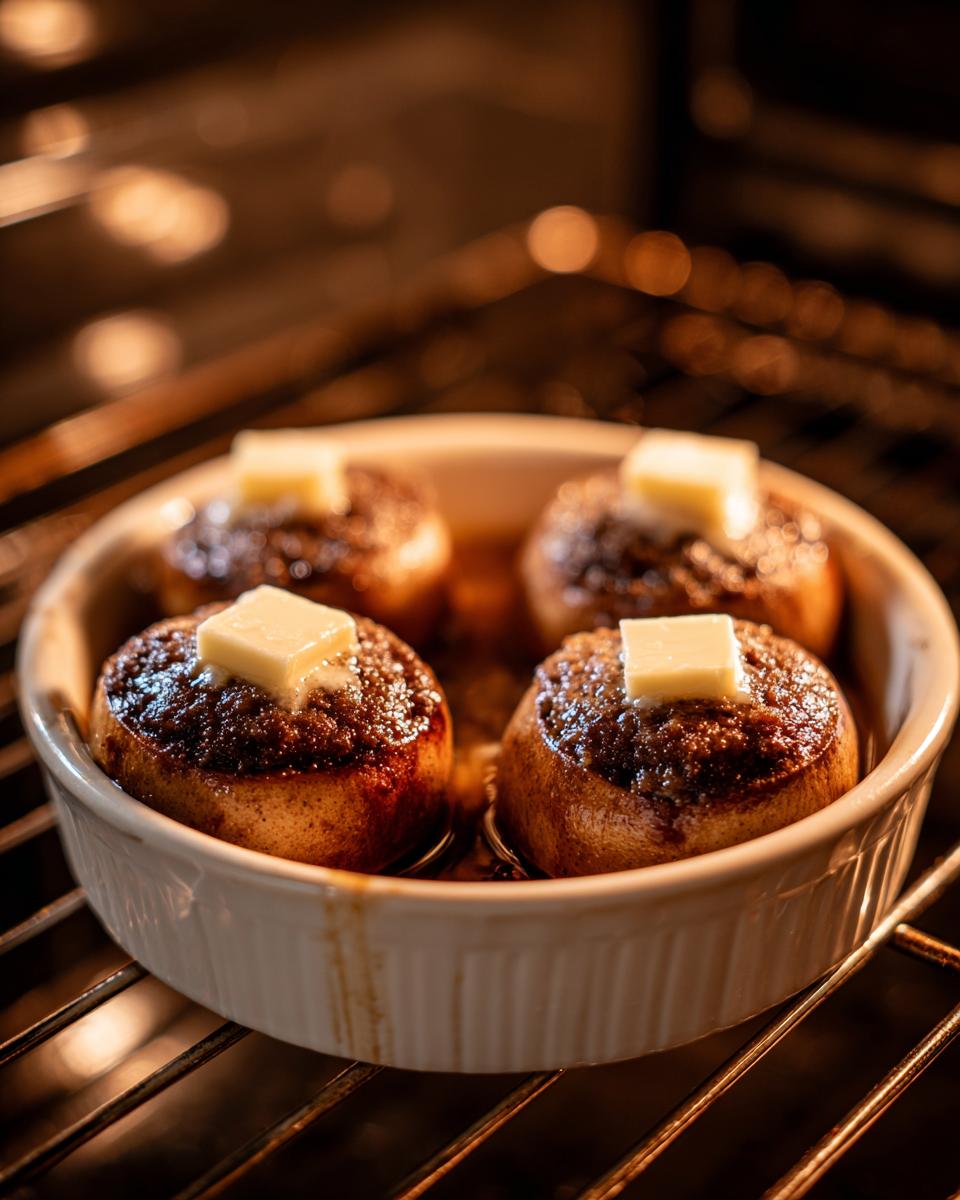
Time for the magic! In your separate little bowl, just toss together that packed brown sugar, the cinnamon, and the nutmeg. Mix it until it looks beautifully combined—that’s your signature warm apple dessert aroma right there. Next, gently place the apple cavities full of this spice mix. The secret to moistness? Take your little pats of butter and set one right on top of the filling of each apple. Don’t stir it in! It needs to melt down slowly as it heats up.
Baking and Checking Doneness of Your Baked Apples
We’re going to use steam to make sure your apples get wonderfully soft without burning the tops. Pour that 1/4 cup of water right into the bottom of the baking dish, surrounding the apples but not splashing into the cavities. Pop them in the oven for about 35 to 45 minutes. Keep an eye on them, as the apple variety changes the cook time! You want them deeply tender. The best way to test for doneness isn’t the toothpick test, though—it’s a sharp fork: if your fork slides in with almost zero resistance, they are done! Pull them out right away and let them cool just a touch before digging in.
Tips for the Best Baked Apples Success
I’ve made hundreds of batches of these baked apples over the years (sometimes just for me, shhh!). Over time, I’ve picked up a few little tricks to guarantee they turn out tender, sweet, and absolutely perfect every single time. These aren’t just steps; they are the little secrets that elevate them from good to totally unforgettable.
- Apple Variety Matters Immensely: If you use a super soft apple, they turn to mush before the sugar melts. You absolutely need a firm apple, like Honeycrisp, or even a good Granny Smith if you like a little tartness. They need to stand up to the heat and still have integrity when you check them with your fork.
- The Foil Tenderizer Secret: If you worry your apples are too firm or you’re using giant varieties, use the tip from the notes! Cover that baking dish loosely with aluminum foil for the first 20 minutes. This traps the steam from the water at the bottom, cooking the interior faster. Then pull the foil off for the last 15-20 minutes so the tops caramelize nicely.
- Don’t Skip the Water: That 1/4 cup of water in the dish isn’t optional; it’s essential! It boils and turns to steam, which is what gently cooks the apples from the outside in, ensuring they get that beautifully soft texture without the filling burning. It makes for a fantastic syrupy sauce left in the pan too!
- Maple Syrup Swap: If you are out of brown sugar or just want a slightly different flavor profile—maybe a bit more depth that works wonderfully with vanilla—feel free to swap half of the brown sugar out for real maple syrup. I tried this swap many times when testing my easy apple recipe variations, and it adds such a lovely warmth.
- Keep Them Warm for Serving: These are an apple dessert best served warm, not piping hot. If you have to wait even 10 minutes between pulling them out and serving them with ice cream, just put the whole dish back into a *turned-off* oven. The residual heat keeps them perfect without overcooking them.
Serving Suggestions for Your Homemade Apple Dessert
Okay, the smell coming from your oven right now is just heavenly, isn’t it? These tender, spiced apples are fantastic on their own, but honestly, they reach true dessert perfection when you add a little something extra on top. This is where you get to personalize your comfort food! Since we made these so versatile, they work whether you are looking for a quick snack or a full-blown celebration dessert.
If you’re going the classic route, you cannot beat a scoop of high-quality vanilla ice cream melting slowly over that warm, caramelized butter and sugar mix. That hot-and-cold contrast is just divine. I sometimes use a slightly heavier splash of cream if I’m making these for breakfast, just drizzled over the top instead of a whole scoop of ice cream.
You know I love making these work for breakfast too! If you have leftovers or just want a slightly heartier crunch, spoon those warm apples right over a bowl of plain or vanilla oatmeal. The spices blend right into the oats, making it feel like a holiday morning. If you’re feeling adventurous and want something totally different, don’t forget to check out my recipe for easy fruit dip recipe, no marshmallow—it’s actually amazing dolloped over a warm apple wedge if you want something creamy but less sweet than ice cream!

Storage and Reheating Instructions for Leftover Baked Apples
Now, here’s the thing about these baked apples: they are almost always gone the night I make them because everyone dives in! But if, by some miracle of willpower, you have any leftovers, I want to make sure you can bring them back to life perfectly the next day. The goal is to maintain that tender texture without turning them into mush when you reheat them. Trust me, throwing them in the microwave on high power for too long is a quick way to ruin that lovely soft fruit structure we worked for.
For short-term storage, let them cool down completely on the counter first. Once they are room temperature, pop them, filling and any cinnamon syrup left in the bottom of the dish, into an airtight container. They do really well stored this way in the refrigerator for up to three or four days. Because they contain butter, they definitely solidify a bit when they are cold, but don’t panic!
Reheating is where you need to use a little care:
- The Oven is Your Best Friend: If you want them to taste nearly fresh-baked, preheat your oven to a lower temperature, maybe 300 degrees. Place the apples in a small, oven-safe dish, add maybe a teaspoon of water or a tiny pat of butter to the bottom of the dish you are reheating them in, and warm them for about 10 to 15 minutes. This gentle heat warms the apple through evenly and keeps the filling gooey.
- Microwave Safety: If you need a quick apple snack right now, the microwave is fine, but be quick! Use 50% power for 30-second bursts until they are warm. If you go full power, they sometimes heat unevenly, leaving you with a rock-hard center and hot edges.
They are still delicious cold, especially if you’re looking for an unexpectedly refreshing, slightly sweet afternoon bite, but I highly recommend warming them up just a touch to release those wonderful spices again!
Frequently Asked Questions About Baked Apples
I always get the same few questions pop up when I share this simple recipe for baked apples, so I figured I’d put the answers right here for you. It makes trying this easy apple recipe so much less stressful when you know what to watch out for! Whether you’re making these for a cozy night in or trying to perfect that cinnamon spiced apples flavor profile, these little tips should help you out.
What is the best type of apple for baked apples?
This is probably the most important question! You absolutely need a firm apple—think Honeycrisp, Gala, or even Granny Smith if you like some serious tartness to balance that brown sugar. Why? Because we’re aiming for tender fruit that still holds its shape beautifully. If you use a mushy apple like McIntosh, by the time the filling is warm and gooey, you’ll just have apple sauce in a skin. You want the structure to last throughout the baking time!
Can I make these baked apples ahead of time?
Yes, you totally can, which is fantastic when you have company! You can bake them completely, let them cool, and store them airtight in the fridge for up to three days. When you reheat them gently (I prefer the oven method I mentioned earlier!), they come right back. They are still delicious served cold when you need a quick apple snack, but warming them always brings back that fresh-baked aroma.
Did you try these? I’d love to hear how they turned out! If you’re looking for more ideas for easy, whole-fruit treats, be sure to check out my guide on healthy snack ideas!
Finding Your Seventh Flavour in These Baked Apples
Baking these simple baked apples truly taps into that special feeling—that Seventh Flavour—that comes from making nourishing, fragrant food at home. They are proof that the most satisfying Comfort Food Apple Recipe needs just a few ingredients and a little bit of love. I hope serving these brings immense joy to your table! When you try this recipe, please come back and leave a comment below, I’d love to know what you served them with. If you want to learn more about how we find that extra spark in every dish, you can always read about us here on our About Page.
PrintSimple Stuffed Baked Apples with Cinnamon Brown Sugar
You can make these tender baked apples easily. This recipe uses simple ingredients like brown sugar and cinnamon to create a warm, comforting dessert perfect for any season.
- Prep Time: 10 min
- Cook Time: 40 min
- Total Time: 50 min
- Yield: 4 servings 1x
- Category: Dessert
- Method: Baking
- Cuisine: American
- Diet: Vegetarian
Ingredients
- 4 medium baking apples (like Honeycrisp or Gala)
- 1/4 cup packed brown sugar
- 1 teaspoon ground cinnamon
- 1/4 teaspoon ground nutmeg
- 2 tablespoons unsalted butter, cut into small pieces
- 1/4 cup water
Instructions
- Preheat your oven to 375 degrees Fahrenheit (190 degrees Celsius). Lightly grease a small baking dish.
- Wash the apples. Use a melon baller or small spoon to carefully core the center of each apple, leaving about a half-inch border at the bottom so the filling stays inside. Do not cut all the way through the bottom.
- In a small bowl, mix together the brown sugar, cinnamon, and nutmeg.
- Place the cored apples into the prepared baking dish.
- Spoon the sugar and spice mixture evenly into the cavity of each apple.
- Place one small piece of butter on top of the filling in each apple.
- Pour the 1/4 cup of water into the bottom of the baking dish around the apples. This creates steam to help them soften.
- Bake for 35 to 45 minutes, or until the apples are tender when pierced with a fork. Baking time depends on the size and variety of your apples.
- Carefully remove the dish from the oven. Let the baked apples cool slightly before serving warm.
Notes
- Serve these warm baked apples with a scoop of vanilla ice cream or a drizzle of heavy cream for a richer dessert.
- For a different flavor, substitute half of the brown sugar with maple syrup.
- If you prefer softer apples, cover the baking dish loosely with foil for the first 20 minutes of baking.
Nutrition
- Serving Size: 1 apple
- Calories: 220
- Sugar: 35g
- Sodium: 2mg
- Fat: 7g
- Saturated Fat: 4g
- Unsaturated Fat: 3g
- Trans Fat: 0g
- Carbohydrates: 40g
- Fiber: 5g
- Protein: 0g
- Cholesterol: 15mg