
Some desserts just feel important, right? They aren’t your average Tuesday night snack; they’re the centerpiece for birthdays, the star of Valentine’s Day dinners, and the reason people stand around the dessert table chatting long after dinner is over. For me, that ultimate showstopper dessert has always been the red velvet cake. It’s elegant, it’s dramatic, and let’s be honest, it screams celebration!
But here’s the kicker: too many red velvet recipes out there are just plain *sad*. They turn out dry, or worse, they look like someone accidentally spilled a bottle of food coloring into a basic chocolate cake. That’s simply not what a true classic deserves. When I, Aria Sterling, decided to tackle this legend, I spent months in my kitchen ensuring this wasn’t just red cake—it’s the moist red velvet cake recipe people dream about.
We’re aiming for that authentic Southern flavor profile. That means leaning hard into the subtle acidity from buttermilk and vinegar reacting perfectly with the baking soda. That chemical magic is the secret sauce, giving you that incredibly tender crumb cake that practically melts on your tongue. Trust me, after testing batches until my kitchen counter looked like a crimson crime scene, I finally nailed the foolproof technique for truly velvety cake texture.
- Why This Is The Best Red Velvet Cake Recipe You Will Ever Make
- Ingredients for Your Authentic Southern Red Velvet Cake
- Step-by-Step Instructions for the Best Red Velvet Cake From Scratch
- Tips for a Perfect Moist Red Velvet Cake Recipe
- Making Your Red Velvet Cake a Showstopper Dessert
- Storage and Reheating Instructions for Your Red Velvet Cake
- Frequently Asked Questions About Making Red Velvet Cake
- Nutritional Estimate for This Red Velvet Cake Slice
- Share Your Red Velvet Cake Creations
Why This Is The Best Red Velvet Cake Recipe You Will Ever Make
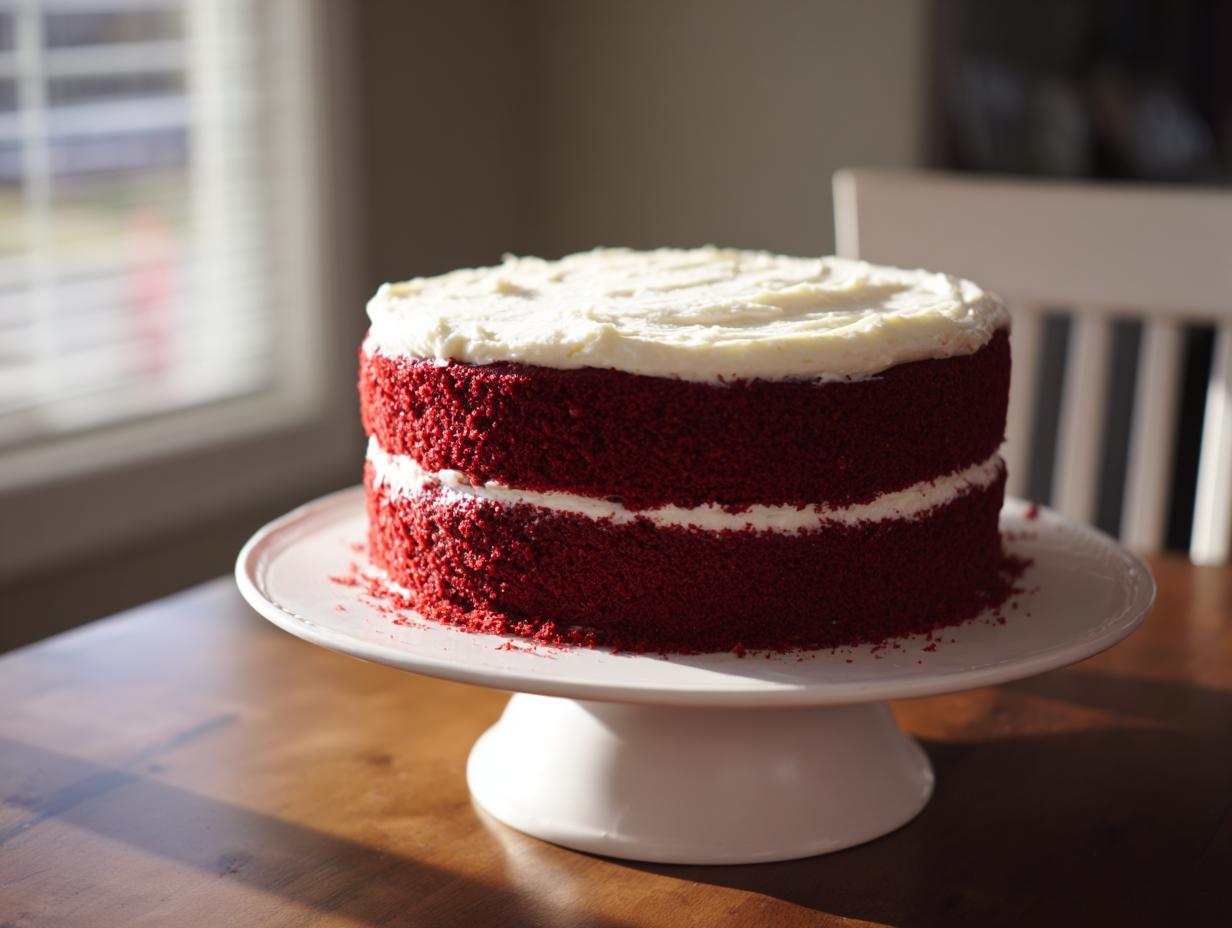
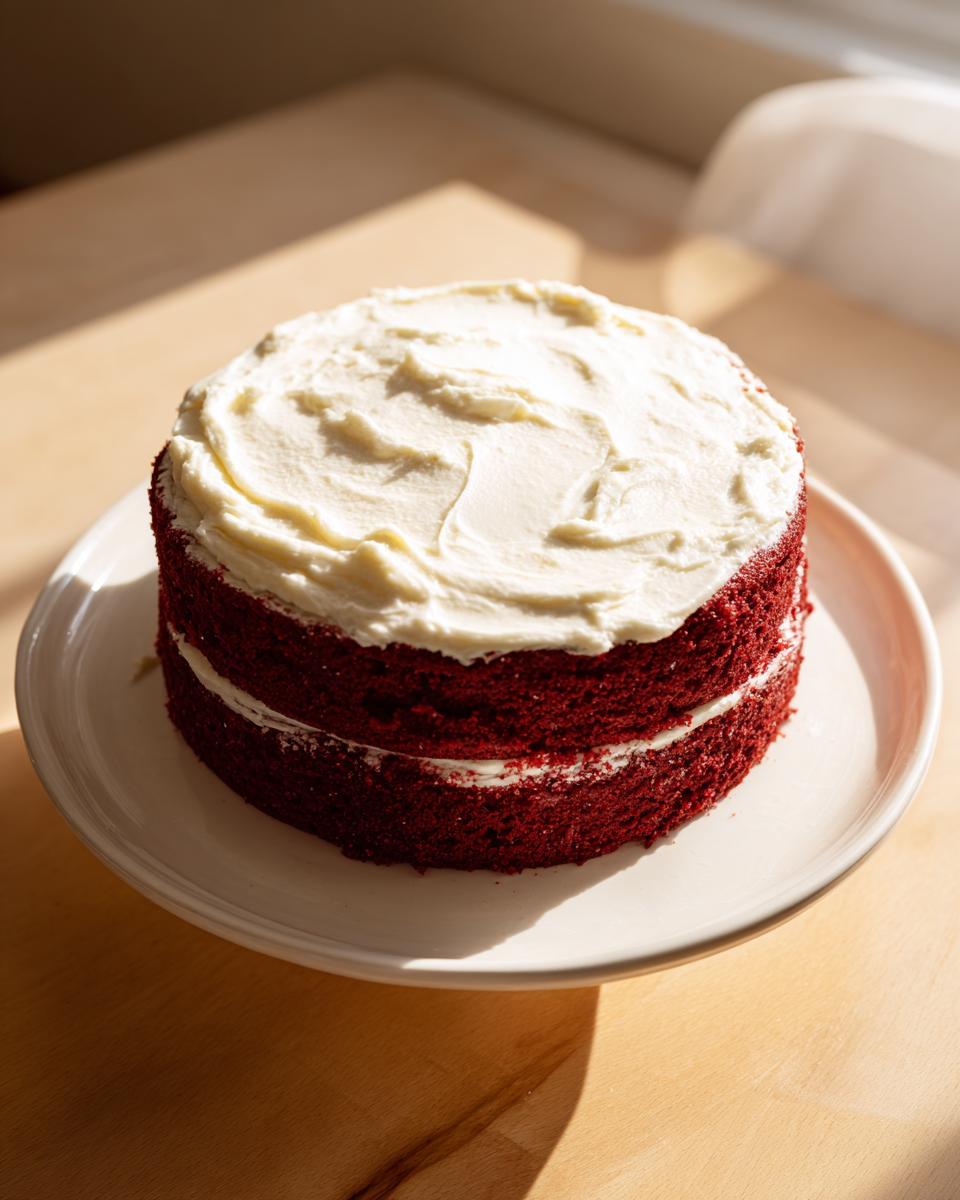
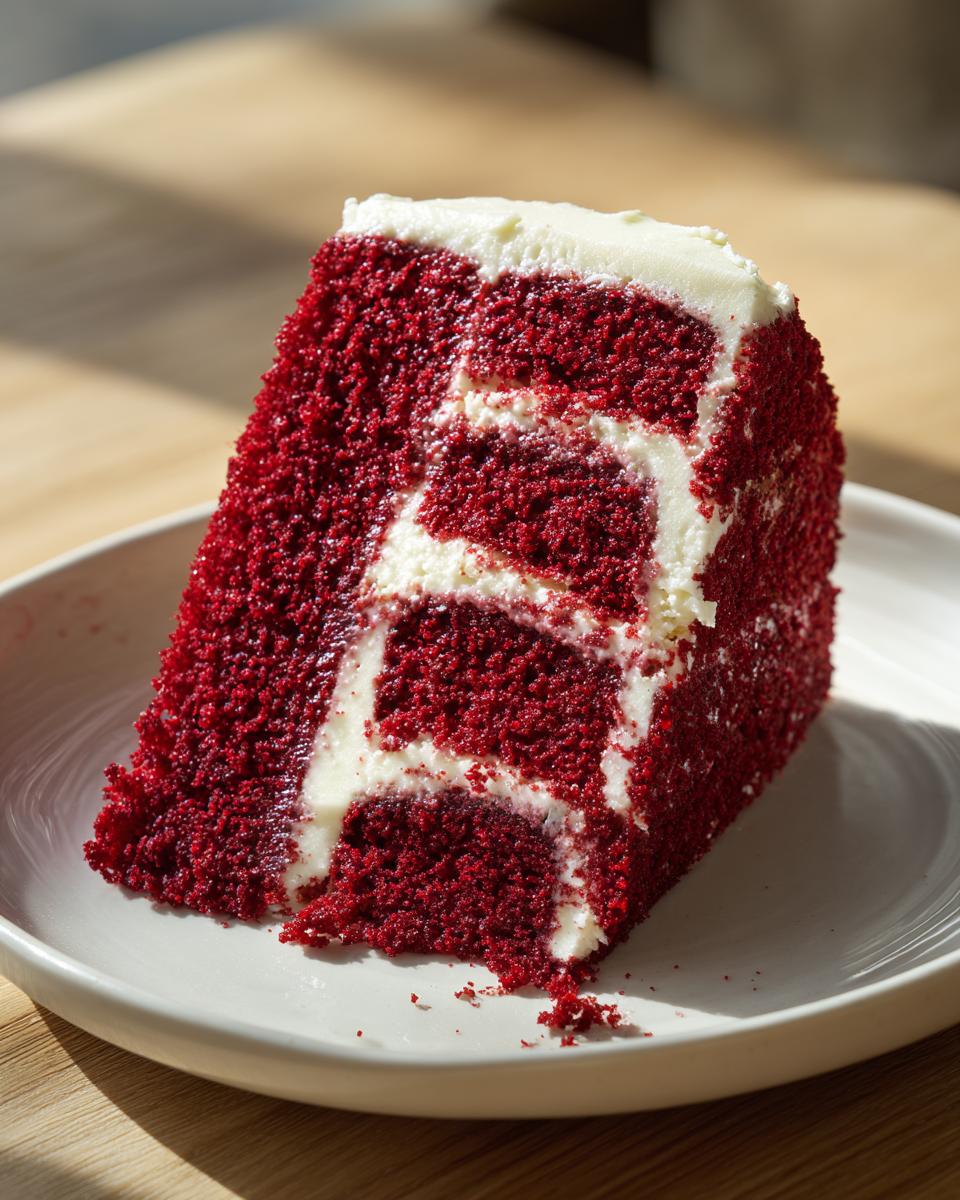
Look, I’m not saying this lightly, but this recipe changed things for me. Baking this perfect red velvet cake wasn’t just about getting the color right; it was about texture. I chased that perfect middle ground—that incredibly moist red velvet cake recipe that still felt light enough to call itself fluffy. When I finally pulled those two 9-inch layers out of the oven and they were perfectly even, smelled exactly like a true Southern kitchen, and cut with zero crumbling, I actually cheered!
If you are looking for that signature tender crumb cake that somehow stays moist for days, you’ve found it. I spent weeks comparing recipes before deciding on the oil base mixed with the right amount of cocoa. If you want the deep dive into how I tested every single variable, you can read more about my kitchen philosophy over on the About page, but trust me on this: this version minimizes fuss and maximizes flavor.
Achieving That Signature Velvety Cake Texture
So, what makes it velvety and not just crumbly? It comes down to basic kitchen chemistry, but done right. The tang from the vinegar and buttermilk isn’t just for flavor; it’s vital! That acid reacts hard with the baking soda, giving you a beautiful lift. Plus, we use oil instead of solely relying on butter. Oil stays liquid at room temperature, which is what keeps this red velvet cake feeling impossibly soft and moist long after it leaves the oven.
Ingredients for Your Authentic Southern Red Velvet Cake
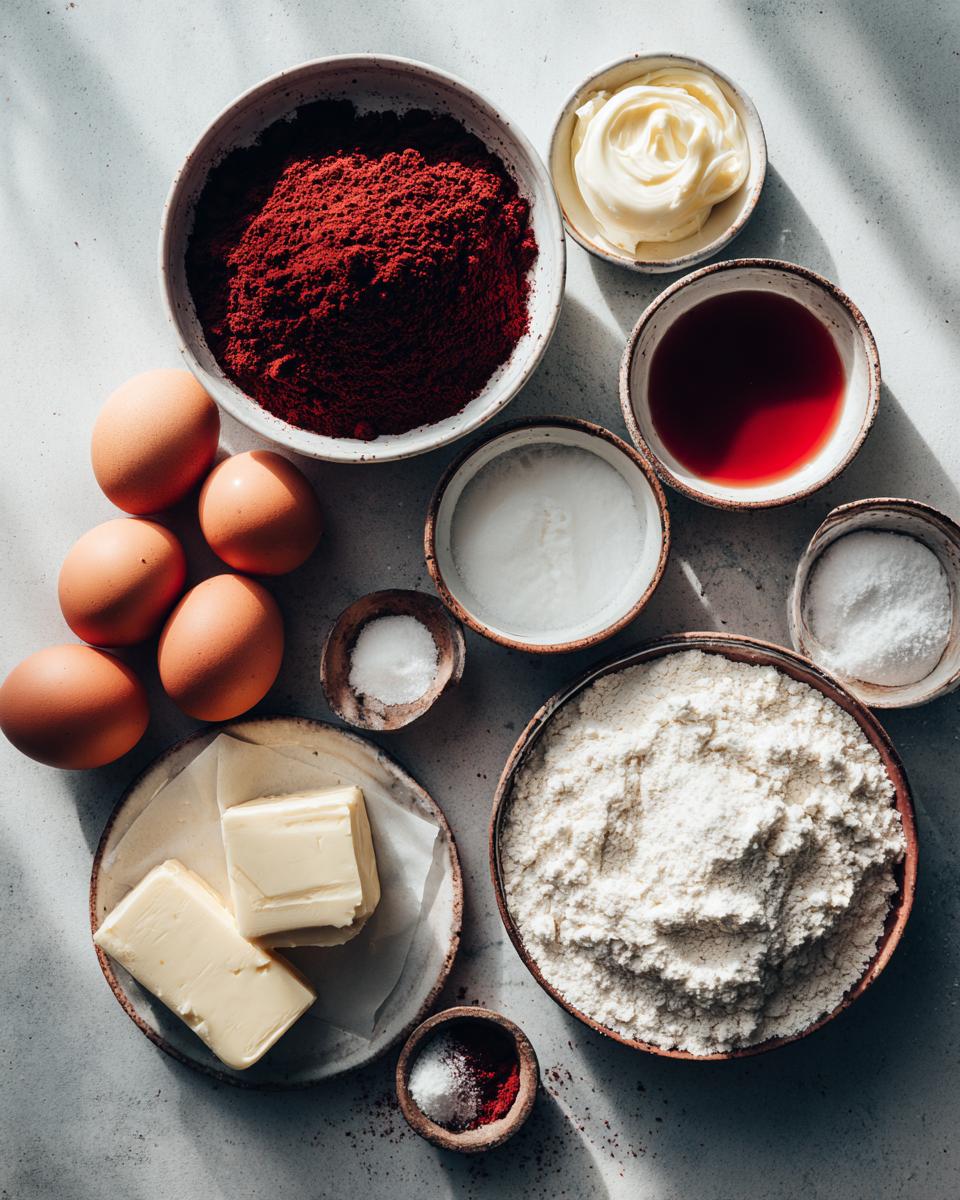
Okay, let’s get down to business! The ingredients list for this red velvet cake looks long, but don’t let that scare you. It’s just the magic combining the wet and dry components—especially that crucial trio of buttermilk, vinegar, and cocoa powder that gives it that true Southern depth, not just harsh red color. Remember, every measurement matters here, especially when you’re aiming for that famously fluffy red velvet cake.
When it comes to the frosting, listen closely: the cream cheese and butter absolutely must be softened to room temperature. If they are too cold, I promise you’ll end up with chunks in your beautiful frosting, and that ruins the whole ‘easy’ feeling of finishing this spectacular cake!
For the Classic Red Velvet Layers
Here is what you need to create those perfect, vibrant layers. Seriously, grab the good stuff for this part, okay?
- 1 1/2 cups vegetable oil
- 1 1/2 cups granulated sugar
- 2 large eggs
- 1 teaspoon vanilla extract
- 1 cup buttermilk
- 1 tablespoon white vinegar
- 2 tablespoons red food coloring (liquid or gel)
- 1 1/2 cups all-purpose flour
- 1 teaspoon baking soda
- 1 teaspoon salt
- 1 tablespoon unsweetened cocoa powder
One quick note on color: to get that really deep, gorgeous, vibrant red cake coloring that makes people gasp, I strongly recommend using a high-quality gel food coloring. The liquid stuff just doesn’t pack the same punch without using way too much of it, which can mess up the batter structure.
For the Homemade Cream Cheese Frosting
This frosting is non-negotiable, folks. It has to be rich, tangy, and perfectly smooth to counter the tender cake layers. Make sure your dairy items are actually soft!
- 8 ounces cream cheese, softened
- 1/2 cup (1 stick) unsalted butter, softened
- 4 cups powdered sugar, sifted
- 1 teaspoon vanilla extract
For the very best, lump-free result on your homemade cream cheese frosting, have patience with the softening step. If everything creams together beautifully—that’s your ticket to an easy red velvet cake finish!
Step-by-Step Instructions for the Best Red Velvet Cake From Scratch
Alright, now that we have all our beautiful ingredients ready, let’s talk method. This whole process is surprisingly quick—you can easily have your batter mixed in about 20 minutes, which is amazing for a cake this impressive! Remember, the secret to keeping this red velvet cake tender is how we combine everything. We are careful; we are deliberate, but we aren’t dragging this out all day!
Mixing the Red Velvet Cake Batter
First things first: preheat your oven to 350 degrees F and get those two 9-inch cake pans greased and floured. I like to use a little spray oil and then dust with flour—nothing worse than a beautiful cake getting stuck!
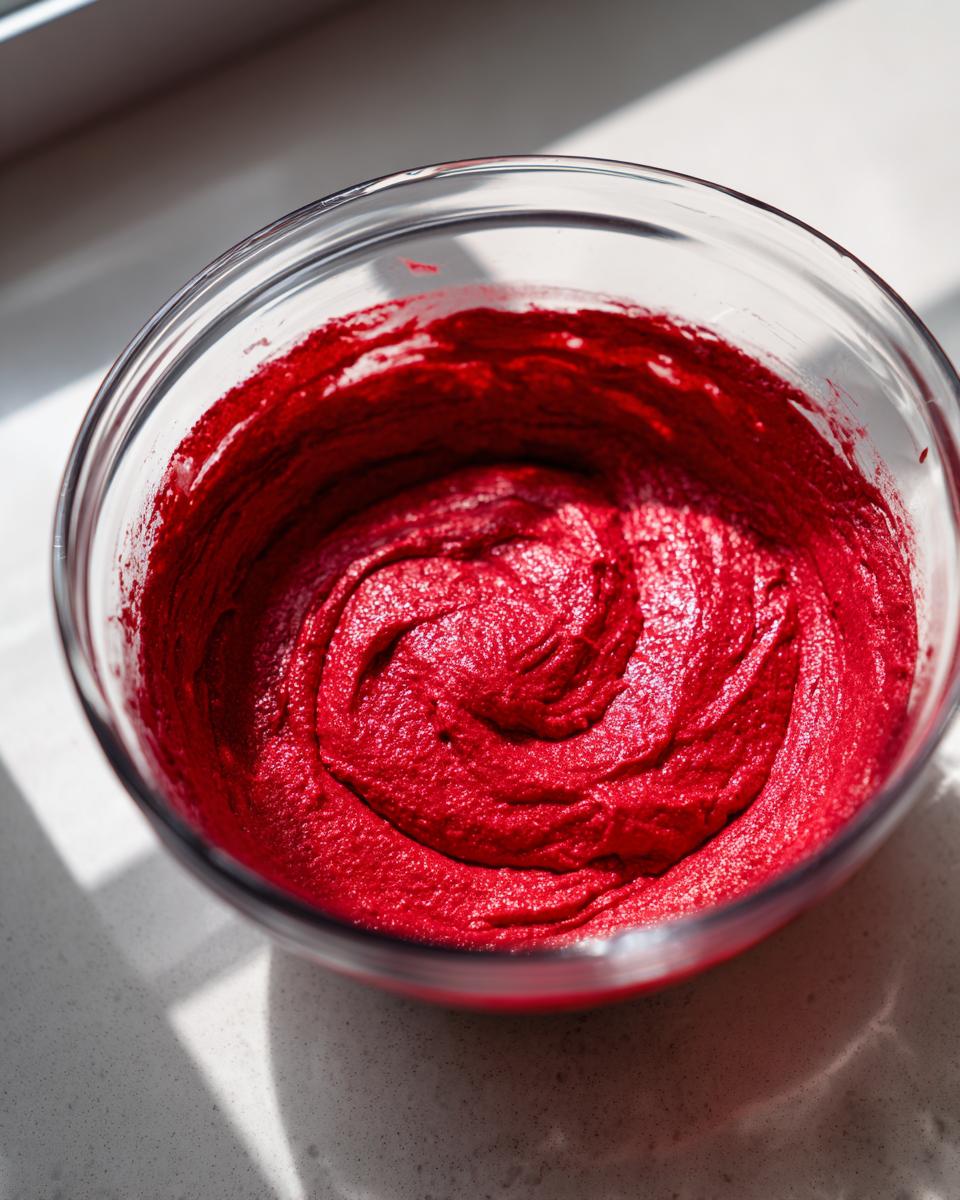
In your big bowl, start by whisking the vegetable oil and granulated sugar until they look happy together. Then, beat in the eggs one at a time. Don’t rush this; let each egg fully incorporate before adding the next one. Follow that with the vanilla extract. Now, grab a small bowl for your liquids: whisk together the buttermilk, that crucial tablespoon of white vinegar, and your red food coloring. Set that aside.
In a separate bowl, swiftly whisk your dry stuff: flour, baking soda, salt, and cocoa powder. Now comes the careful part! Add about half of the dry mixture to your wet mixture and mix it on low speed—just until it disappears. Then, pour in all the buttermilk mixture and blend. Finally, add the remaining dry ingredients and mix only until the batter is smooth! I cannot stress this enough: Do not overmix! Overmixing builds gluten, and we want fluffy, not tough, cake layers.
Baking and Cooling the Fluffy Red Velvet Cake
Divide that gorgeous red batter evenly between your prepared pans. Pop these beauties into the preheated oven. They usually bake up perfectly in about 30 to 35 minutes. You know it’s done when a wooden pick inserted right into the center comes out clean. They should smell slightly chocolatey and deeply satisfying!
Resist the urge to dump them out immediately! Let the cakes cool in the pans on a wire rack for about 10 minutes. This gives them just enough time to firm up so they won’t tear when you flip them out upside down onto the rack to cool completely. Seriously, wait until they are stone cold before you even think about frosting them!
If you want to see how others have made this amazing cake, check out some great inspiration over at The Recipe Source.
Assembling with Rich Homemade Cream Cheese Frosting
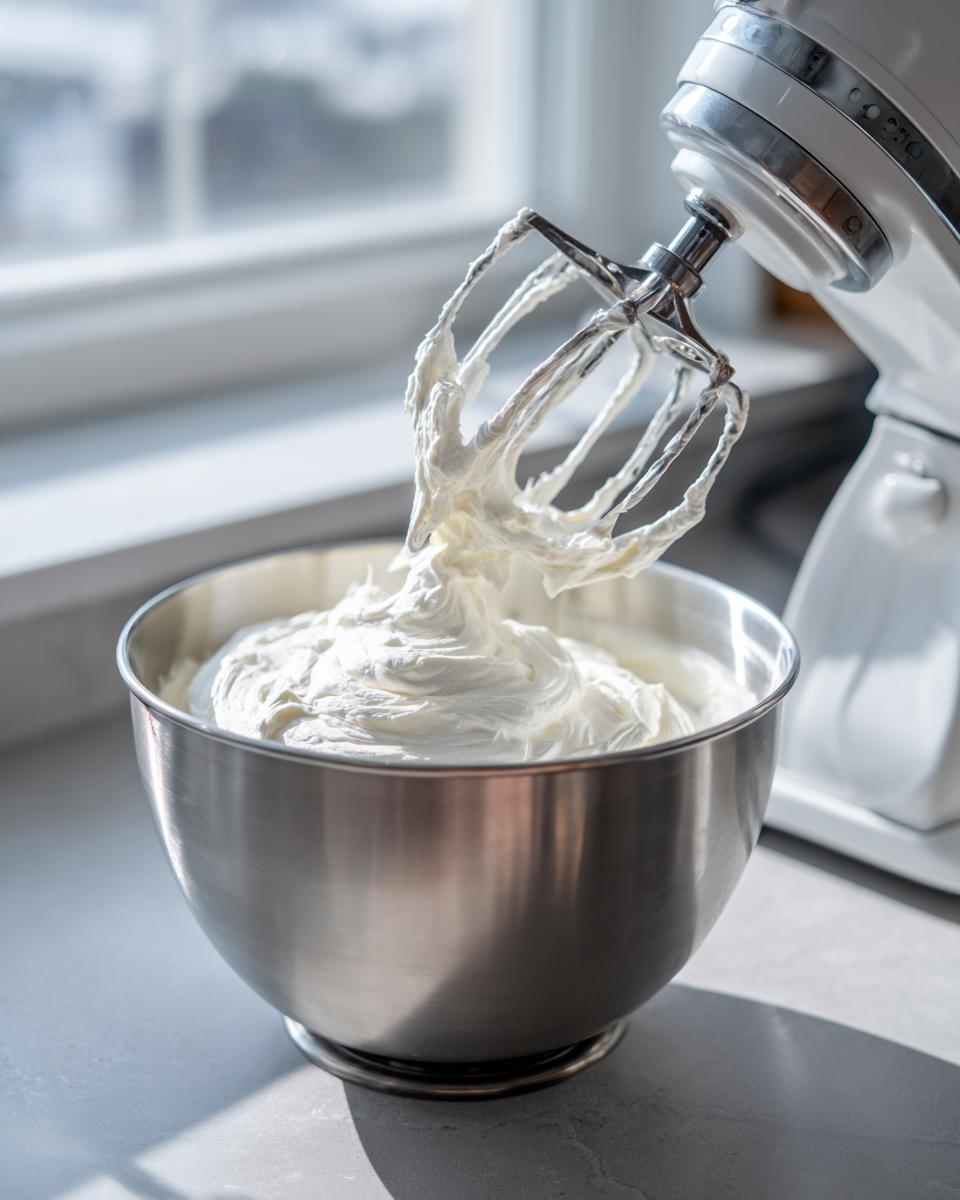
While those gorgeous classic red velvet layers are cooling, you whip up the best part! In a separate large bowl, beat your softened cream cheese and butter until they are completely smooth—no lumps allowed! Slowly start adding that sifted powdered sugar, and then finally, the vanilla extract until everything is creamy and dreamy. This makes the perfect topping for any red velvet cake for birthdays.
Once the layers are totally cool—and I mean completely cool to the touch—it’s time to build! Frost that first layer, top it with the second, and then go to town covering the sides and the top with that rich, tangy frosting. It’s what makes this cake legendary!
Tips for a Perfect Moist Red Velvet Cake Recipe
I know you want the best result, and honestly, sticking to these little details is what separates a good cake from the best red velvet cake from scratch. It’s less about complicated techniques and more about respecting these core flavor components. If you cut corners here, I promise, you’ll miss that special something that sets this dessert apart.
We included some very specific notes in the recipe card, and honestly, they are non-negotiable if you want that true, rich Southern style. Don’t skip them!
The Role of Buttermilk in Your Traditional Red Velvet Baking
This is where we separate the pretenders from the pros! You might see some versions of this calling for regular milk, but please don’t do it! The slight tang you get from using buttermilk—which is basically just soured milk—is crucial. It works together with the vinegar to activate that baking soda perfectly. This acidic duo is what gives you that unbelievably soft structure and that slight, wonderful tang in every bite.
If you’ve ever made a straight-up buttermilk cake recipe, you already know the magic acid creates. For red velvet, it’s even more important because it helps balance the sweetness and ensures you get that melt-in-your-mouth finish we are aiming for. Trust me, swapping it out for plain milk will leave your cake sad and flat!
Making Your Red Velvet Cake a Showstopper Dessert
Now that your layers are cool and you’ve slathered on that gorgeous, tangy cream cheese frosting, it’s time for the fun part: making this beauty shine! This is the kind of cake that stops conversations, you know? It’s not just for birthdays anymore; this recipe is absolutely perfect for those elegant holiday red velvet desserts you see in magazines.
You don’t need a pastry degree to make this look professional, I promise. My best trick for finishing up any layer cake—especially one with such a vibrant color—is using the cake crumbs.
Decorating with Classic Cake Crumb Borders
When you trim the domes off your layers before frosting (if you need to level them, that is!), save those pretty little red crumbs. You can gently press these reserved crumbs onto the sides or around the base of the finished cake. It frames the white frosting beautifully and draws attention right back to that incredible, vibrant red color. It’s an old-school trick that screams classic Southern baking.
This simple touch makes it instantly ready for any celebration. Whether it’s a big milestone or just a required Tuesday night treat, this look elevates the whole experience. You can even use red sprinkles if you have them handy, but those crumbs add such great texture across the outside!
Perfect for Birthdays and Special Gatherings
Honestly, this recipe makes the perfect red velvet cake for birthdays because it’s sturdy enough to handle a few candles and transport well, but it’s soft enough that everyone fights over the last slice. The rich color just looks so celebratory next to candles or holiday décor.
I often look at pictures of cakes I’ve made over the years, and the red velvet always catches my eye first. It just feels special! If you scroll through some inspiration on how truly gorgeous these layer cakes can look, head over to check out Julie Marie Eats for some stunning assembly ideas. Check out these ideas here!
No matter how you decorate it—simple, sleek, or covered in crumbs—the quality inside this cake guarantees that everyone will be asking you for the recipe!
Storage and Reheating Instructions for Your Red Velvet Cake
Okay, you’ve made the most incredible, show-stopping, ultra-moist red velvet cake, and now you have leftovers (which is a good problem to have, by the way!). Because we made that glorious, rich homemade cream cheese frosting, we need to take good care of this masterpiece.
The number one rule here sounds drastic, but it’s necessary: you *must* refrigerate this cake if you have leftover frosting on it. Cream cheese frosting doesn’t play nice sitting out on the counter, especially if your kitchen runs warm. Cover the cake loosely with plastic wrap—try not to let the wrap touch the frosting too much, or it’ll drag off those pretty swirls!
Bringing the Cake Back to Life Before Serving
Here is the crucial step that people always mess up when storing cake: you can’t serve cold cake. Seriously, it ruins everything! When the cake is cold, that gorgeous oil we used to keep it moist red velvet cake recipe style will start to firm up, making the crumb taste denser and less tender. Nobody wants that!
So, if you pulled that beautiful classic red velvet layers cake out of the fridge, give it at least an hour, maybe even two, on the counter before you slice into it. Let it come back up slightly closer to room temperature. You’ll notice almost instantly how the texture softens back to that cloud-like, fluffy red velvet cake consistency that you worked so hard to achieve.
Tips for Short-Term Storage
If you only have a small slice left, covering it tightly with plastic wrap works great to keep it from drying out for about three days in the fridge. If you’re only storing the plain, leftover cake layers *before* frosting, you can wrap them tightly in plastic wrap and then tightly in aluminum foil. This keeps them fresh until you’re ready to frost them the next day. Seriously, this cake is fantastic the day after you bake it, too, once those spice flavors have time to settle in!
Frequently Asked Questions About Making Red Velvet Cake
I get tons of messages, and honestly, the questions about this red velvet cake pop up over and over! It’s great, because it means you’re all trying to nail that perfect bake. I’ve gathered the most common queries right here to make sure your cake is an absolute success. If you still have questions after trying this recipe, feel free to reach out through my contact page!
Can I make this easy red velvet cake recipe as a sheet cake?
Oh, absolutely! Sometimes you don’t want to deal with stacking and frosting layers, especially when you need a big batch for a crowd. You can definitely use this batter to make a single 9×13 inch sheet cake instead of the two round layers. Just remember, since the pan is deeper, the baking time will be slightly longer. Keep checking it with a wooden pick after the 30-minute mark; you’re looking for that clean withdrawal to confirm it’s ready!
What if I don’t have buttermilk for my red velvet cake?
This is the million-dollar question for any buttermilk cake recipe lover! If you open your fridge and realize you’re out of buttermilk, don’t panic and run to the store. You can whip up a quick substitute right at home. Just take your standard milk—whole milk is best—and measure out one cup. Stir in one tablespoon of white vinegar or fresh lemon juice for every cup of milk. Let that sit on the counter for about five or ten minutes. It will curdle slightly, and that slight sourness is exactly what you need to get that necessary reaction with the baking soda in your recipe to ensure you get that beautiful, tender crumb cake!
How do I prevent my red velvet cake from turning brown instead of red?
This happens when the cocoa overpowers the color, or if the acid isn’t kicking in right. Remember, traditional red velvet cake isn’t supposed to taste like a heavy chocolate cake; it should be subtle. If you notice your cake batter looking a bit dull after adding the food coloring, it’s probably because you used the standard liquid drops. For that picture-perfect, vibrant red cake coloring, you absolutely need to use a high-quality, concentrated gel food coloring. Use just a teaspoon or two of gel, and you’ll get incredible color depth without adding extra liquid that messes up the ratios. Also, keep that cocoa powder amount low, because too much cocoa naturally turns your cake dark brown!
Nutritional Estimate for This Red Velvet Cake Slice
Look, I’m all about the joy of baking and eating incredible food, and the Seventh Flavour philosophy is about connection, not counting every last calorie! But I know some of you are curious about what’s in this magnificent towering slice of red velvet cake. Since this recipe comes straight from my home kitchen, using standard ingredients, these numbers are just estimates. They’ll change based on the brand of oil you use or how heavy-handed you are with the homemade cream cheese frosting!
I always run my perfected recipes through a general analysis tool just so we all have a ballpark idea. Please remember these figures are approximations for one generous slice, assuming you make 12 servings as directed. Don’t stress too much—just enjoy that perfectly moist texture!
- Serving Size: 1 slice
- Calories: 450
- Fat: 25g (with 10g Saturated Fat)
- Carbohydrates: 58g
- Sugar: 55g (Yes, sugar is high, but it’s worth it!)
- Protein: 4g
- Cholesterol: 55mg
As you can see, this is definitely an indulgence—a true celebration cake rich with sugar and fat, which is what makes that classic cake so tender and satisfying. It’s designed to be a showstopper dessert, not an everyday bake, so enjoy every single bite!
Share Your Red Velvet Cake Creations
Baking is always better when we share the results, isn’t it? That’s the whole idea behind Seventh Flavour—we’re a community learning and celebrating together in our kitchens. Now that you’ve mastered the steps for making what I truly believe is the best red velvet cake from scratch, I absolutely want to see what you made!
Did it come out perfectly moist? Did the kids devour the layers before you could even frost the top? Did you try a variation? Let me know!
Rate This Recipe and Tell Me What You Think!
Once you’ve had a slice (or two!), please take a moment to leave a rating below. Five stars means you achieved that signature velvety texture and moistness we talked about! Your feedback is gold; it helps me know which recipes to keep perfecting and which ones need a little more tweak testing for the next generation of bakers. Sharing your rating helps others feel confident taking on this amazing Southern red velvet cake.
Show Me Your Showstopper Styling
If you took a picture of your finished beauty—maybe it’s that vibrant red next to a fancy spread for a holiday, or just sitting on the cooling rack before you frosted it—please, please share it with me on social media! Tagging me lets me see your amazing work. I love seeing how everyone takes this classic foundation and makes it their own.
Remember, every successful bake builds confidence, and I’m so proud of you for tackling this showstopper dessert! If you have questions about substitutions or storage, you can always check our policies or privacy notes over at our site, but honestly, connecting with you about the finished product is my absolute favorite part of the process.
PrintThe Best Authentic Southern Red Velvet Layer Cake with Homemade Cream Cheese Frosting
Make this ultra-moist and soft Southern Red Velvet Cake from scratch. This classic recipe features a tender crumb and is paired with rich, homemade cream cheese frosting, making it a showstopper for any birthday or holiday gathering.
- Prep Time: 20 min
- Cook Time: 35 min
- Total Time: 55 min
- Yield: 12 servings 1x
- Category: Dessert
- Method: Baking
- Cuisine: American
- Diet: Vegetarian
Ingredients
- 1 1/2 cups vegetable oil
- 1 1/2 cups granulated sugar
- 2 large eggs
- 1 teaspoon vanilla extract
- 1 cup buttermilk
- 1 tablespoon white vinegar
- 2 tablespoons red food coloring (liquid or gel)
- 1 1/2 cups all-purpose flour
- 1 teaspoon baking soda
- 1 teaspoon salt
- 1 tablespoon unsweetened cocoa powder
- 8 ounces cream cheese, softened
- 1/2 cup (1 stick) unsalted butter, softened
- 4 cups powdered sugar, sifted
- 1 teaspoon vanilla extract
Instructions
- Preheat your oven to 350 degrees F. Grease and flour two 9-inch round cake pans.
- In a large bowl, whisk together the oil and granulated sugar until combined. Beat in the eggs one at a time, then stir in the vanilla extract.
- In a separate small bowl, mix the buttermilk, white vinegar, and red food coloring. Set aside.
- In a medium bowl, whisk together the flour, baking soda, salt, and cocoa powder.
- Add half of the dry ingredients to the wet ingredients and mix on low speed until just combined. Add the buttermilk mixture and mix until blended. Add the remaining dry ingredients and mix until the batter is smooth. Do not overmix.
- Pour the batter evenly into the prepared cake pans.
- Bake for 30 to 35 minutes, or until a wooden pick inserted into the center comes out clean. Let the cakes cool in the pans for 10 minutes before inverting them onto a wire rack to cool completely.
- Prepare the cream cheese frosting: In a large bowl, beat the softened cream cheese and butter together until smooth. Gradually add the powdered sugar, beating until creamy. Mix in the vanilla extract.
- Once the cakes are completely cool, frost the first layer, top with the second layer, and frost the top and sides of the cake.
Notes
- For a vibrant red cake coloring, use a high-quality gel food coloring instead of liquid coloring.
- True Southern red velvet cake gets its slight tang and moist texture from the combination of buttermilk and vinegar reacting with the baking soda.
- If you want a slightly easier assembly, you can use this recipe to make a single 9×13 inch sheet cake instead of layers.
Nutrition
- Serving Size: 1 slice
- Calories: 450
- Sugar: 55g
- Sodium: 320mg
- Fat: 25g
- Saturated Fat: 10g
- Unsaturated Fat: 15g
- Trans Fat: 0g
- Carbohydrates: 58g
- Fiber: 1g
- Protein: 4g
- Cholesterol: 55mg