
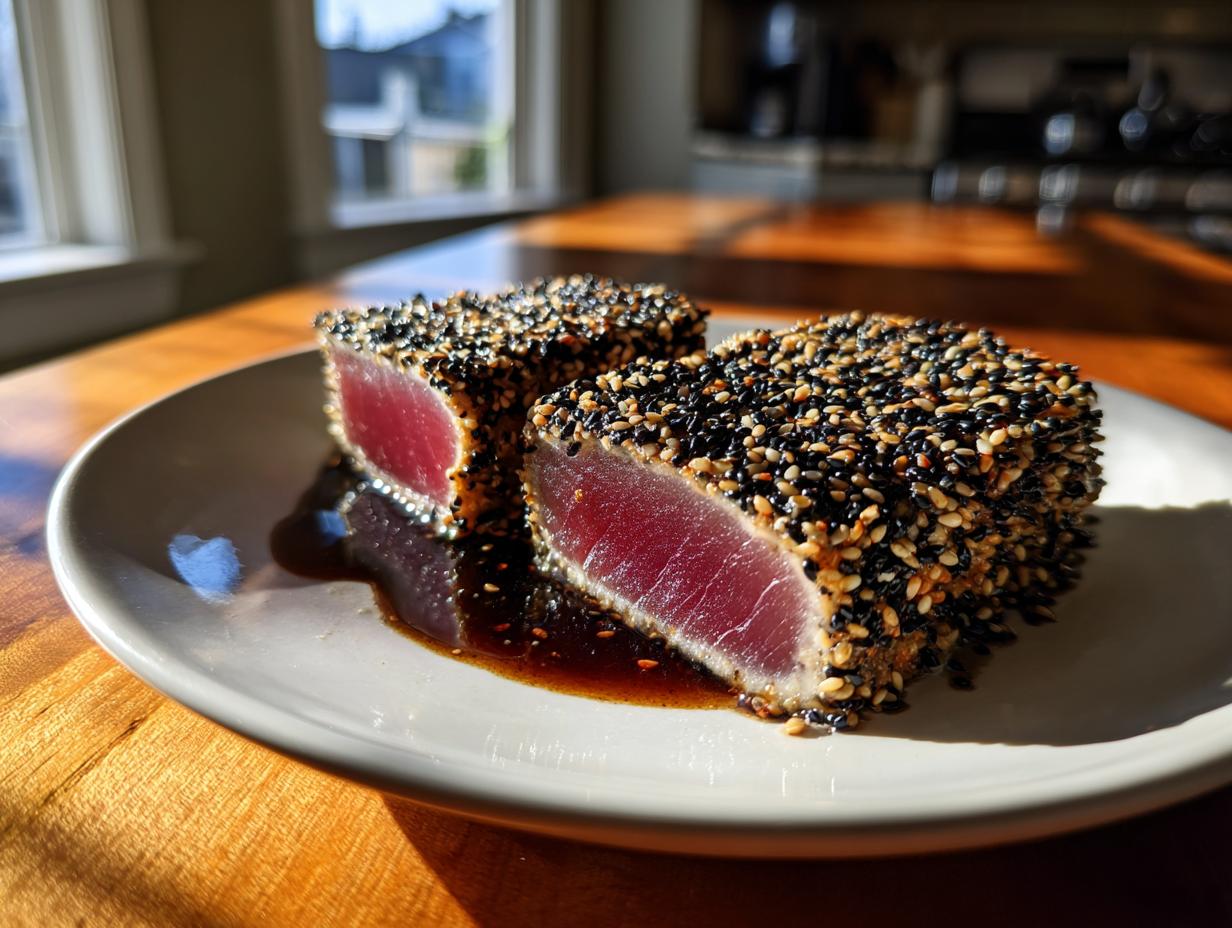
If you think serving a truly gourmet dinner means spending hours fussing over complicated sauces, I’m here to tell you that you’ve got it all wrong! Sometimes the best meals are the ones that are ready almost before you decide you want them. That’s exactly what we’re doing today with this incredible Seared Ahi Tuna. Seriously, we’re talking three minutes of active cooking time for a dish that tastes like you ordered it right off a high-end menu.
My name is Aria Sterling, and escaping the high-pressure world of marketing to chase real flavor in my own kitchen is the best decision I ever made. I used to spend my evenings testing recipes, trying to figure out how to make quick seafood delicious and accessible. This Seared Ahi Tuna recipe—using beautiful, high-quality sushi grade tuna—was one of the first big wins! People kept asking for it, which is how Seventh Flavour actually started. I realized everyone deserves that little spark of excitement when they sit down to eat something special, even on a Tuesday night. Trust me, once you master that fiery sear, you’re set for life.
- Why You Will Master This Seared Ahi Tuna Recipe
- Essential Ingredients for Perfect Seared Ahi Tuna
- Equipment Needed for Your Seared Ahi Tuna
- Step-by-Step Instructions for Seared Ahi Tuna
- Tips for Success When Making Seared Ahi Tuna
- Ingredient Notes and Substitutions for Your Asian Tuna Recipe
- Serving Suggestions for Gourmet Tuna
- Storage and Reheating Instructions for Leftover Seared Ahi Tuna
- Frequently Asked Questions About Seared Ahi Tuna
- Share Your Seared Ahi Tuna Experience
Why You Will Master This Seared Ahi Tuna Recipe
I designed this recipe specifically for the home cook who wants that big “wow” factor without the commitment. You don’t need a professional kitchen for this; you just need a hot pan and quality ingredients. This isn’t just another dinner; it’s an instant upgrade to your weeknight routine.
- It’s lightning fast! We’re talking about a true quick seafood recipe, often done in under 20 minutes total.
- We’re treating basic ingredients like gourmet tuna, giving you that wonderful restaurant texture at home.
- It’s incredibly satisfying but keeps things light—a perfect healthy dinner choice.
- My instructions are foolproof because I tested this obsessively when I first transitioned out of my marketing job and into full-time cooking!
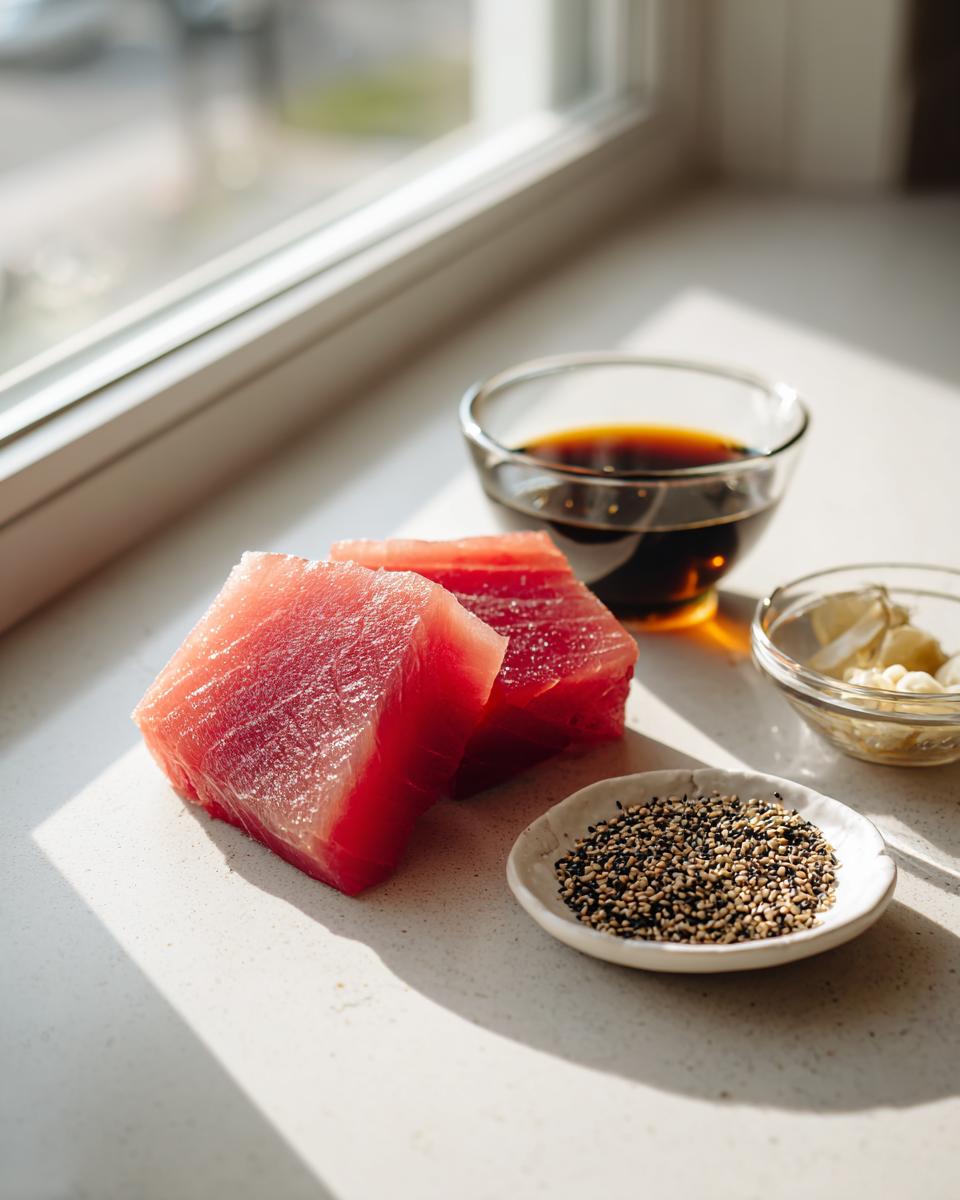
Essential Ingredients for Perfect Seared Ahi Tuna
When you’re searing tuna this quickly, every single ingredient has to pull its weight. There’s no hiding anything here! You absolutely must source the best tuna you can find. I mean it—this relies on getting true sushi grade yellowfin tuna steaks. If it isn’t labeled sushi grade, don’t even attempt this high-heat sear because we aren’t cooking it through.
The marinade is simple, bringing in those beautiful Asian notes, but the quality of the oil matters since it’s heating up fast. Here’s what you need to grab from the shop:
- 2 (6 ounce) sushi grade tuna steaks (Make sure these are thick enough to sear!)
- 2 tablespoons sesame oil (Good quality, please!)
- 1 tablespoon soy sauce or tamari (Tamari is my go-to if I want to keep it gluten-free.)
- 1 teaspoon grated fresh ginger
- 1 clove garlic, minced (Don’t even think about using garlic powder here!)
- 1/2 teaspoon black pepper
- 1/4 cup sesame seeds (I always prefer a mix of black and white for visual appeal.)
Equipment Needed for Your Seared Ahi Tuna
Okay, let’s talk tools. Because we are aiming for an intense sear, the equipment you use is almost as important as the fish itself. You cannot use that flimsy aluminum pan your college roommate gave you; it just won’t hold the heat needed for a gorgeous crust.
For this Asian tuna recipe, I swear by two things in my kitchen. First, you need something that gets screaming hot and stays hot, which is why a heavy cast iron skillet is my absolute first choice. It retains heat like a champ, giving you that amazing, even crust in just a minute or so per side.
Here is the short list of what you’ll need on hand before you even start whisking the marinade:
- A reliable, heavy-bottomed skillet. Cast iron is highly recommended! If you don’t have cast iron, use the heaviest stainless steel pan you own.
- A small bowl for mixing the marinade.
- A shallow plate or rimmed baking sheet for coating the tuna in sesame seeds.
- Paper towels. Don’t skip on these—we need the fish totally dry!
- A very sharp knife for slicing afterward. A sharp blade prevents you from squishing that delicate sear when you cut it.</li
That’s it! No fancy immersion circulators or expensive thermometers needed for this super quick seafood recipe. Just trust your heat, and you’ll be golden.
Step-by-Step Instructions for Seared Ahi Tuna
Listen, I know excitement makes us want to rush things, but when it comes to cooking sushi grade tuna, patience in the prep stage pays off HUGE later. If you think you can just pull the tuna out of the fridge and toss it in the pan, you’ll end up with a soupy marinade and a pale sear. We need dry fish and a fiery hot pan!
Preparing the Yellowfin Tuna for Searing
First things first: grab those beautiful tuna steaks and pat, pat, pat them dry with paper towels. I mean it—get them completely dry on every single surface. If they’re damp, the pan is just going to steam them instead of searing them, and that’s a cardinal sin in my book. Next, whisk up our quick Asian marinade—just combine that sesame oil, soy sauce, ginger, and garlic. Brush this mixture generously over all sides of the tuna so it smells incredible.
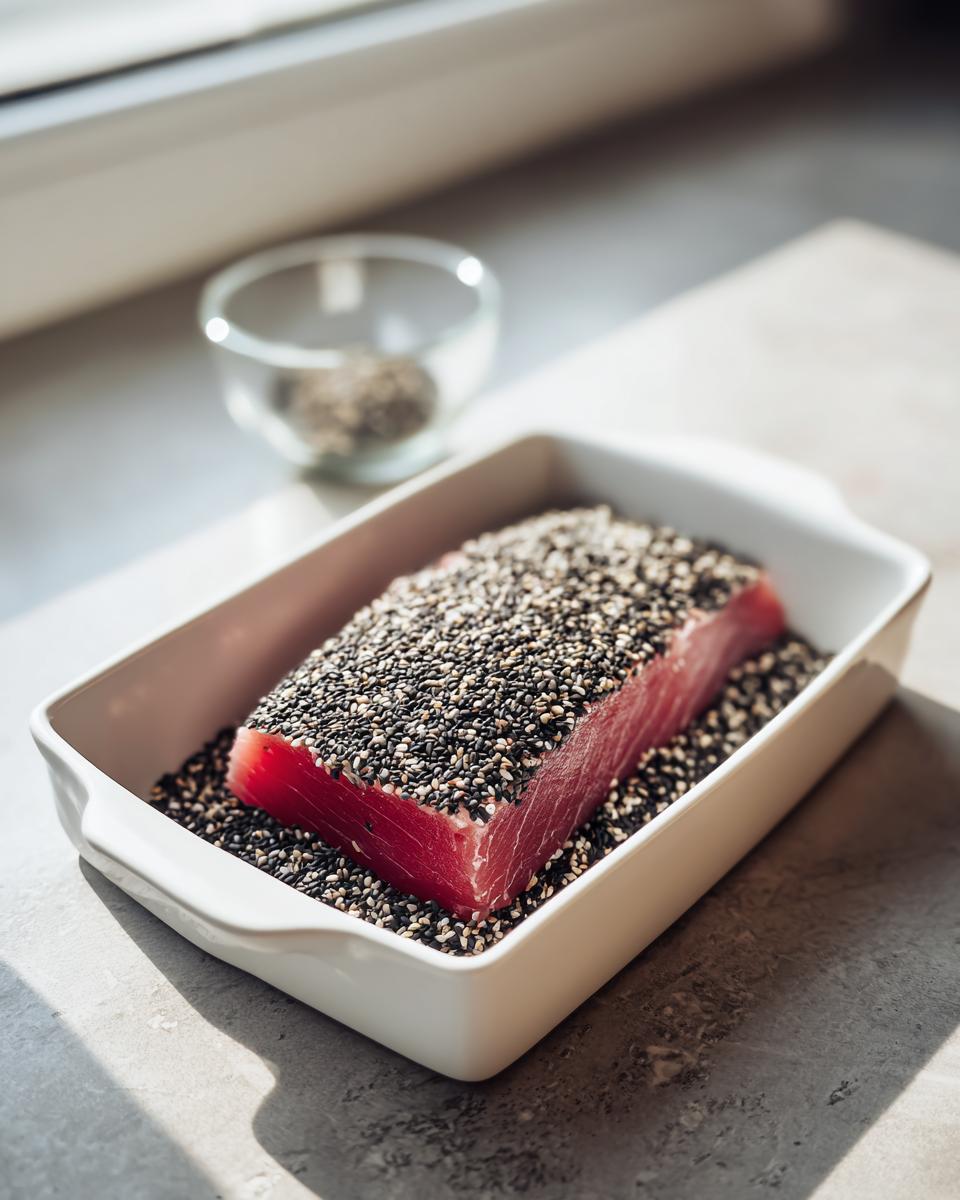
Now, here’s where I incorporate a little trick I learned: take those coated steaks and press them firmly into your mixed sesame seeds on a plate. You want a thick, beautiful crust all the way around. After they’re coated, pop them in the fridge for about 15 minutes to chill down slightly. This helps keep the center rare when they hit the heat later!
Achieving the Perfect Sear on Your Seared Ahi Tuna
This is the moment of truth for your Seared Ahi Tuna! Put your skillet (preferably cast iron) on the highest heat your stove can manage. It needs to be ripping hot—not just shimmering, but maybe slightly smoking when you add the fish. You don’t need much extra oil because we coated the fish so well.
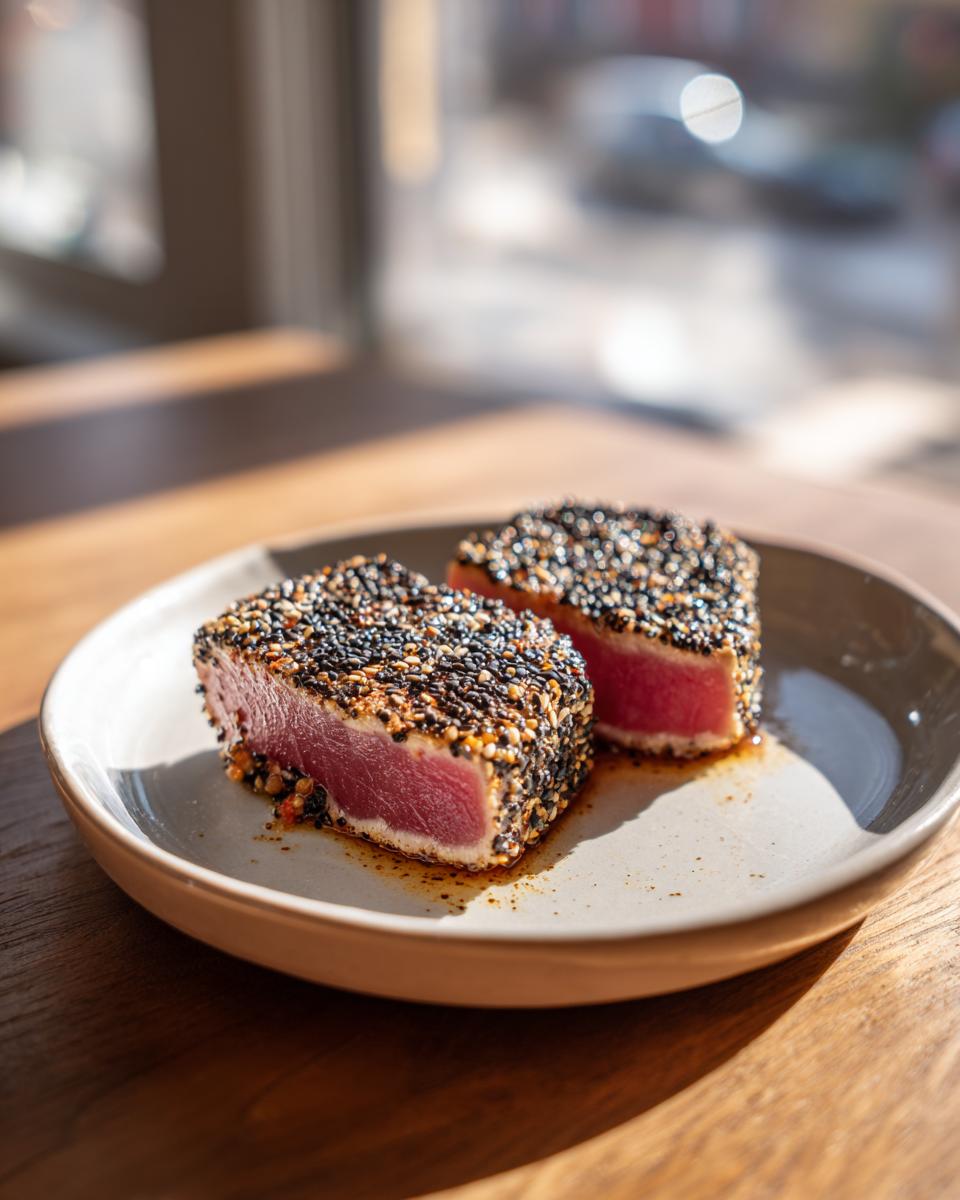
Gently place the tuna in that screaming hot pan. Seriously, do not move them! We are aiming for a quick flash of heat for that crust. For truly rare tuna, you’re looking at 60 to 90 seconds per side. That’s it! If you try to peek or move them around, you lose the crust. Once the time is up, pull them out right away. We are going for a beautifully crusted outside and a cool, almost raw center. Don’t panic if it looks too raw; resting time will soften it perfectly!

Tips for Success When Making Seared Ahi Tuna
You’ve nailed the sear, congratulations! But the process isn’t quite finished yet. I learned early on that pulling the tuna straight from the pan to the plate results in raw juices pouring all over the cutting board, which ruins our beautiful crust and dries out the fish.
You absolutely must let your gourmet tuna rest. I set mine aside on the cutting board—uncut—for about five full minutes. This lets those juices settle back into the muscle fibers. If you don’t rest it, you’re draining all the moisture we worked so hard to keep inside!
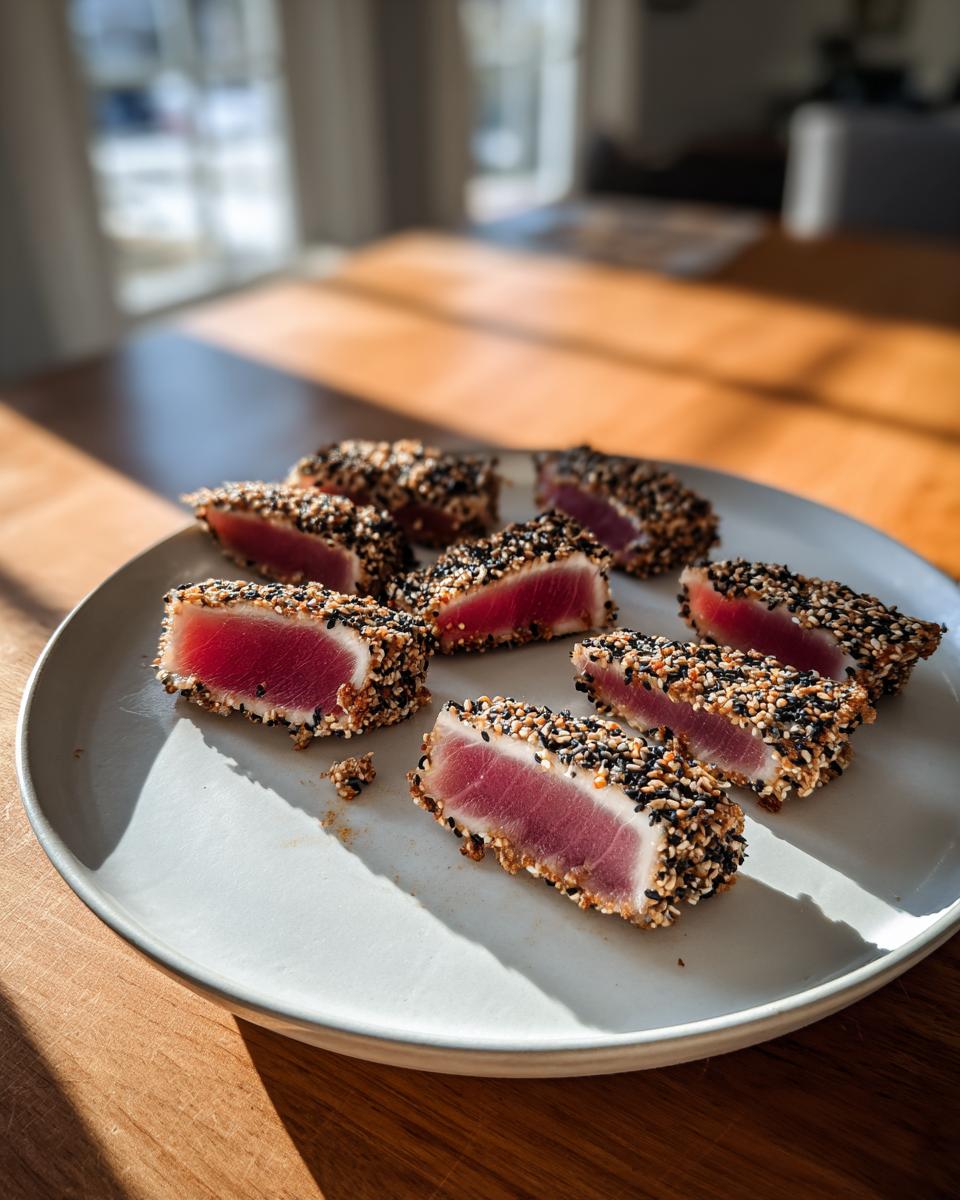
Once rested, the slicing technique is crucial for enjoying this healthy dinner. You always need to slice your yellowfin tuna against the grain. Look closely at the steak; you’ll see long, pale lines running through the flesh. Slice perpendicular to those lines using your sharpest knife. This shortens the muscle fibers, making every single bite incredibly tender and easy to chew. It makes all the difference between a nice bite and a truly melt-in-your-mouth experience!
Ingredient Notes and Substitutions for Your Asian Tuna Recipe
This is where we talk about the things you can cheat on, and the things you absolutely cannot. Let’s start with the non-negotiable item: the tuna. I can’t stress this enough—if you are trying to make this amazing Seared Ahi Tuna without certified, high-quality sushi grade tuna, you are going to be disappointed, and frankly, that makes me sad!
The term “sushi grade” basically tells you that a professional has handled this yellowfin tuna with the utmost care regarding temperature and bacterial control. Since we are cooking this fish for maybe 90 seconds total, we need to trust the source completely. That’s my personal rule, built from years of testing recipes where folks tried to save a few bucks on the main protein. Don’t do it!
Now for the easy swaps! If you need this fantastic Asian tuna recipe to be gluten-free, substituting tamari for regular soy sauce is a perfect solution. Tamari brings just as much deep, savory umami flavor without the wheat. Also, if you don’t have fresh ginger on hand (though I strongly prefer it for that spicy kick!), you can use about 1/4 teaspoon of ground ginger, but you’ll lose some of that bright freshness.
The sesame oil is the other key player here because it’s doing double duty—flavoring the fish and providing high-heat fat for the crust. Stick to pure sesame oil for the marinade; don’t use toasted sesame oil in the marinade unless you cut it way down, because toasted oil has a much lower smoke point and will burn instantly in our screaming hot pan. For the high-heat searing oil, if you feel like you need extra slickness beyond the seeds and marinade, just use a neutral high-heat oil like avocado oil rather than trying to force more sesame oil into the actual searing step.
Serving Suggestions for Gourmet Tuna
So you’ve got this perfectly seared, ruby-red center in your hands—now what? Part of the joy of making something this fresh and beautiful is plating it right! Since this gourmet tuna has such a bright, savory Asian flavor, you want sides that complement it without overpowering that delicate sear. I love making an entire, balanced meal around these steaks.
For starters, the base of the plate absolutely has to soak up any of those flavorful juices that might escape when you slice the fish. My go-to is always freshly steamed jasmine rice. It’s fluffy, slightly sticky, and just neutral enough to let the fish shine. If you’re trying to keep it lighter, you can use quick-cooking brown rice, but make sure you cook it slightly less so it holds its texture!
Next, you need something green to add crunch and color. I usually steam up some crisp asparagus spears, but I don’t just boil them! I lightly toss them with a tiny dash of rice vinegar and maybe a sprinkle of flaky sea salt right before serving. Anything quick and lightly dressed works well—think quick-blanched green beans or maybe some edamame pods mixed with a little chili flake if you like some heat.
If you want to elevate this even further when serving your Seared Ahi Tuna, think about a simple sauce or dressing to drizzle around the plate, not over the crust! A very light dressing made from mixing rice vinegar, a drop of honey, and maybe some thinly sliced scallions is heavenly. It brightens everything up. Remember, this fish is so quick to cook, so you want sides that are equally fast or can be made ahead of time. Keep it clean, keep it bright, and you’ll have a dinner that rivals any Japanese steakhouse!
Storage and Reheating Instructions for Leftover Seared Ahi Tuna
Okay, let’s be real here: this beautiful, quick Seared Ahi Tuna is at its absolute peak the second it leaves the pan and rests for those five minutes. It’s designed to eat immediately while you have that perfect contrast between the sesame-crusted exterior and the cool, ruby-red center. If you have leftovers, that’s fine! But we have to treat them differently because the texture changes quickly once it sits.
If you must store the leftovers, wrap the slices tightly in plastic wrap or put them in an airtight container. Stick them in the coldest part of your refrigerator, but try your best to eat them the very next day. That lovely sear gets a little softer as the fish chills, but it’s still totally edible and delicious cold!
Now, about reheating—I strongly advise against it! Seriously, please don’t try to toss those slices back into the hot skillet. You’ll just cook that beautiful rare center until it turns gray and dry, and we worked way too hard for that result. Remember, this isn’t like cooking a chicken breast; once it heats up again, it keeps cooking internally.
Instead, use the leftovers cold! This is where they shine again as a fantastic quick seafood recipe component. Slice the cold tuna a tiny bit thinner than you did the first time, and toss it right into a big, crisp salad. It’s wonderful over mixed greens with avocado and maybe a drizzle of rice vinegar dressing. It’s also amazing chopped up and mixed into chilled noodles or rice bowls. Think of it like a high-end, savory topping rather than a hot main course, and you’ll be thrilled with the result!
Frequently Asked Questions About Seared Ahi Tuna
When I first started perfecting this recipe, I had a million questions myself! It’s nerve-wracking cooking something so expensive and delicate, but once you know the right answers, it’s just second nature. Here are a few things I hear most often from folks trying out their first batch of Seared Ahi Tuna at home.
I know it seems simple, but getting that sear right is the biggest hurdle! If you’re worried about the equipment or the timing, jump over to my contact page and shoot me a message; I love hearing from readers!
What makes tuna ‘sushi grade’?
This is perhaps the most important question in this whole Asian tuna recipe! When you see “sushi grade,” it really means the specific piece of yellowfin tuna has been handled by experts with freezing and handling procedures designed to eliminate parasites. Because we are barely cooking the middle—leaving it nearly raw—you MUST use fish that is safe to eat uncooked. Don’t rely on regular supermarket tuna for this; look for a reputable fishmonger who explicitly labels theirs as sushi or sashimi grade.
What kind of oil should I use for the actual searing?
That’s a great question if you’re worried about the smoke point! We use sesame oil in the marinade for flavor, but for the actual searing in the super-hot pan, you want an oil with a very high smoke point. I usually just trust the coating on the fish itself, especially since we pressed it firmly into the seeds. However, if you are using a stainless steel pan that tends to stick, just add a very small drizzle of avocado oil or grapeseed oil right before the tuna goes in. These are neutral oils that won’t burn before your Seared Ahi Tuna develops its crust.
What is the best internal temperature for Seared Ahi Tuna?
Since the goal is that beautiful, cool, rare center, you aren’t using a thermometer to cook it through like a chicken breast! You’re using the heat purely to kiss the outside surface. If you are using a thermometer—and I highly recommend one just to be certain—you are aiming for the center to register between 115°F and 125°F. That small range gives you that perfect texture. Remember, that high heat cooks maybe an eighth of an inch deep, leaving the rest of that gorgeous sushi grade tuna completely cool and vibrant!
The main thing is timing: 60 seconds for a very blue center, 90 seconds per side for a slightly darker, medium-rare edge. Don’t leave it in longer!
Can I make this recipe with salmon instead?
You absolutely can use salmon, and it makes a fantastic meal, but you have to adjust your expectations and cooking time significantly! Salmon is much fattier and has a different texture than yellowfin tuna. If you use salmon fillets, you’ll still pat them dry and coat them in seeds, but for a medium-rare center, you’ll need to sear them for closer to 2 to 3 minutes per side, maybe even longer, depending on the thickness of the cut. Salmon can handle that extra time much better than delicate ahi when it comes to cooking through.
Share Your Seared Ahi Tuna Experience
Whew! Now you have everything you need to create a stunning, restaurant-quality Seared Ahi Tuna right in your own spot! I’ve shared all my secrets about getting that perfect sear and keeping the center cool and vibrant. Honestly, that’s the best part of running Seventh Flavour; I get to hear about your successes!
I truly hope you enjoyed the process and that this became a go-to when you need a super fast, incredibly delicious meal. Cooking should always leave you feeling creative and rewarded, and I want to know how this fantastic healthy dinner turned out for you!
Did it work in your cast iron skillet? Did your family light up when they saw those beautiful sesame seeds? Or maybe you tried it with that little touch of rice vinegar in the marinade—I’m dying to know if that brightened up the flavor for you!
Don’t be shy! Please leave a rating below. A quick star rating helps other home cooks who are nervous about trying seafood feel confident enough to jump in. If you had a question or a slightly different approach that worked wonders for your Asian tuna recipe, drop it in the comments. We’re all learning together here in the kitchen!
And if you snapped a picture of that beautiful, rare cross-section—please share it! Tag me online so I can see your gorgeous work. Seeing your finished gourmet tuna always makes my day brighter. Happy cooking, friends!
PrintPerfectly Seared Ahi Tuna Steaks
Learn to sear sushi grade yellowfin tuna perfectly for a quick, healthy dinner with an Asian-inspired flavor.
- Prep Time: 10 min
- Cook Time: 3 min
- Total Time: 18 min
- Yield: 2 servings 1x
- Category: Dinner
- Method: Pan Searing
- Cuisine: Asian
- Diet: Low Fat
Ingredients
- 2 (6 ounce) sushi grade ahi tuna steaks
- 2 tablespoons sesame oil
- 1 tablespoon soy sauce or tamari
- 1 teaspoon grated fresh ginger
- 1 clove garlic, minced
- 1/2 teaspoon black pepper
- 1/4 cup sesame seeds (mixed black and white)
Instructions
- Pat the ahi tuna steaks completely dry using paper towels. This step is crucial for a good sear.
- In a small bowl, whisk together the sesame oil, soy sauce, ginger, and garlic. Brush this mixture evenly over all sides of the tuna steaks.
- Place the sesame seeds on a shallow plate. Press each side of the tuna steaks into the seeds until they are fully coated.
- Heat a heavy-bottomed skillet, such as cast iron, over high heat until it is very hot. Add a small amount of high-heat oil if your pan is not non-stick, but the sesame oil on the fish should suffice for most pans.
- Carefully place the coated tuna steaks in the hot pan. Sear for 60 to 90 seconds per side for rare to medium-rare. Do not overcook.
- Remove the tuna from the pan immediately. Let the steaks rest on a cutting board for 5 minutes before slicing thinly against the grain.
- Serve immediately.
Notes
- For best results, chill the seasoned tuna for 15 minutes before searing to help maintain a rare center.
- Use a sharp knife when slicing the tuna to get clean cuts.
- You can substitute rice vinegar for a portion of the soy sauce for a brighter flavor.
Nutrition
- Serving Size: 1 steak
- Calories: 300
- Sugar: 1
- Sodium: 350
- Fat: 18
- Saturated Fat: 3
- Unsaturated Fat: 15
- Trans Fat: 0
- Carbohydrates: 4
- Fiber: 1
- Protein: 30
- Cholesterol: 70