
There’s just something about pulling a perfectly baked loaf out of the oven that makes the whole house feel instantly calmer, isn’t there? When I moved away from the fast pace of marketing and started Seventh Flavour, it was so I could share these moments of true comfort. I left behind spreadsheets for the slow, satisfying process of creating something real. And when it comes to reliable, taste-the-past baking, nothing beats this Old-Fashioned, Ultra-Moist Date Nut Bread Recipe. Seriously, this date nut bread is my gold standard. It’s completely foolproof, and it delivers that deep, satisfying richness we all crave in a great quick bread.
I’ve tested this recipe dozens of times over the years, tweaking bits and pieces until it hits that perfect sweet spot—moist but sturdy enough to handle a thick swipe of butter. My connection to this recipe isn’t corporate; it’s built on years of weekend baking therapy. This loaf is proof that simple, honest ingredients, handled with care, create the best kind of magic. If you’re looking for consistency and flavor that transports you back to your grandmother’s kitchen, stick right here with me! You can read more about my journey in the kitchen over at the About Page, where I talk more about leaving marketing behind for good.
- Why This Old-Fashioned date nut bread Recipe Delivers Moisture
- Gathering Ingredients for Your date nut bread Loaf
- Simple Baking Recipes: How to Make the Best date nut bread
- Baking Time and Cooling for Your Classic Loaf Cake
- Tips for Success with Homemade date nut bread
- Serving Suggestions for date nut bread as Comfort Food Baking
- Storage and Make Ahead Bread Options for date nut bread
- Frequently Asked Questions about date nut bread
- Nutritional Estimate for This date nut bread Recipe
Why This Old-Fashioned date nut bread Recipe Delivers Moisture
If you’ve ever ended up with a date nut bread that tastes more like sawdust than dessert, I totally get it. Dry quick breads are the worst, aren’t they? That’s why I want to share the absolute secret to making this the Moist Date Nut Bread Recipe you keep forever. It all happens in the very first step, before you even touch the butter.
We soak the chopped dates in boiling water, and here’s the crucial part: we toss in the baking soda right then, too. That hot water softens the dates right down to their core, making them plump, juicy, and ready to melt into the batter. The baking soda reacts with the dates and the eventual acid in the flour when mixed, creating tiny, tenderizing bubbles that keep the crumb soft. Trust me, skipping that soak is what leads to crumbly bread.
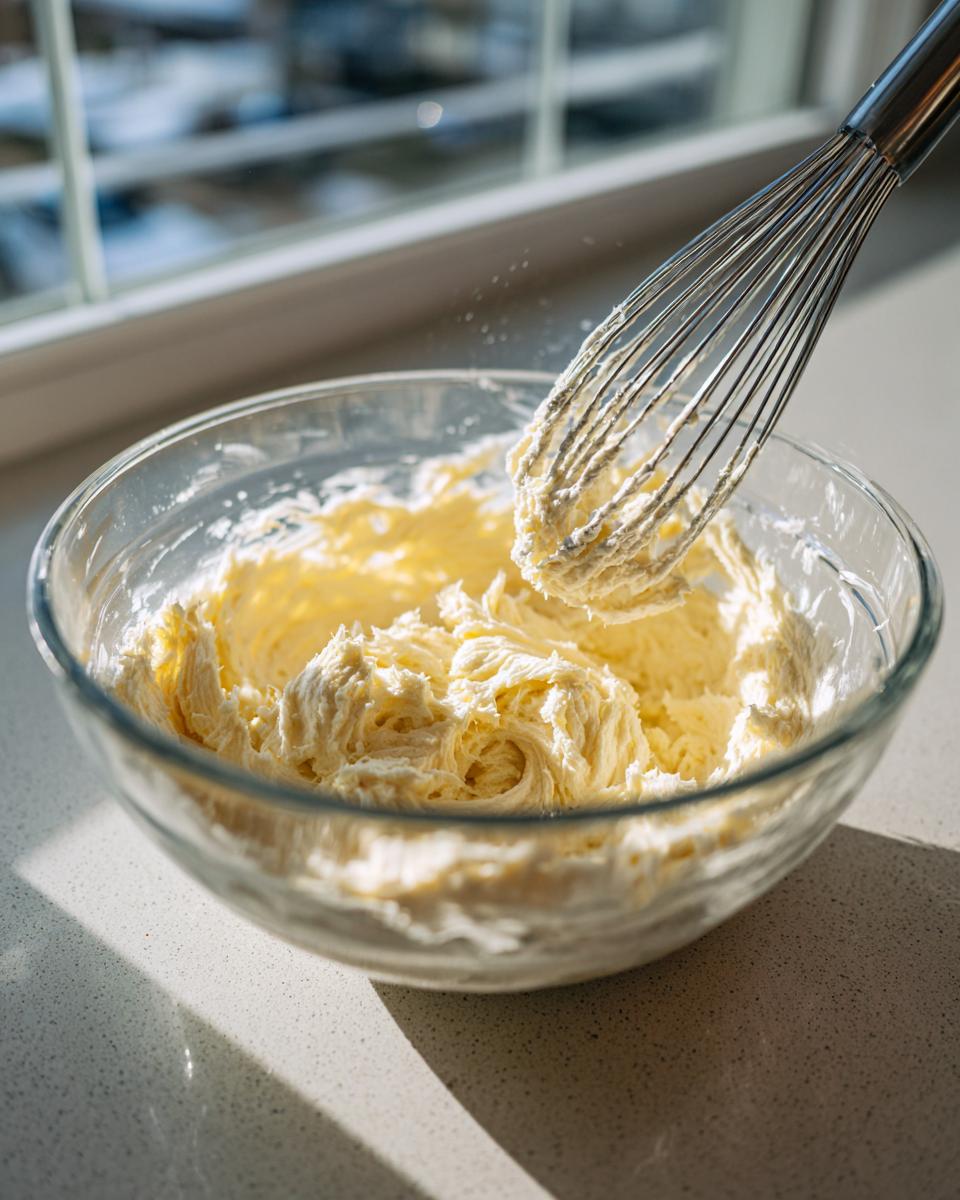
Also, I always use butter here, not oil. While oil guarantees moisture, the butter gives you that rich, classic flavor that oil just can’t replicate. When you cream that softened butter with the sugar, you’re incorporating air that locks in all that wonderful moisture we created by activating the dates. It’s a one-two punch for a perfectly tender loaf, every single time.
Gathering Ingredients for Your date nut bread Loaf
Okay, this is where we get real, because even the best technique falls flat if the ingredients aren’t right. For this classic loaf, we’re keeping things wonderfully simple, but precision matters! You need that full stick of softened butter—please make sure it’s actually softened, not melted, or you’ll run into trouble in the creaming stage.
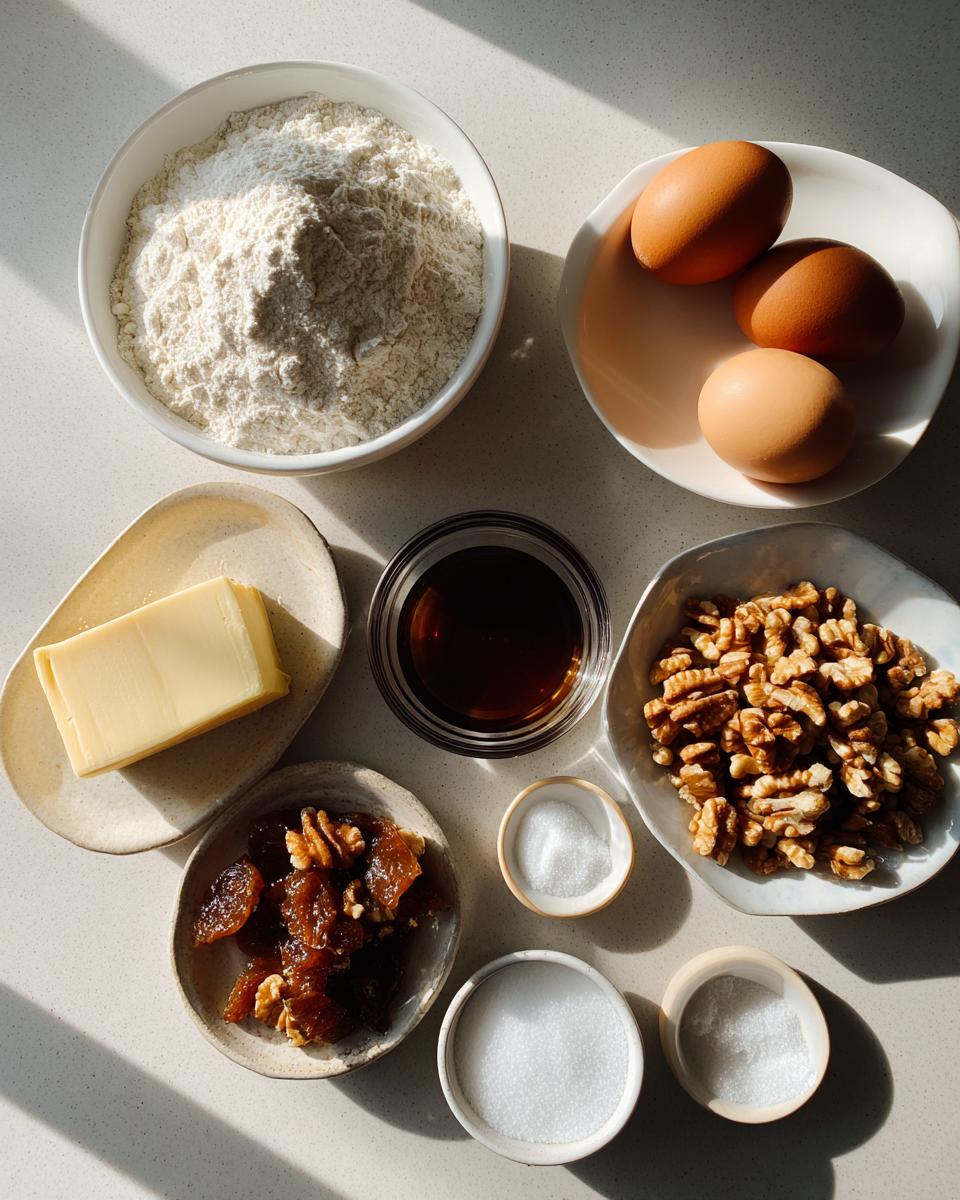
I always use all-purpose flour because it gives the best structure for a quick bread, but don’t fret if your pantry has whole wheat flour sitting there. You can absolutely swap out half of the all-purpose flour for whole wheat. Just know that the 100% whole wheat version will be a little denser, you might lose just a *touch* of that cloud-like tenderness we’re aiming for.
Ingredient Notes and Substitutions for date nut bread
You noticed those walnuts in the list, right? They provide that essential crunchy contrast. If walnuts make you nervous, pecans are a fantastic substitute, or even almonds! Just chop them roughly so you get nice pockets of crunch.
Now, about those dates. Make sure they are pitted! Nobody wants that surprise when they take a bite. We call for dates and walnuts, but that recipe note I added mentions you can easily pivot to a Banana Date Nut Bread Variation if you have some overripe bananas hanging around. That just adds another layer of natural sweetness. If you want it naturally sweet with even more flavor, sometimes I swap the granulated sugar for maple syrup, but you’ll need to cut back on the boiling water slightly to keep the batter thick. It’s all about playing gently with the formula!
Simple Baking Recipes: How to Make the Best date nut bread
This is the part I love most—watching the batter come together. If you’re new to baking loaves like this, don’t stress! This recipe fits perfectly into the category of Simple Baking Recipes that give you huge rewards for minimal fuss. Remember, baking is methodical, but it shouldn’t be scary. Preheat that oven to 350°F right away, and get that 9×5 loaf pan greased and floured. Having everything ready is key for Easy Quick Bread Baking. This reliable formula is perfect for a weekend project or for prepping easy breakfasts you can grab all week long; check out loads of other great ideas on my Easy Breakfast Recipes page!
Once the oven is heating, our very first action is to treat those dates right. That soaking step is non-negotiable if you want the ultimate moist loaf.
Preparing the Dates and Activating Soda
Get your chopped dates into a small bowl. Now, pour that full cup of boiling water right over them. As soon as you do that, stir in the baking soda. You might see a little bit of fizzing; that’s good! It means the soda is getting to work softening those fibers. You have to let this sit undisturbed for a full 10 minutes. If you rush this, those dates will be tough little rocks in your beautiful bread. Patience here pays off in every single soft bite later.
Mixing Wet and Dry Components for date nut bread
While your dates are soaking, move onto the main structure. In a separate large bowl, take your softened butter and that cup of sugar. Cream them together until they look truly fluffy and pale yellow. This is important! You’re building air pockets right here.
Then, add your eggs—but do it slowly. Beat them in one at a time making sure the first one is fully mixed in before you even think about adding the second. Vanilla goes in last for the wet ingredients.
In another bowl, quickly whisk together your flour, baking powder, and salt. Now, the balancing act begins. You’ll gently add the dry mixture into the wet mixture, alternating with the date mixture you prepared earlier. Always start and end with the dry ingredients. And here is my biggest tip, the one I learned from my own early kitchen mistakes: Do Not Overmix! Stop mixing the second you stop seeing streaks of white flour. Seriously! A few tiny lumps? Perfect! Overmixing develops gluten in the flour, which turns a tender loaf into something chewy and tough. We want tender, right?
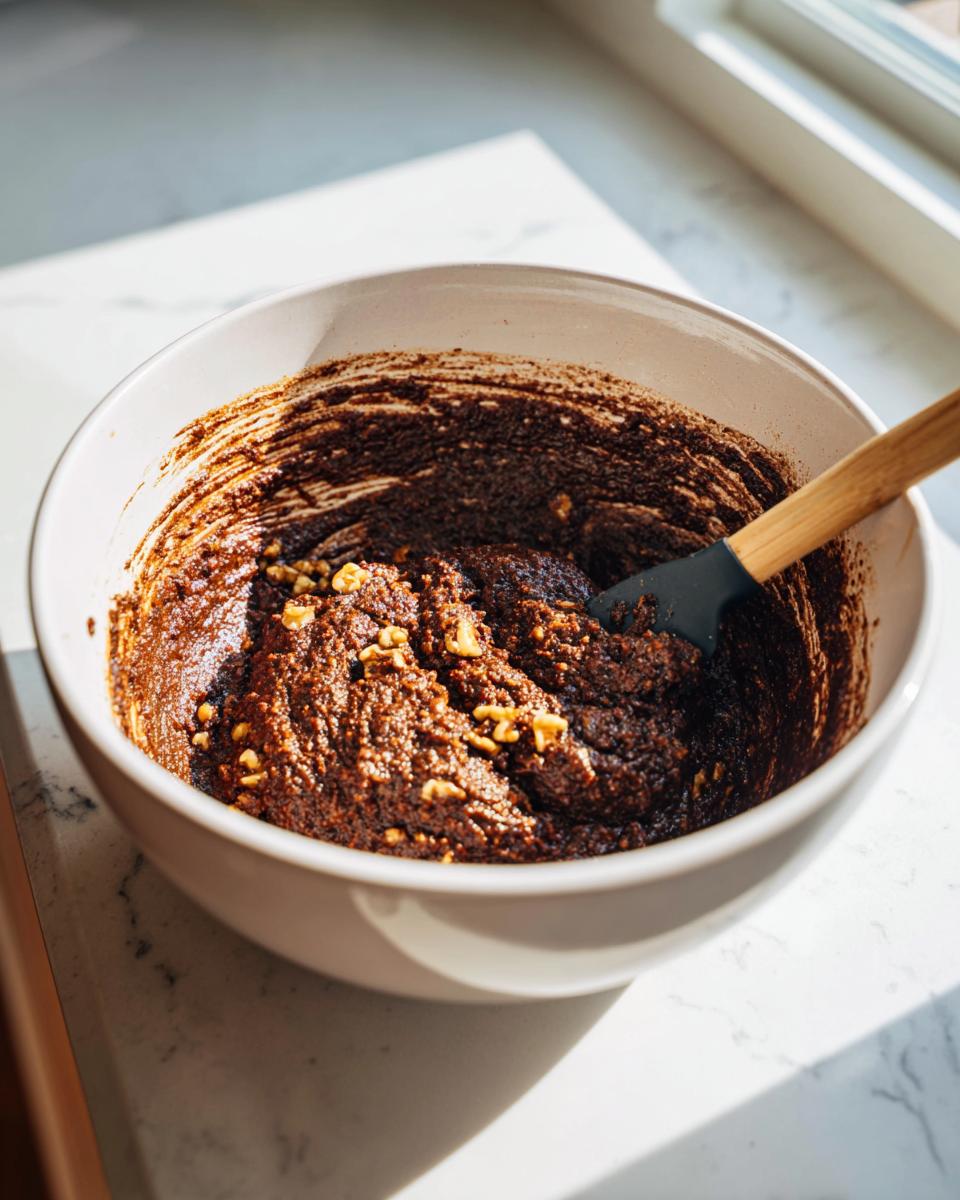
Finally, gently fold in the walnuts. Once everything is just barely incorporated, scrape it all into your prepared pan. My personal check? I usually peek around the 50-minute mark. Sometimes the top looks golden, but the middle is still raw. A quick, gentle poke right at the top center—if it springs back slightly, it’s getting close! Don’t wait until the skewer test tells you it’s done; use your eyes and hands first!
Baking Time and Cooling for Your Classic Loaf Cake
Now we wait, which is sometimes the hardest part when you smell something this good baking away! For this wonderful Classic Loaf Cake, you’re typically looking at 55 to 65 minutes in that 350-degree oven. Yes, I know that’s a big window, but every oven is different, and nobody wants a raw hot spot in the middle of their beautiful loaf.
Around the 55-minute mark, you absolutely need to test it. Don’t just use the toothpick test, though—that’s only one part of the puzzle! Insert a thin wooden skewer or a clean, thin knife right into the very center of the loaf. If it comes out holding wet batter, it needs more time, maybe another 5 to 10 minutes. If you see moist crumbs clinging to the tip of the knife, that’s the sweet spot for this bread.
If you pull it out and it looks completely clean, you’ve gone too far and you might have a slightly drier loaf than we want. It’s always better to check early and give it five more minutes than to overbake it right out of the gate.
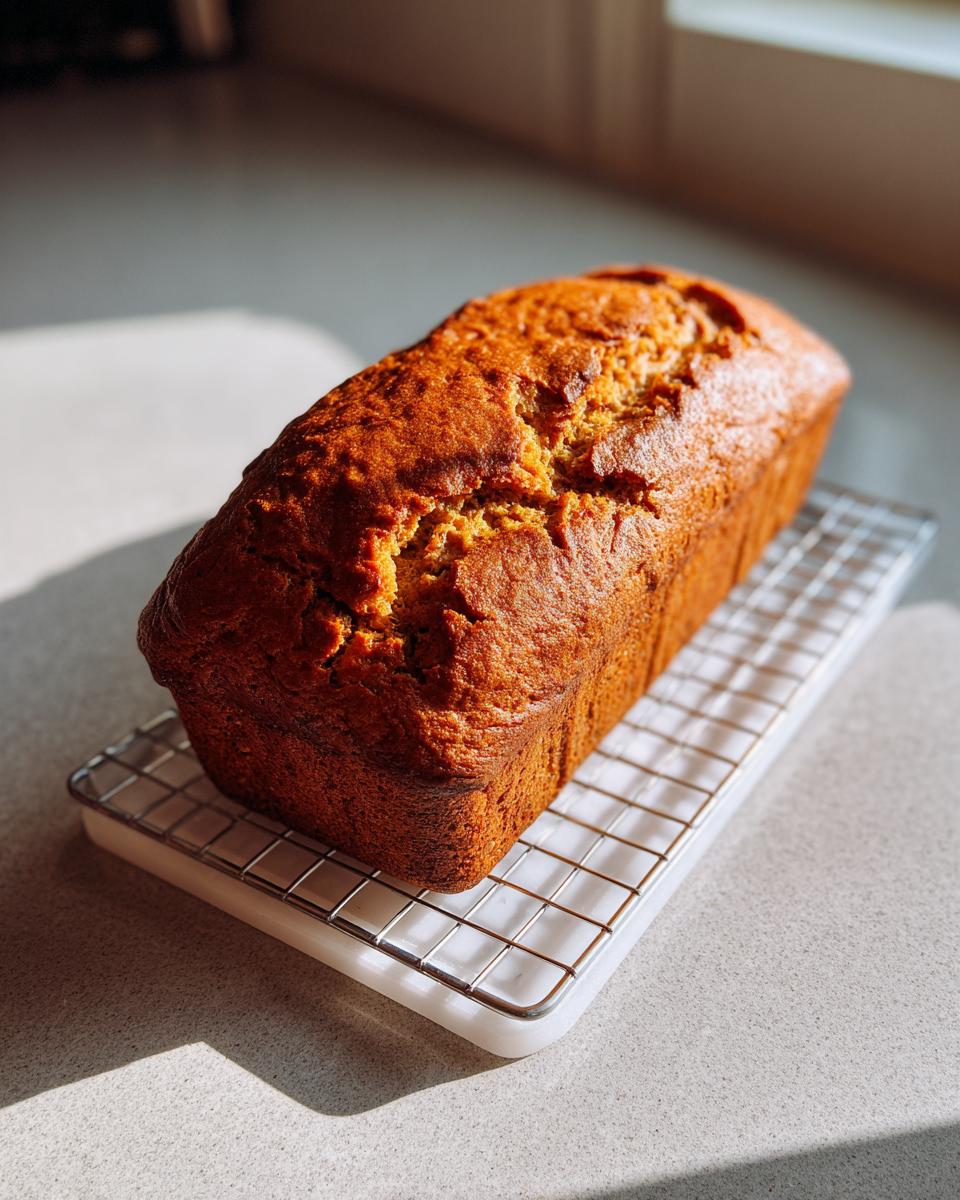
Once it’s done, you have to resist the urge to dump it out immediately. This bread needs a little handshake from its pan to set up properly. Let that loaf cool right there in the pan on a wire rack for a full 10 minutes. This short rest lets the structure firm up so it doesn’t collapse or stick when you try to release it. After those ten minutes, gently turn it out onto the rack, remove the pan, and let it cool completely, or at least until it’s just warm enough to cut.
Tips for Success with Homemade date nut bread
Baking is so much better when you feel confident, and I want your experience creating this Homemade Date Bread to be perfect. I have three little tricks that I swear by every time I pull out the mixer for this loaf. First up: room temperature eggs. I know setting eggs out seems fussy, but cold eggs actually shock the creamed butter mixture and cause it to deflate slightly. Room temperature eggs mix in smoothly and help create that lovely, uniform crumb.
Next, let’s talk dates again. If you are chopping them by hand, dust them lightly with about a tablespoon of your flour mixture *before* you add them to the final batter. This is a trick from my early days that stops them from clumping together in one dense spot at the bottom of the loaf. They stay suspended so nicely throughout the batter that way!
Finally, be mindful of your pan material. I love the look of a glass loaf pan—it gives the outside that gorgeous, deep golden crust—but glass holds heat longer than metal. If you use glass, you might need to bake for an extra 5 to 7 minutes, or start checking earlier than 55 minutes. Metal pans typically bake a little faster. Always trust your skewer test over the clock, especially when you check out my list of other quick appetizer recipes for more simple baking fun!
Serving Suggestions for date nut bread as Comfort Food Baking
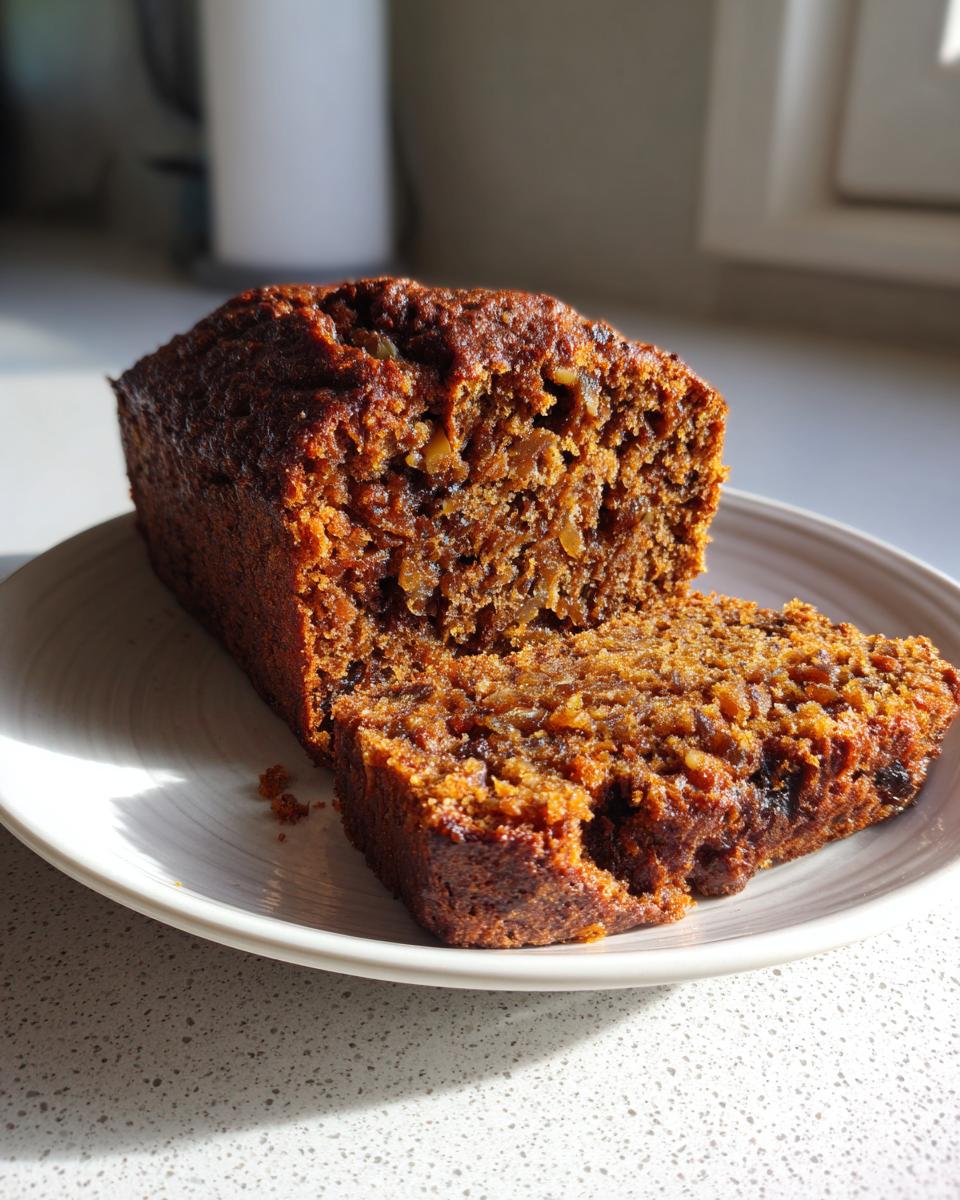
Oh, this is the best part! Once your loaf is completely cool—or, let’s be real, only just warm enough that you won’t burn your fingers—it’s time to enjoy some pure, simple Comfort Food Baking.
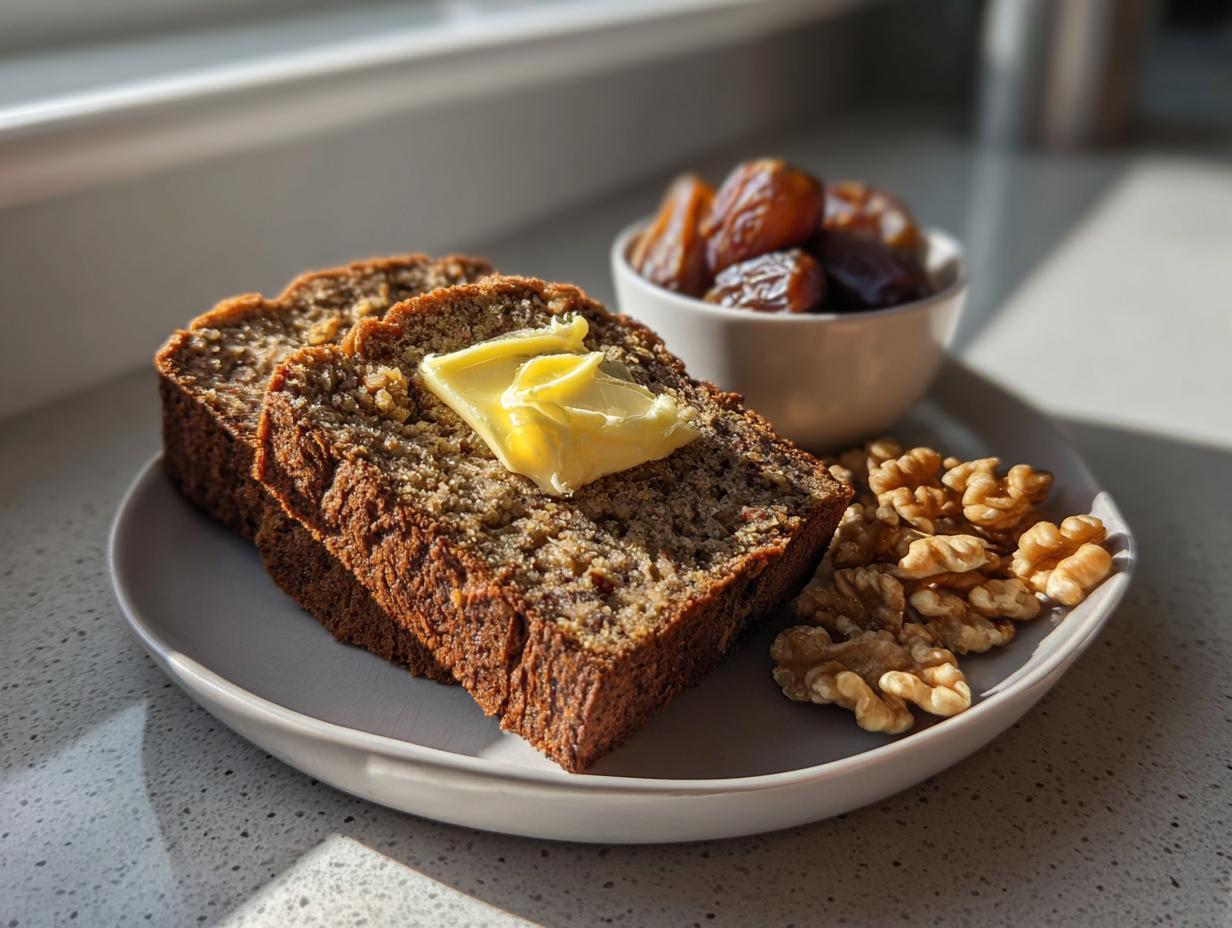
My number one, non-negotiable way to eat this? Sliced thick, held under the broiler for just 30 seconds until the edges are crisp, and then smothered in softened, good-quality salted butter. The heat melts the butter right into those sweet date pockets. It’s heaven. You have to try it this way, just once, before you try anything fancier!
This bread really shines as a simple snack, too. It’s just perfect alongside a piping hot cup of coffee in the morning. It doesn’t need much dressing up at all, which is what I love about these old-fashioned recipes. If you want something slightly richer for an afternoon treat, it makes a wonderful base for dessert. I’ve seen people take a slice, warm it up, and top it with a simple, tangy cream cheese frosting, or maybe even a drizzle of honey. That bit of tang cuts through the sweetness beautifully.
If you’re looking for other fantastic ideas on how to incorporate homemade loaves into your daily routine, take a peek at my Healthy Snack Ideas post for some inspiration!
For the holidays, this loaf shines beautifully on a platter. It pairs wonderfully with salty cheeses or even a sharp cheddar if you’re doing a brunch spread. If you want to see how another great baker handles a similar classic, this one from The Baking Chocolatess is just lovely, too: Old-Fashioned Date Nut Bread.
Storage and Make Ahead Bread Options for date nut bread
One of the real joys of baking a quick bread like this date nut bread is knowing you have something delicious ready to go for days. This is truly the definition of a great Make Ahead Bread! Because we worked so hard to get this loaf perfectly moist, storage is important to keep that texture locked in.
At room temperature, this loaf is fantastic for about two to three days. You just need to wrap it tightly once it’s totally cool. I mean tight! Use plastic wrap first, pressing it right up against the loaf so air doesn’t get in to dry it out. Then, if you plan on keeping it longer than a day, wrap that plastic-wrapped loaf again in aluminum foil. Keep it on the counter, maybe under a dome if you have one. The cooler the better, but avoid the fridge if you can, as sometimes the cold air can actually make quick breads feel a bit firmer than we want.
If you baked this for a holiday or just made a double batch because—let’s face it, one loaf never lasts—freezing is your best friend. The trick to freezing this loaf successfully is to let it cool completely. I mean, stone cold! Then, wrap it tightly in that plastic wrap, followed by a good layer of heavy-duty aluminum foil. Squeeze out as much air as you can between those two layers. This locks out freezer burn.
When you’re ready to eat it, just pull the frozen loaf out of the freezer and let it thaw overnight on the counter, still wrapped. Once it’s thawed, you can unwrap it, slice it, warm it up slightly, and enjoy that fresh-baked texture all over again. It truly holds up beautifully, which is why it is such a wonderful, fuss-free choice for busy weeks!
Frequently Asked Questions about date nut bread
When I share these classic recipes, people always have great follow-up questions. And honestly, that’s what building confidence in the kitchen is all about—asking the scary questions! I’m happy to shed some light on baking the perfect loaf of date nut bread.
Can I use different nuts in this date nut bread recipe?
Absolutely! The primary goal here is texture contrast, not a strict nut mandate. If walnuts aren’t your favorite, pecans are a superb 1:1 swap, offering a similar buttery crunch. Almonds work too, though they tend to be a bit harder. If you have a nut allergy, you can totally make this a simple date loaf by leaving them out entirely. Just add an extra tablespoon of flour if you skip the nuts, as they do absorb a tiny bit of moisture.
How do I prevent my loaf from sinking in the middle?
Sinking usually happens for two reasons, and it’s usually not your fault! First, check your baking powder and soda—if they’re old, they won’t give you lift. Secondly, and this is common with quick breads, if you open your oven door too early—say, before the 45-minute mark—the blast of cold air can deflate that rising dough instantly. Resist the urge to check until later, and always ensure your batter isn’t too thin by following that soaking step closely! If you’re looking for dinner inspiration later, I have some great quick weeknight dinners to get you through the week.
Can this date nut bread be made gluten-free?
It is possible, but it requires an extra hand. Standard all-purpose flour is what gives this traditional loaf its structure. If you want to try a gluten-free version, use a good quality 1-to-1 gluten-free blend that contains xanthan gum. I’d suggest adding just a bit more liquid, maybe an extra tablespoon of milk or water, because GF flours tend to absorb liquids differently. You may also find older recipes, like this wonderful one that inspired mine, that offer gluten-free modifications: Pat Nixon’s Date Nut Bread.
What is the difference between this date nut bread and fruitcake?
That’s a fun distinction! Fruitcake is usually much denser, often soaked in alcohol or molasses, and packed *very* heavily with dried fruits and candied peel. Our date nut bread is a lightened-up Old-Fashioned Quick Bread. It uses leavening agents like baking soda/powder for a softer crumb, and it’s intended to be eaten fresh, often warm with butter, rather than cured and aged like a traditional fruitcake.
Nutritional Estimate for This date nut bread Recipe
Now, I always want to be upfront about what’s going into our bodies, even when we’re baking something wonderfully indulgent like this date nut bread. Keep in mind that these numbers are estimates because the exact size of your dates, the specific brand of flour, or how much butter sticks to the sides of your bowl can change things slightly. But this gives you a good ballpark idea for serving size!
When you slice this loaf, you get a taste of pure, wholesome snack bread history, and here’s the breakdown for one slice, based on the recipe yielding 10 generous servings:
- Calories: 285
- Fat: 14g
- Saturated Fat: 5g
- Trans Fat: 0g
- Cholesterol: 55mg
- Sodium: 180mg
- Carbohydrates: 38g
- Fiber: 2g
- Sugar: 25g (Mostly natural sugars from the dates!)
- Protein: 4g
You can see that the sugar content is a bit higher, but remember, those dates are doing a lot of the heavy lifting in terms of sweetness! It’s worth every bite, especially when you serve it warm, just like I showed you in the serving suggestions. It’s truly the ultimate home baking treat.
PrintOld-Fashioned, Ultra-Moist Date Nut Bread Recipe
Bake a classic, comforting loaf of date nut bread. This easy quick bread recipe produces an ultra-moist texture and rich flavor, perfect for breakfast or a wholesome snack.
- Prep Time: 15 min
- Cook Time: 60 min
- Total Time: 75 min
- Yield: 1 loaf (about 10 servings) 1x
- Category: Quick Bread
- Method: Baking
- Cuisine: American
- Diet: Vegetarian
Ingredients
- 1 cup boiling water
- 1 cup pitted, chopped dates
- 1 teaspoon baking soda
- 1/2 cup (1 stick) unsalted butter, softened
- 1 cup granulated sugar
- 2 large eggs
- 1 teaspoon vanilla extract
- 1 1/2 cups all-purpose flour
- 1 teaspoon baking powder
- 1/2 teaspoon salt
- 1 cup chopped walnuts
Instructions
- Preheat your oven to 350 degrees Fahrenheit. Grease and flour one 9×5 inch loaf pan.
- Place the chopped dates in a small bowl. Pour 1 cup of boiling water over the dates and stir in the baking soda. Let this mixture stand for 10 minutes.
- In a large bowl, cream together the softened butter and granulated sugar until light and fluffy. Beat in the eggs one at a time, then mix in the vanilla extract.
- In a separate bowl, whisk together the flour, baking powder, and salt. Gradually add the dry ingredients to the wet ingredients, mixing until just combined. Do not overmix.
- Stir the date mixture (including the liquid) and the chopped walnuts into the batter.
- Pour the batter into the prepared loaf pan.
- Bake for 55 to 65 minutes, or until a wooden skewer inserted into the center comes out clean.
- Let the bread cool in the pan for 10 minutes before turning it out onto a wire rack to cool completely.
Notes
- Serve this homemade date nut bread warm with butter spread on top for the best flavor.
- This loaf freezes well; wrap tightly in plastic wrap and then foil before freezing for up to three months.
- For a variation, substitute 1/2 cup of the dates with 1/2 cup mashed ripe banana for a banana date nut bread.
Nutrition
- Serving Size: 1 slice
- Calories: 285
- Sugar: 25g
- Sodium: 180mg
- Fat: 14g
- Saturated Fat: 5g
- Unsaturated Fat: 9g
- Trans Fat: 0g
- Carbohydrates: 38g
- Fiber: 2g
- Protein: 4g
- Cholesterol: 55mg