
Oh, if there’s one combination that stops me dead in my tracks every single time, it’s rich, dark chocolate meeting that salty, creamy hug of peanut butter. Truly, there’s nothing better, right? That famous flavor profile from the classic candy we all adore suddenly got an upgrade—it’s now in bar form! We’re making buckeye brownies today, and trust me, these are the ultimate way to get your fix. After countless weekend batches and kitchen experiments, I perfected this layered treat to be completely reliable for you. These aren’t just any dessert; they are the fuss-free, crowd-pleasing dream bars you’ve been searching for, delivering that signature taste perfectly every time you bake them.
If you’re looking for more amazing, tested sweet treats, you should absolutely check out my collection of easy dessert recipes!
- Why You Will Love These Buckeye Brownies
- Gathering Ingredients for Your Buckeye Brownies
- Step-by-Step Instructions for Layered Buckeye Brownies
- Tips for Perfect Buckeye Brownies Every Time
- Ingredient Notes and Variations for Peanut Butter Brownies
- Serving Suggestions for Your Chocolate Peanut Butter Dessert
- Storage and Reheating Instructions for the Ultimate Brownie Dessert
- Frequently Asked Questions About Buckeye Brownies
- Share Your Experience Making These Crowd Pleasing Desserts
Why You Will Love These Buckeye Brownies
I know you’re curious about making these, so let me just quickly hit on why these buckeye brownies immediately jump to the top of my holiday baking list every year. They just tick every single box for a perfect homemade treat!
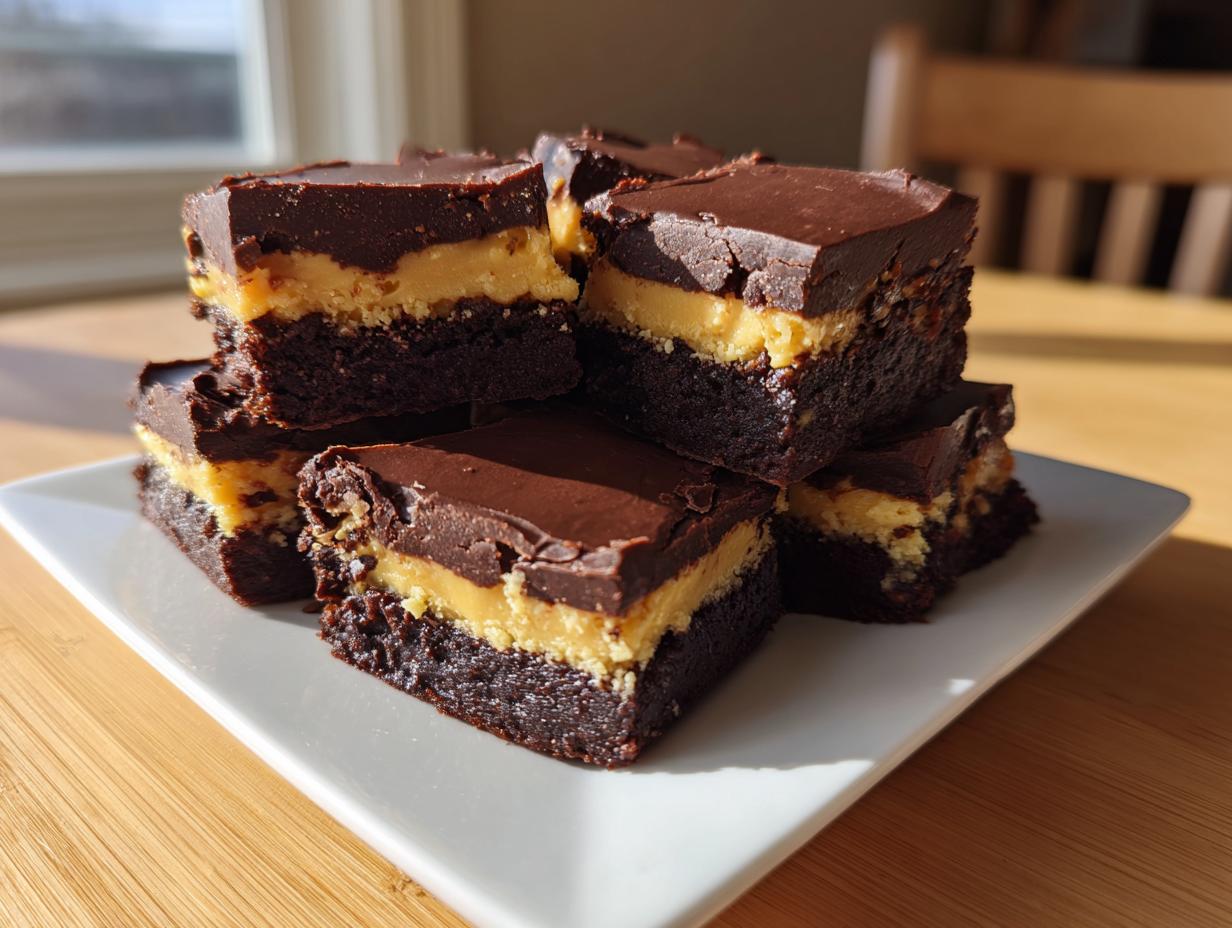
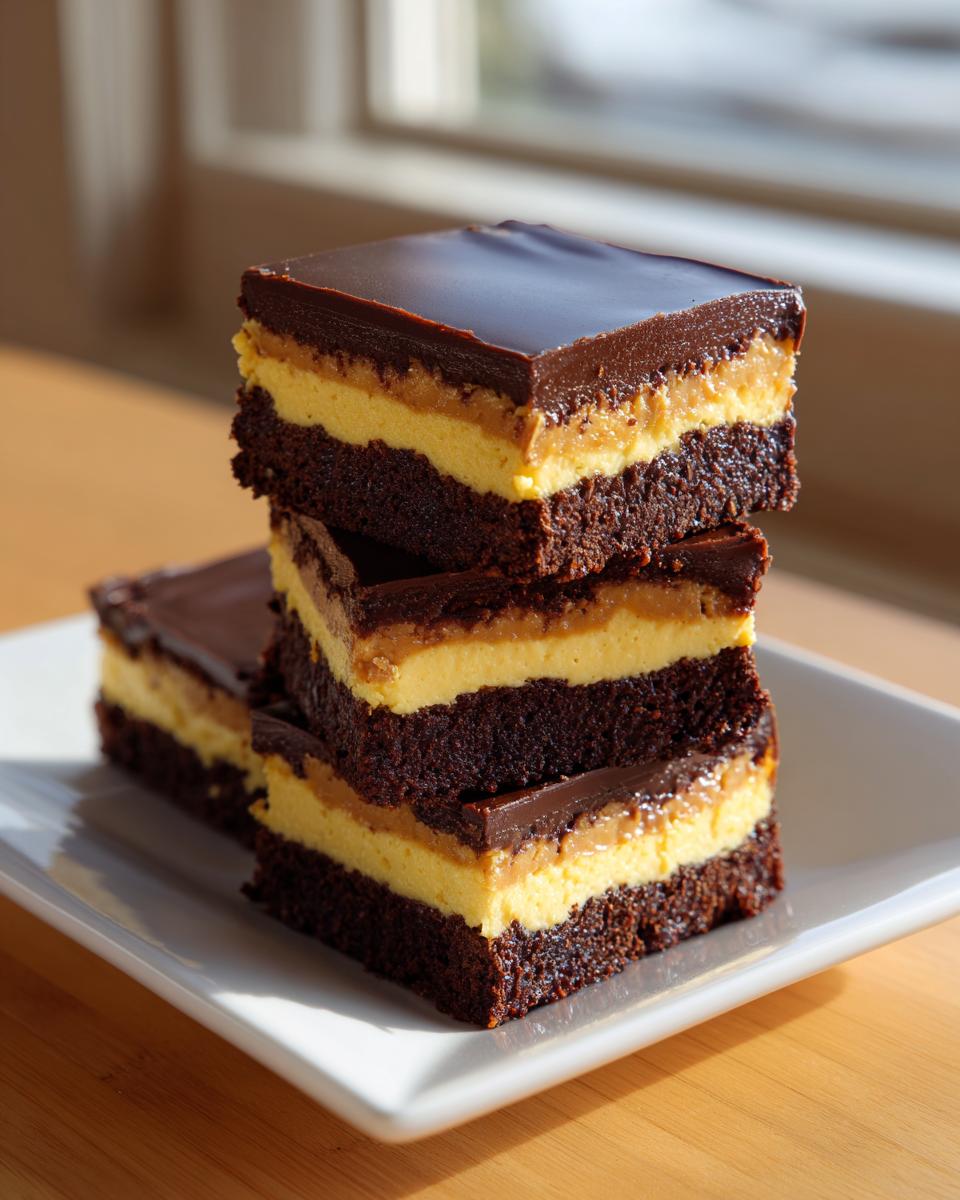
- The best part is the texture contrast—it’s a dream! You get that deep, gooey fudge from the bottom layer, a smooth, almost cloud-like peanut butter center, and then a crisp, snappy chocolate shell on top.
- They look incredibly impressive because of the distinct layers, but honestly, they are simpler to pull off than you think.
- Everyone loves chocolate and peanut butter, so these are instant crowd-pleasers for parties or potlucks. They disappear way too fast!
Flavor and Texture Highlights
You get that intense peanut butter flavor that makes the original candy so special, but paired with a seriously fudgy base. I always aim for a brownie that is dense and chewy—not cakey! Then, that final layer of melted chocolate seals in all that moisture and gives you that satisfying little *crack* when you bite into it. It’s pure decadence, my friends.
Ease of Preparation
Seriously, we’re keeping things simple here because life is already complicated enough! Using a good quality box brownie mix is my little secret for making these easy brownie bars without sacrificing any of that rich, homemade flavor. It cuts down on ingredients and worry right at the start, letting you focus on getting those killer middle and top layers just right.
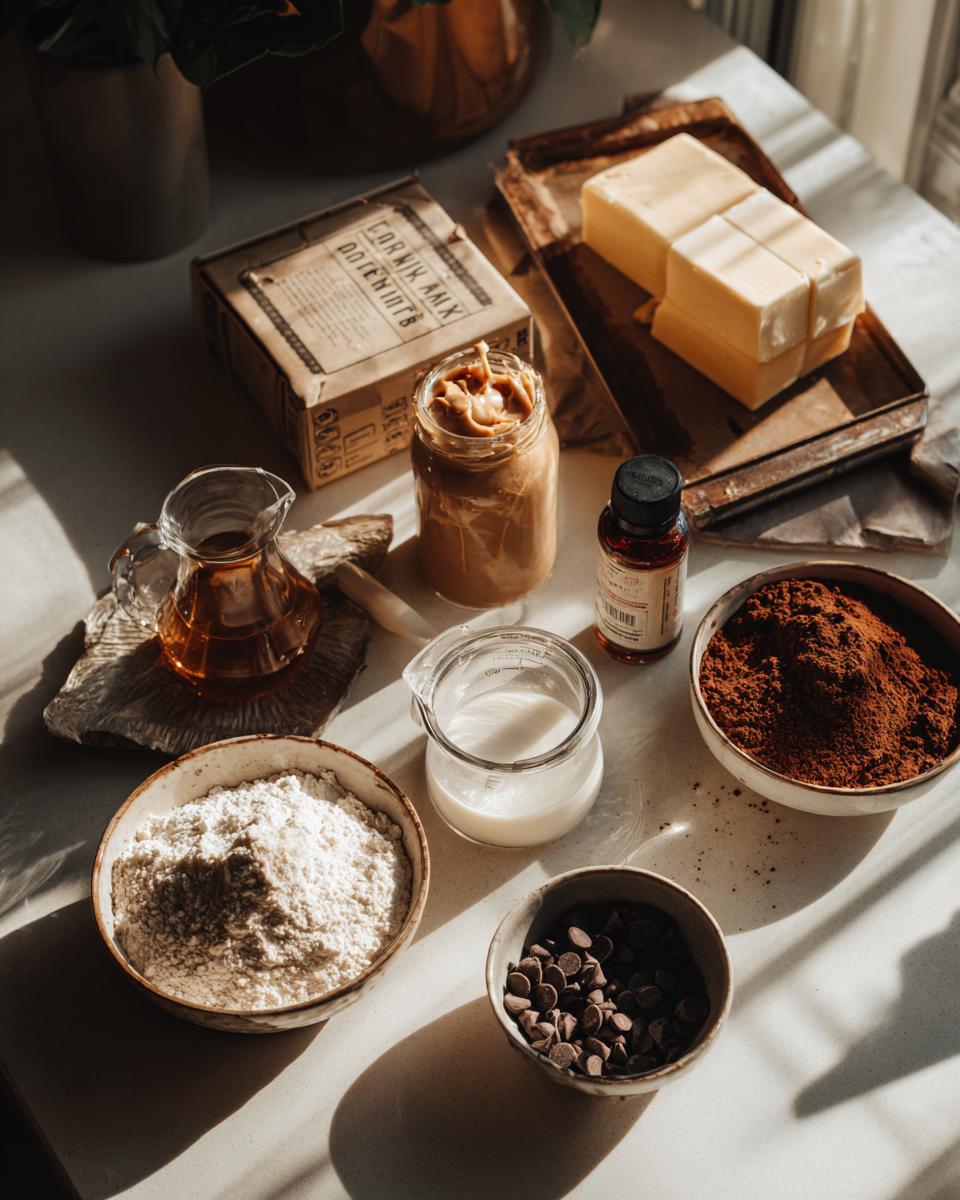
Gathering Ingredients for Your Buckeye Brownies
Okay, laying out your ingredients is crucial! When you’re making something this rich, like our buckeye brownies, knowing exactly what you need and making sure they’re prepped correctly saves so much stress later. I’ve learned that being precise upfront means you don’t end up with a runny layer or a separated topping. This list is exactly what I use for the ultimate layered chocolate peanut butter dessert.
For the Fudgy Brownie Base
Since we are keeping this easy, we lean on a good box of fudgy brownie mix. You need that entire box, which generally calls for the specific amount of eggs, oil, or water listed right on the packaging. But here’s my little trick for a richer bottom layer: I always swap out the water the box calls for and use whole milk instead. It just fattens up that chocolate base so beautifully!
- 1 box (18.3 oz) fudge brownie mix (plus whatever ingredients the box tells you to add)
For the Creamy Peanut Butter Layer
This filling is what screams ‘Buckeye candy!’ I use unsalted butter because I control the saltiness with the peanut butter, but whatever you have works. Make sure your butter is truly softened, almost room temperature—not melty! Also, please, please sift that powdered sugar. Nobody wants sugar clumps hiding in their smooth peanut butter fudge brownies.
- 1 cup (2 sticks) unsalted butter, softened
- 1 cup creamy peanut butter (this is non-negotiable—no natural separation kind here!)
- 4 cups powdered sugar, sifted
- 1 teaspoon vanilla extract
- 1/4 cup milk (you might use all of it, or maybe just three-quarters—we’ll tweak that later!)
For the Chocolate Ganache Brownies Topping
We are going for that gorgeous, high-gloss finish on top, which is why we add a little something extra to the chocolate chips. The shortening or coconut oil helps the chocolate stay smooth and spreadable while it’s hot, and it gives you that perfect snap once it chills. Don’t skip it!
- 1 1/2 cups semi-sweet chocolate chips
- 2 tablespoons shortening or coconut oil
Step-by-Step Instructions for Layered Buckeye Brownies
Now for the fun part! Putting these amazing buckeye brownies together is all about patience between the layers. We need each part to set up correctly so that when you slice them, you get those beautiful, distinct layers of chocolate and peanut butter. Trust me when I say the cooling time is just as important as the baking time!
Preparing the Brownie Base
First up is getting that chocolate base ready. Prepare your favorite fudgy brownie mix according to the box directions, but remember my little secret? Instead of using water, swap it out for whole milk if the box calls for it. It just makes those peanut butter chocolate squares taste a little more homemade and rich. Pour that batter into your greased 9×13 inch pan.
Bake it following the package time, but once they come out, you absolutely have to let them cool completely! I mean it—cool, cool, cool. Putting a thick layer of peanut butter on warm brownies means you’ll end up with a sloppy, mingled mess rather than gorgeous, separate layers.
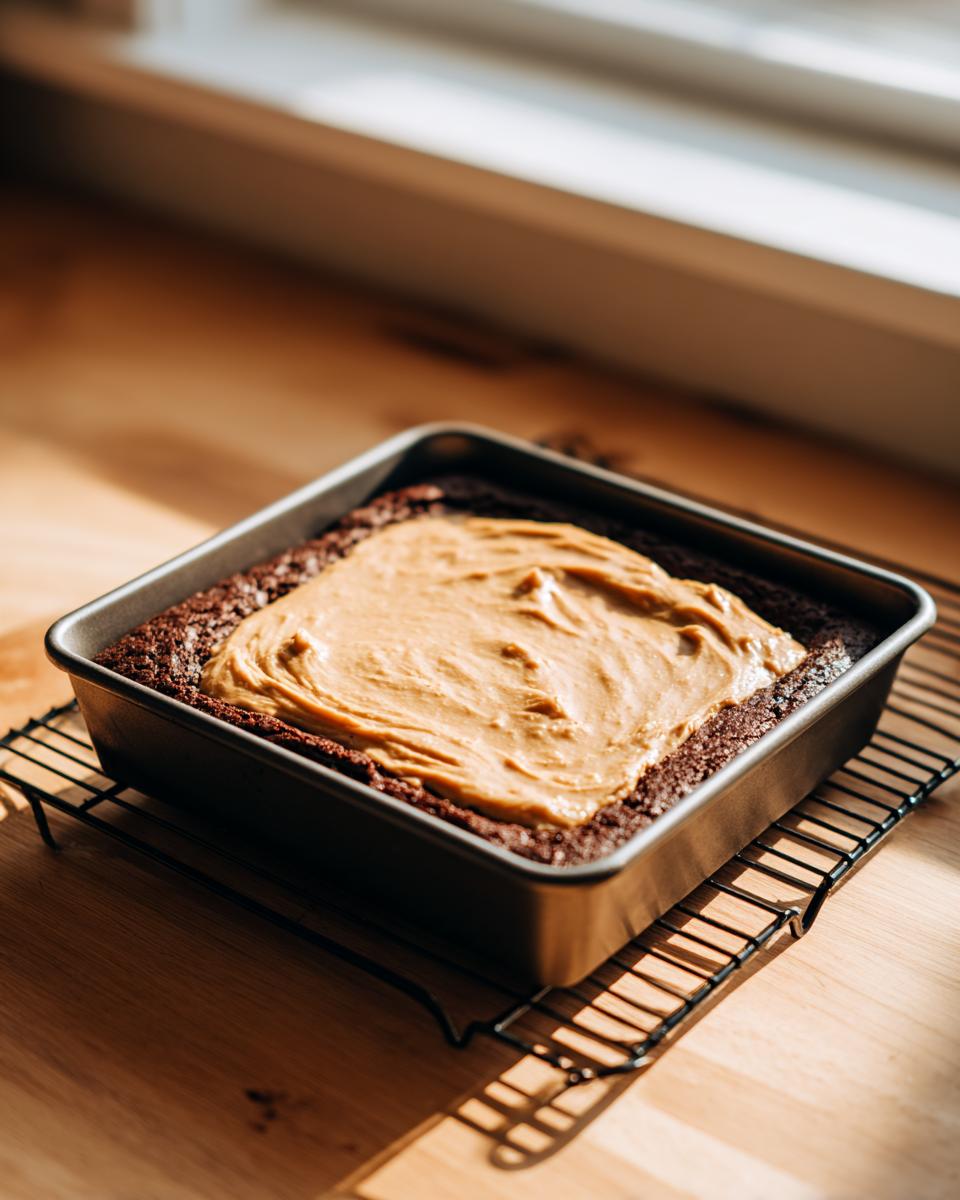
Creating the Peanut Butter Fudge Brownies Filling
While those guys are cooling down (go chill, everyone!), we whip up the filling. In a big bowl, beat your softened butter and creamy peanut butter together until they sing—nice and smooth. Then, start adding that sifted powdered sugar and vanilla, mixing slowly at first so you don’t create a sugar cloud in your kitchen! Remember, you want this filling smooth and spreadable, like a super thick frosting. If it seems too stiff, add that milk one tablespoon at a time until you reach the right consistency. Gently spread this mixture evenly over those completely cooled brownies.
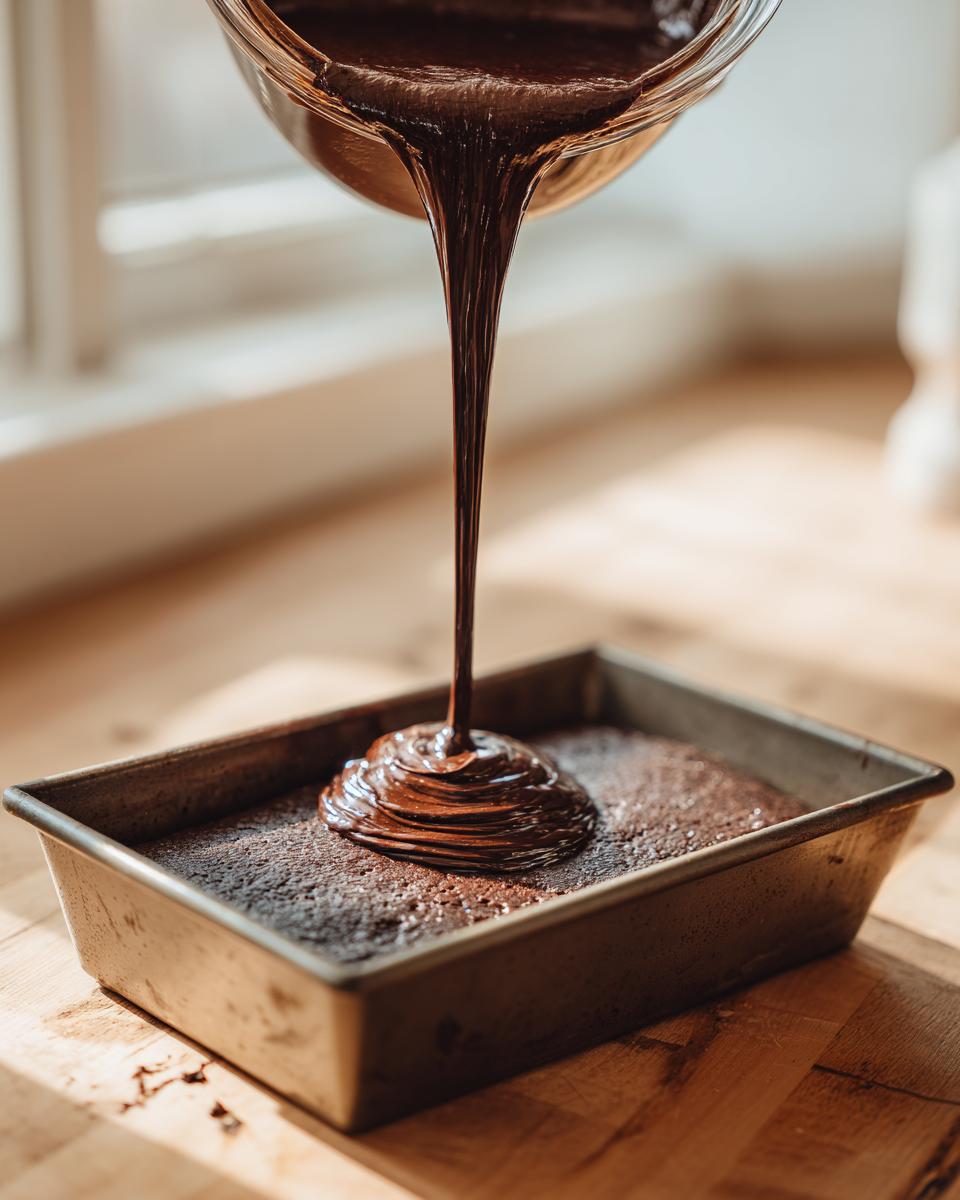
Applying the Chocolate Ganache Brownies Topping
Time for the glossy cap! For the chocolate topping, combine your chocolate chips and shortening in a microwave-safe dish. Microwave this in short, 30-second bursts, stirring really well after every single zap. That way, you avoid burning the chocolate. Once it’s smooth as silk, pour it over that peanut butter layer. Tilt your pan gently—don’t stir!—to get that beautiful, even coating. Now, here’s the hard part: you need to chill these in the refrigerator for at least two hours. This firms everything up perfectly before you cut into these decadent desserts.
Don’t forget you can find more fantastic treats when you check out my easy dessert recipes!
Tips for Perfect Buckeye Brownies Every Time
I want your buckeye brownies to be legendary, not just good! Because we’re dealing with three distinct layers here, sometimes things can get a little temperamental—maybe the filling goes soft, or the chocolate cracks when you slice it. Don’t panic! I’ve worked through these hiccups in my own kitchen thousands of times, and I’ve got the tricks ready for you to get that bakery-style perfection without the headache. Follow these little pointers, and you’ll have the richest chocolate peanut butter dessert imaginable.
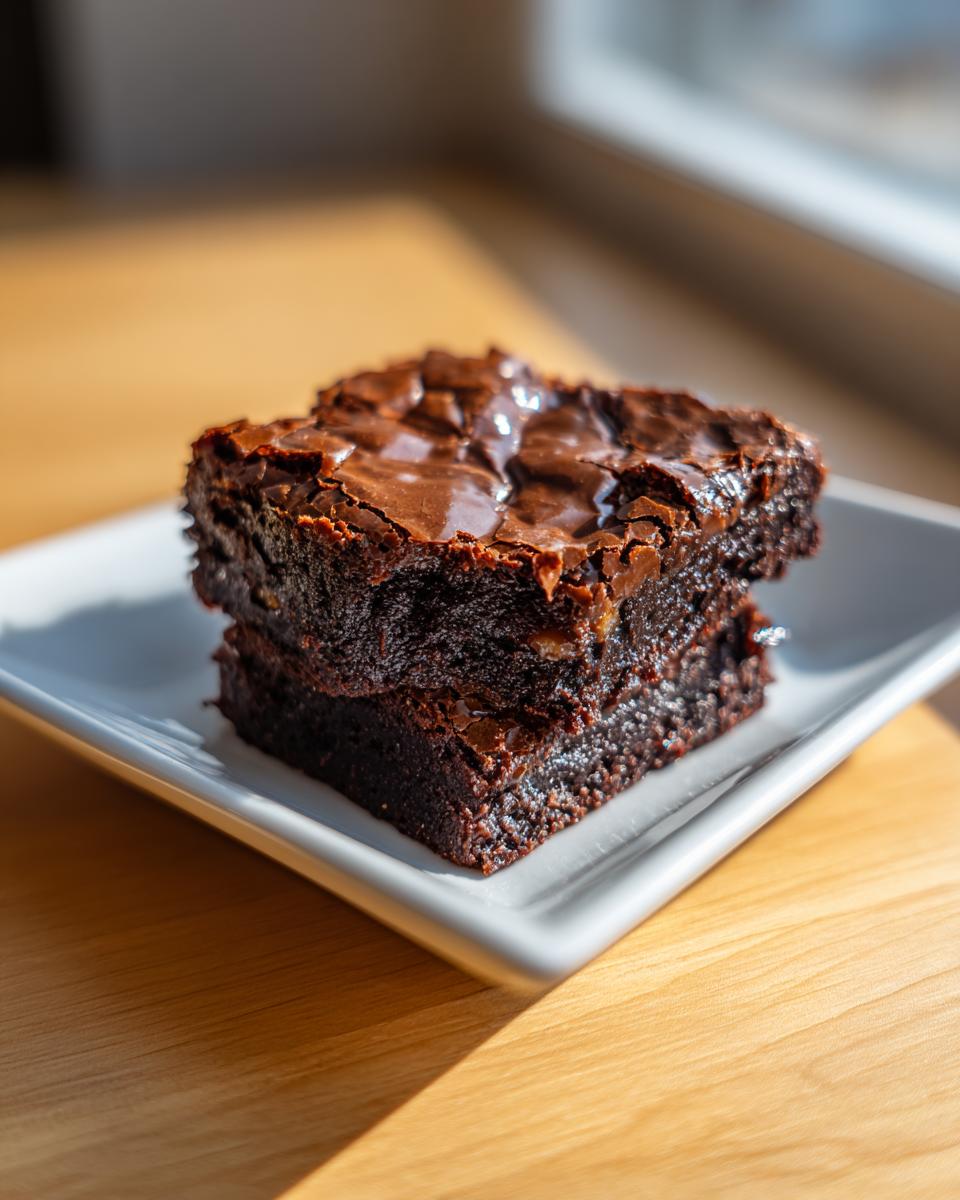
Achieving the Fudgiest Brownie Base
Remember how I mentioned swapping the water for milk when we prepped the box mix? That’s Step One for fudgy success. For Step Two, if you really want that super dense, chewy bottom layer—the kind that almost resists the fork—you need to slightly under-bake them. I mean just barely. If the box says bake for 30 minutes, pull them out at 27 or 28 minutes. When you shake the pan, the center shouldn’t jiggle much at all, and the toothpick test should come out with moist, clinging crumbs, not completely clean. They firm up a ton more once they cool down and absorb the moisture from the peanut butter layer above.
Controlling Peanut Butter Layer Consistency
This is where beginners sometimes go wrong! The peanut butter middle layer needs to be firm enough to handle the melted chocolate topping, but soft enough to still feel luscious when you bite through it. If your mix seems way too stiff while you’re beating it, add that milk one *teaspoon* at a time until it smooths out to a thick, spreadable frosting texture. Conversely, if you added too much milk and it’s looking a bit runny—don’t fret! Just slowly beat in an extra half cup of sifted powdered sugar until it stiffens back up. A stiffer layer means less chance of the chocolate topping cracking when you try to cut those beautiful squares. If you want more info on making killer peanut butter fillings, I saw a great article over at Meilan’s Recipes that walks through managing texture!
Ingredient Notes and Variations for Peanut Butter Brownies
I totally get it—sometimes you need to switch things up based on allergies or what you have on hand, or maybe you just want to try making these peanut butter brownies a little differently next time. Since I always test things exhaustively in my own kitchen, I can tell you exactly how to swap things without ruining that perfect layered structure. We want everyone to be able to enjoy this decadent chocolate peanut butter dessert!
Gluten-Free and Dairy Substitutions
If you need to take the gluten out of the equation, you’re in luck because this recipe is so forgiving! The structure really comes from the butter, eggs, and the solid peanut butter layer, not the flour in the brownie mix. Just grab your favorite gluten-free brownie mix. I actually have a great recipe for sweet potato brownies if you ever venture away from the box, but for this, stick to a GF box mix and follow its liquid instructions as written. For the dairy side, you can usually get away with non-dairy milk in the brownie base, but you *must* use a high-quality, firm vegan butter substitute for the peanut butter layer, or it might turn out too soft.
Nut-Free Alternatives
Since these are inspired by Buckeye candy, the peanut butter is the star, but if you have a serious nut allergy in your household, we have to rethink that middle layer. You can substitute the peanut butter with sunflower seed butter, which has a similar texture and creaminess when mixed with the sugar. It gives a slightly different, toastier flavor, but it holds up perfectly well to making those nice, thick peanut butter fudge brownies. If you’re looking for more ideas on how to handle allergies in decadent treats, check out the variations that my friends at Cooking Virtuoso!
I also saw some great notes about using sunflower seed butter to keep things nut-free on Cooking Virtuoso’s post, so feel free to peek there if you need more ideas!
Serving Suggestions for Your Chocolate Peanut Butter Dessert
Whew! You’ve made it through the baking and the chilling—now you get to the best part: showing off those beautiful buckeye brownies! Because these are so rich and dense, part of the Seventh Flavour experience is making sure the presentation lives up to the incredible taste hiding inside. They are definitely one of my go-to crowd pleasing desserts because they look so professional sitting out on a platter.
Presentation Ideas for Buckeye Brownies
First things first: cutting! You need a really sharp, thin knife, and I mean *sharp*. Wipe the knife clean and briefly dip it in hot water between every single cut. This keeps that glossy chocolate topping from dragging or cracking as you slice through the thick peanut butter layer below. It makes a world of difference in how clean your squares look on the plate!
If you want to really dress them up, try a tiny sprinkle of flaky sea salt right after you pour the chocolate topping, but before it sets. That little bit of sparkle and saltiness cuts through the intense sweetness beautifully. Another thing I do for parties is serve them slightly smaller than usual—maybe 30 squares instead of 24—since they are so rich. Nobody leaves complaining they didn’t get enough!
Pairing with Beverages
These layered brownies are heavy hitters in the flavor department, so you need drinks that can balance that richness. You definitely don’t want something overly sweet next to them. My number one suggestion, always, is a strong, hot cup of black coffee. The bitterness of the coffee is the perfect foil for all that chocolate and sugar.
For a non-caffeinated option, a big, cold glass of whole milk is unbeatable—it’s like taking me right back to childhood! If you’re serving these for a summer gathering, a sparkling water with fresh lemon or lime is fantastic because the bubbles and acid cleanse your palate between bites. If you’re looking for a dessert dip to serve alongside, perhaps something light like my easy fruit dip recipe could be a nice, non-competing side option.
Storage and Reheating Instructions for the Ultimate Brownie Dessert
So, you’ve made these amazing buckeye brownies and everyone has had one (or maybe two, I won’t judge!). Now, you have leftovers, which is a wonderful problem to have! Since we’ve got that thick, creamy peanut butter layer in the middle, you can’t just leave these sitting out on the counter like a standard frosted cookie bar. Think of that peanut butter filling like a delicate fudge; it needs a little chill time to keep its shape and stay perfectly sliceable.
I always store mine in an airtight container right in the refrigerator. I’ve found that keeps them freshest, usually for about five to seven days. They stay perfectly good—the brownie base stays moist, and the chocolate top doesn’t get that strange, chalky look that sometimes happens when chocolate sits too long. If the topping seems to have gotten *too* firm after a couple of days in the cold, letting the bars sit on the counter for about 15 to 20 minutes before serving them lets them warm up just enough to soften that chocolate layer again.
Can you freeze them? Yes, you absolutely can! They freeze surprisingly well, which is great for making these decadent treats ahead of time for big holiday gatherings. Wrap individual squares tightly in plastic wrap first, and then place them all into a good, freezer-safe bag or container. They should be perfect for up to three months. When it’s time to eat them, just move them straight from the freezer into the fridge to thaw overnight. Don’t try to rush the thawing process at room temperature, or the chocolate can start to sweat and look weird. If you love knowing how to keep your baked goods pristine, you might like the tips on keeping treats fresh that my friends at Cleverly Simple share!
Frequently Asked Questions About Buckeye Brownies
It’s natural to have questions when you’re tackling a layered masterpiece like this! I always find that once you know the small secrets for each layer, making these buckeye brownies becomes second nature. Here are the things I get asked most often about achieving the perfect chocolate peanut butter dessert.
Can I make these Buckeye Brownies without using a box mix?
Oh, absolutely! If you prefer going the full scratch route, you definitely can use your favorite homemade brownie recipe for the base. The biggest thing I tell people when they switch from the box to scratch is to pay close attention to the liquid ratios. Box mixes are formulated to be very forgiving. If your scratch recipe calls for, say, one cup of water, try cutting that down to three-quarters of a cup or so. That extra reduction in liquid is what helps guarantee you get that dense, fudgy texture on the bottom that stands up to the top two layers!
How do I get the chocolate topping smooth and glossy?
This is all about temperature control and using that “secret weapon” I wrote about: the shortening or coconut oil. When you melt down your chocolate chips, don’t be tempted to blast them in the microwave for a full minute! That high heat cooks the fats and makes the chocolate seize up or look dull later. I stick to 30-second intervals, stirring thoroughly until it looks like 90% melted, and then I just stir until the residual heat melts the last few lumps. That little bit of shortening we added keeps the fats moving smoothly, leading to a super glossy, beautiful finish when it sets up firm.
What is the best way to store these Peanut Butter Fudge Brownies?
Because of that rich, creamy filling, these are definitely not a room-temperature bar, especially if you live somewhere warm! To keep them tasting absolutely incredible and holding their shape, you must store these Peanut Butter Fudge Brownies in an airtight container in the refrigerator. I find they are best served slightly chilled. If you leave them out for too long before serving, the peanut butter layer can get a little too soft, and you’ll lose that satisfying clean slice. Keep them tightly covered in the fridge for up to a week!
Share Your Experience Making These Crowd Pleasing Desserts
Honestly, seeing your creations is the best reward for all the testing I do in my kitchen! I truly hope these buckeye brownies bring a little moment of joy to your table, whether it’s just for you after a long day or for a huge gathering. Food tastes better when it’s shared, right?
I would absolutely love to hear how they turned out for you! Did the peanut butter layer set just how you like it? Did the family gobble them down immediately? Please take a moment to leave a rating down below using the stars so future bakers know what to expect. And if you took a picture of your beautiful, glossy, layered bars, tag me on social media! It makes my day to see my recipes living happily in your homes.
And hey, if you ran into a small hiccup or have a substitution that you think worked like a charm, share that insight too! That community knowledge helps us all get better. If you ever need to reach out directly with a burning question or just want to chat about baking, my contact page is always open and waiting for you at my contact page. Happy baking, friends!
PrintDecadent Buckeye Brownies with Peanut Butter Fudge Layer
Make rich, fudgy Buckeye Brownies featuring a creamy peanut butter center and a glossy chocolate ganache topping. This layered dessert combines the classic candy flavors into an easy-to-make bar.
- Prep Time: 20 min
- Cook Time: 30 min
- Total Time: 170 min
- Yield: 24 servings 1x
- Category: Dessert
- Method: Baking
- Cuisine: American
- Diet: Vegetarian
Ingredients
- 1 box (18.3 oz) fudge brownie mix (plus ingredients listed on box for brownies)
- 1 cup (2 sticks) unsalted butter, softened
- 1 cup creamy peanut butter
- 4 cups powdered sugar, sifted
- 1 teaspoon vanilla extract
- 1/4 cup milk
- 1 1/2 cups semi-sweet chocolate chips
- 2 tablespoons shortening or coconut oil
Instructions
- Prepare the brownie base according to the box directions, substituting water with milk if you want a richer texture. Pour the batter into a greased 9×13 inch baking pan.
- Bake the brownies according to the package directions for a 9×13 pan. Let the brownies cool completely in the pan on a wire rack.
- To make the peanut butter layer, beat the softened butter and peanut butter together in a large bowl until smooth.
- Gradually add the sifted powdered sugar and vanilla extract, mixing on low speed until combined. Add the milk one tablespoon at a time until the mixture is smooth and spreadable, like a thick frosting.
- Spread the peanut butter mixture evenly over the cooled brownie layer.
- To make the chocolate topping, combine the chocolate chips and shortening in a microwave-safe bowl. Microwave in 30-second intervals, stirring well after each, until the chocolate is completely smooth.
- Pour the melted chocolate mixture over the peanut butter layer. Tilt the pan gently to spread the chocolate evenly, creating a smooth, glossy finish.
- Chill the brownies in the refrigerator for at least 2 hours, or until the chocolate topping is firm.
- Cut the chilled brownies into squares to serve. These are the ultimate peanut butter chocolate squares.
Notes
- For a fudgier brownie, reduce the liquid slightly from the box mix instructions.
- If you prefer a firmer peanut butter layer, use slightly less milk in the filling mixture.
- You can use a box brownie mix to make these easy brownie bars quickly.
- For a gluten free option, substitute the brownie mix with your favorite gluten free mix.
Nutrition
- Serving Size: 1 square
- Calories: 350
- Sugar: 35
- Sodium: 150
- Fat: 20
- Saturated Fat: 8
- Unsaturated Fat: 12
- Trans Fat: 0
- Carbohydrates: 42
- Fiber: 1
- Protein: 5
- Cholesterol: 25