
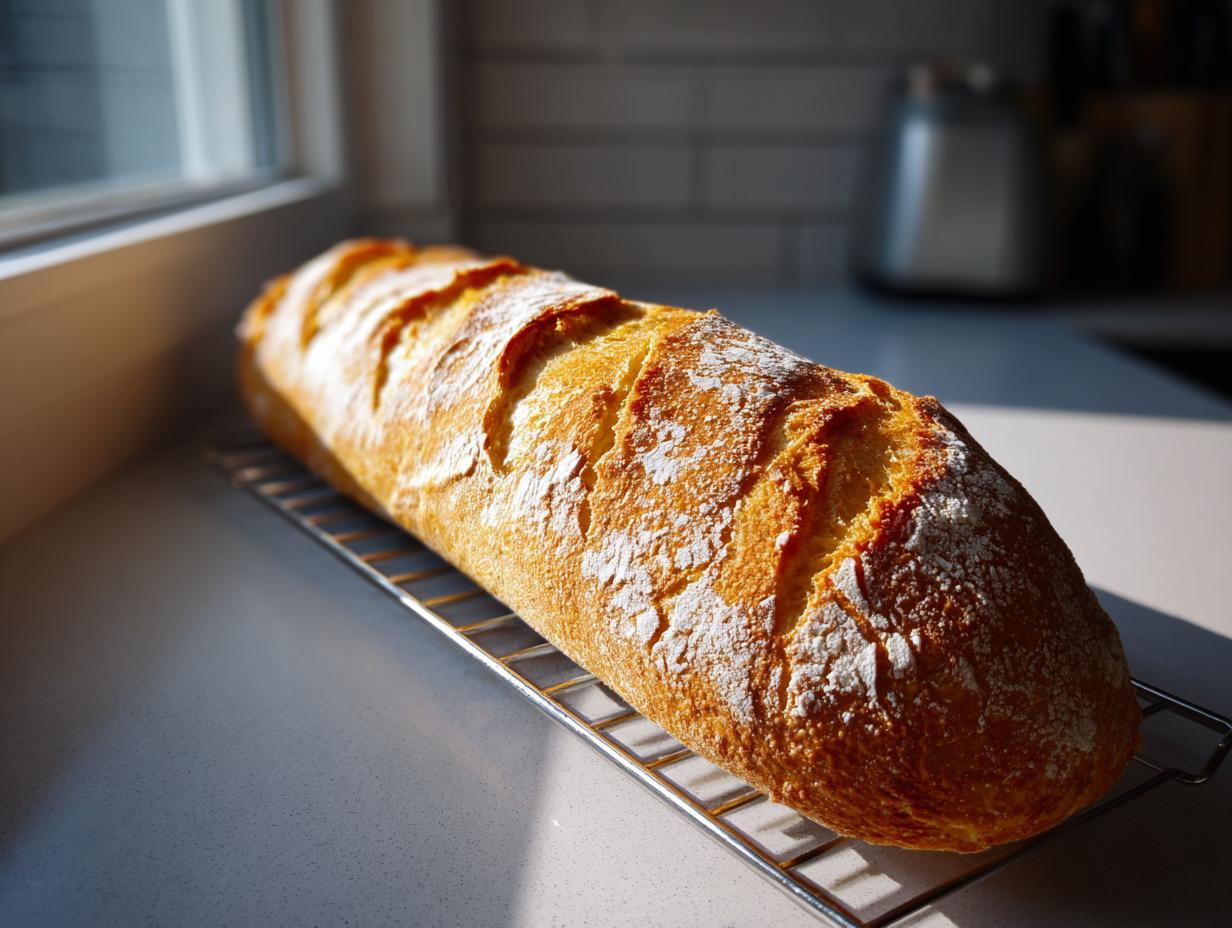
Oh, my goodness, is there anything better than the sound of a freshly baked loaf cooling? That little crackling noise when the crust sets? It just fills the whole house with this incredible, warm promise. I used to spend my days staring at spreadsheets in marketing—seriously!—but now, this sound is my reward, thanks to switching gears and following my true love for the kitchen. I’m Aria Sterling, and I’ve poured all those years of testing into creating this recipe for Classic Crusty Homemade French Bread (Baguette Style). Forget dry, store-bought loaves; we are going to nail that authentic, bakery style result right here at home. This straightforward french bread is the one that changed everything for me, and I think you’re going to love it too. You can read a little more about my journey from the corporate world to baking every day over on my About Page!
- Why This Classic Crusty Homemade French Bread Recipe Works
- Ingredients for Your Crusty Homemade French Bread
- The Step-by-Step Guide to Making French Bread
- Tips for Success with Your Artisan Bread Baking
- Variations on the Classic French Bread
- Storage and Reheating Instructions for Leftover French Bread
- Serving Suggestions for Your No-Fuss French Loaf
- Frequently Asked Questions About Homemade French Bread Recipe
- Nutritional Information Estimate for This French Bread
- Share Your Experience Baking This French Bread
Why This Classic Crusty Homemade French Bread Recipe Works
I know, I know. People think making real French bread means spending all day waiting around for dough. But trust me, this recipe is designed for real life while still delivering that magic!
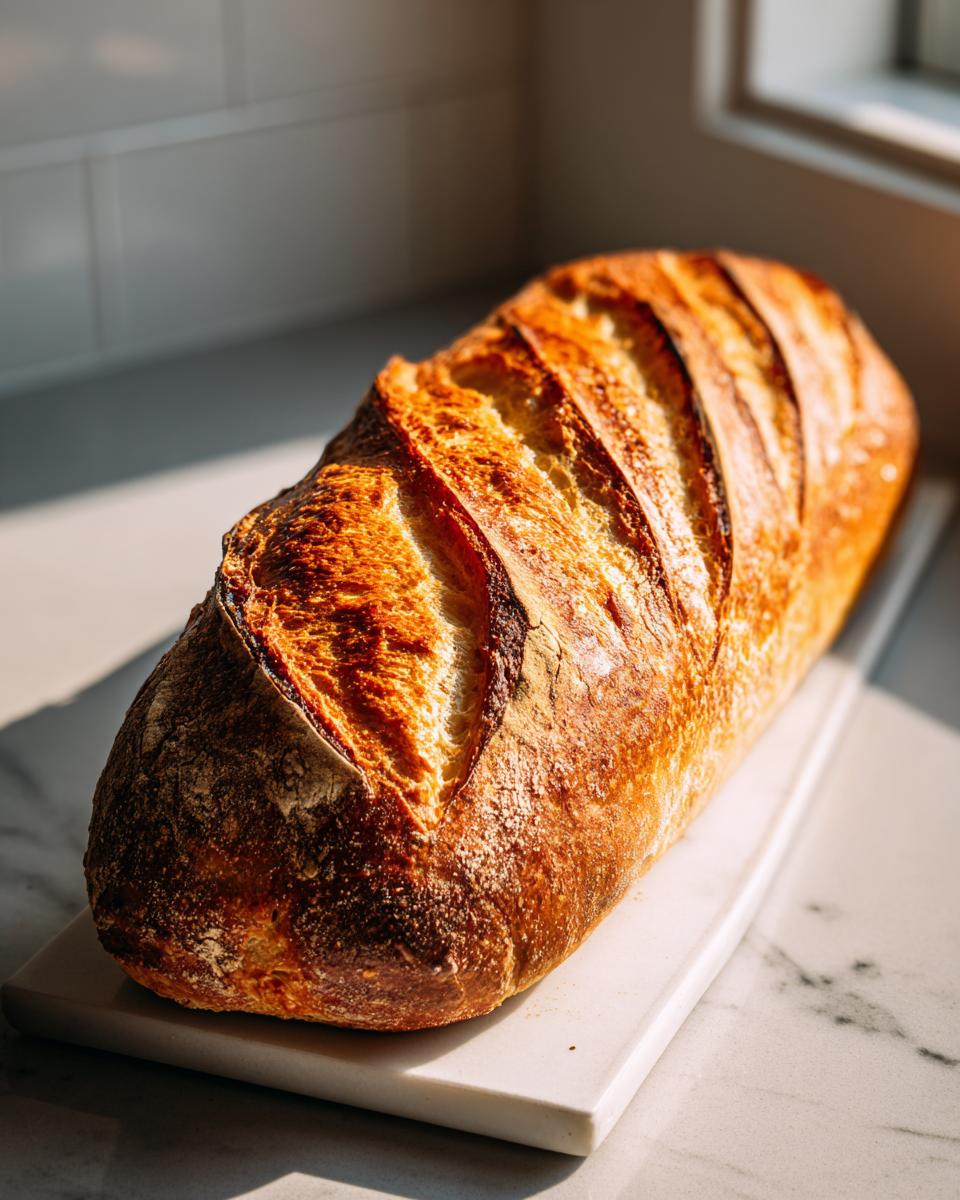
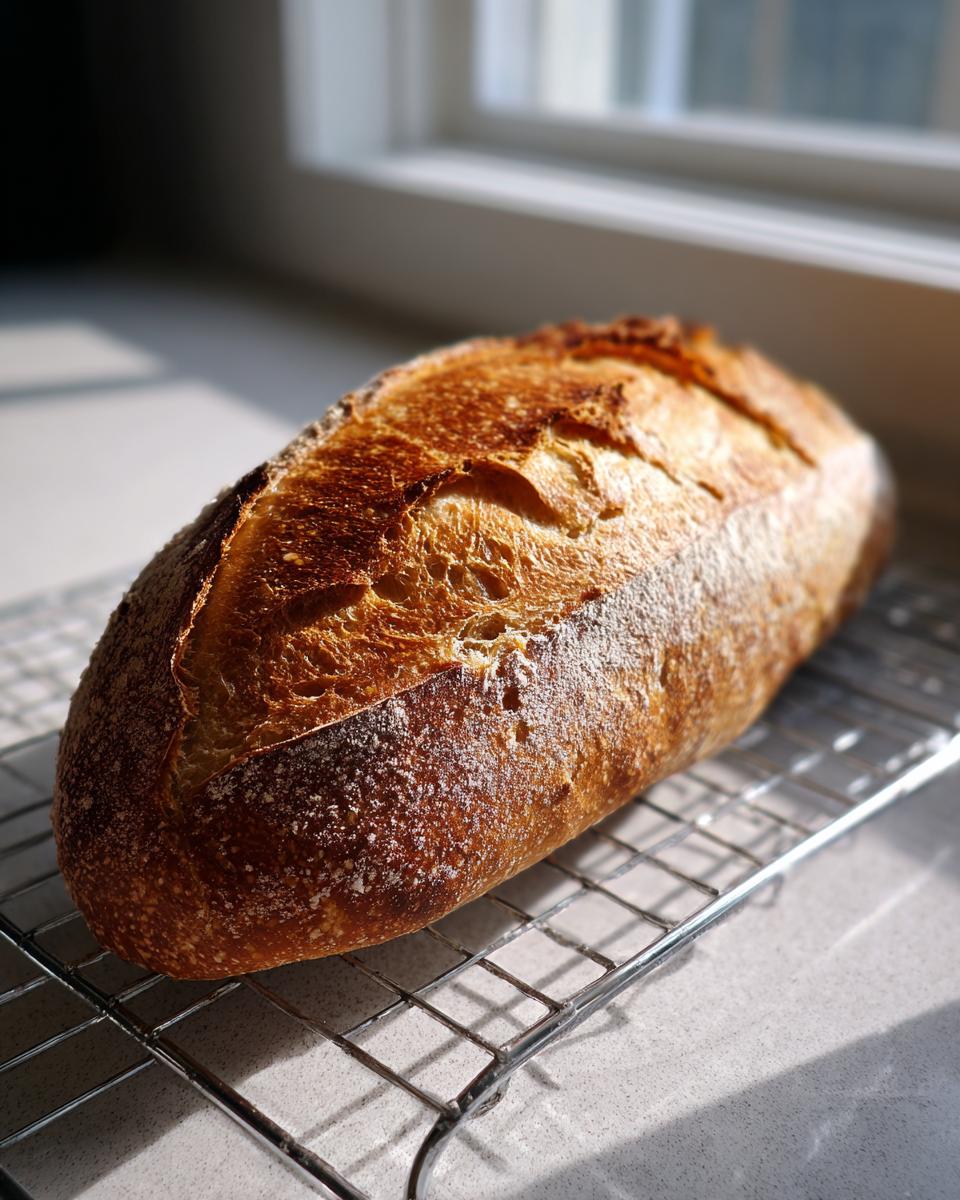
- The crust—oh, that crust! It’s crackly, shatteringly crisp, and just screams ‘bakery.’
- The interior crumb is airy, soft, and full of those beautiful, irregular holes you see in artisan loaves.
- It uses just four basic ingredients, making it the perfect easy French bread for beginners.
Achieving Bakery Style Bread at Home
The secret weapon here is steam, plain and simple. When the hot baking sheet meets the hot water in the oven, the steam keeps the surface of the dough moist for the first critical minutes. This lets the loaf expand fully—that’s the oven spring!—before the crust sets hard. That’s how you get the best homemade French bread recipe results!
Quick French Bread Recipe Under 2 Hours Option
If you’re truly pressed for time, don’t panic! While the traditional timeline is closer to two hours, I included a note below on how to get a decent loaf baked in closer to 90 minutes. It skips a little of the slow flavor development, but for a weeknight dinner, this quick French bread recipe under 2 hours is a lifesaver.
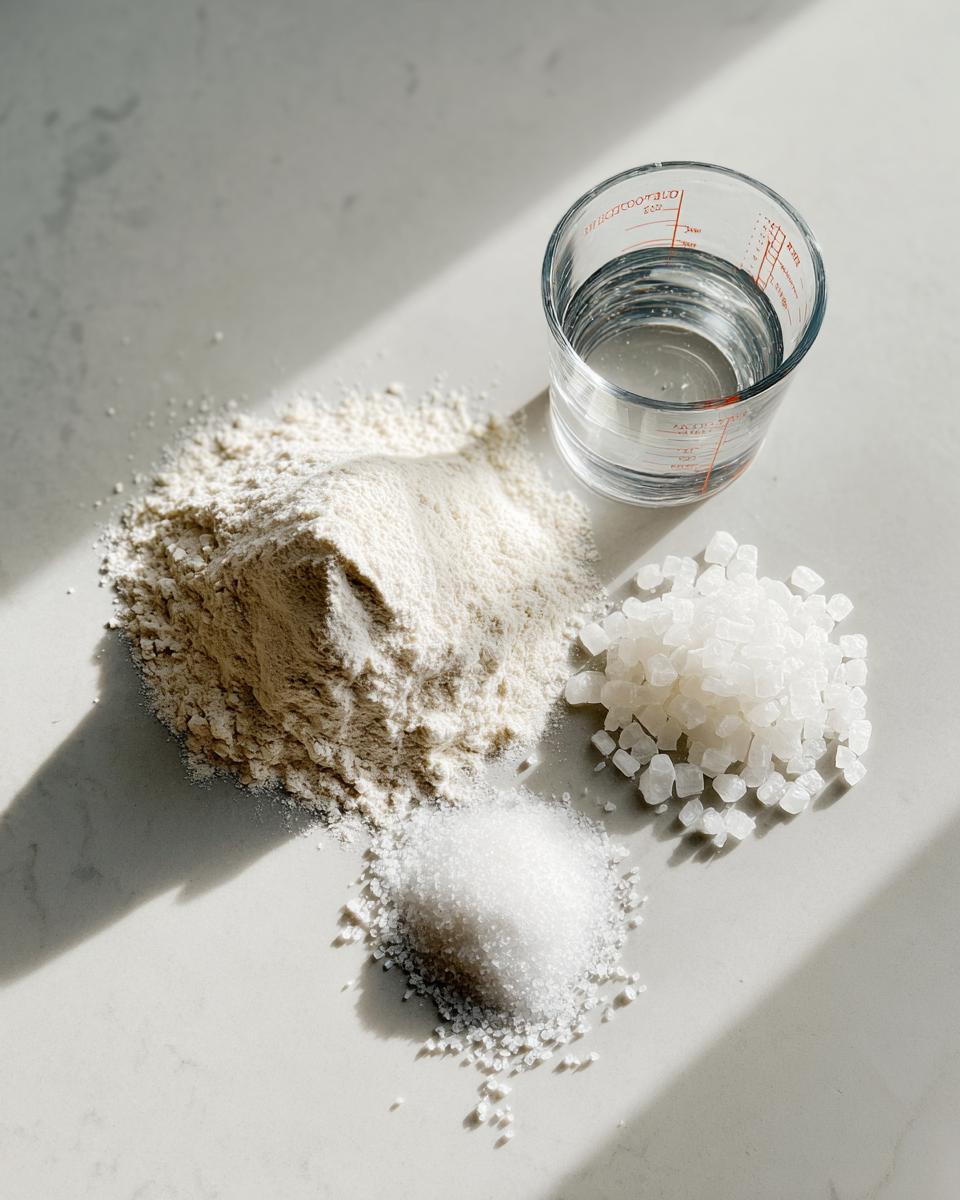
Ingredients for Your Crusty Homemade French Bread
Honestly, looking at this list makes me so happy because it proves you don’t need a mile-long shopping list to create magic. We’re sticking to the basics here—just four core ingredients! This simplicity is why this recipe flies off my counter so fast.
- 3 cups all-purpose flour
- 1 teaspoon instant yeast
- 1 1/2 teaspoons salt
- 1 1/4 cups warm water (about 105-115°F)
I specifically call for instant yeast because it means you don’t have to fiddle around blooming it first. It mixes right in and gets the party started!
Ingredient Notes and Substitutions
The water temperature is pretty important, friends! If it’s too cold, the yeast will snooze, and if it’s boiling hot, well, you’ll kill them. Aim for that sweet spot right around 105 to 115°F. That temperature is perfect for waking up the yeast so it can do its job. While all-purpose flour works beautifully for a classic French loaf, if you want an extra chewy crumb that really stands up to slathering with butter, go ahead and sub in bread flour. It just adds a little extra backbone to your french bread.
The Step-by-Step Guide to Making French Bread
Alright, time to roll up our sleeves! This process is so simple that it honestly feels like cheating. You don’t need to be a professional baker to follow along; think of this as your ultimate easy French bread for beginners walkthrough. Just follow my lead for that perfect loaf! If you ever have questions about the technique or want to chat about baking (or anything else, really!), feel free to reach out to me over at my contact page!
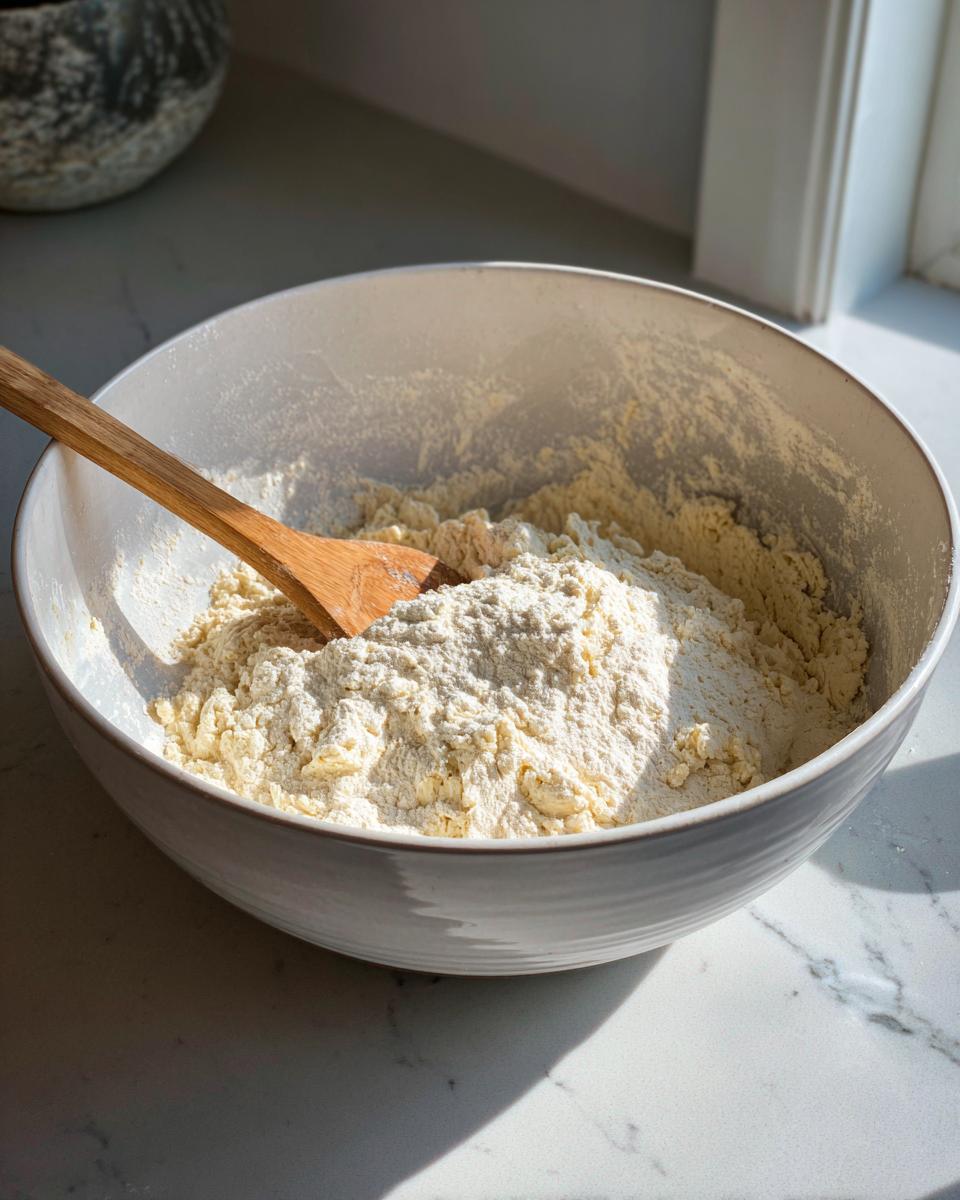
Mixing and First Rest for Perfect French Bread Dough
First things first, grab a big bowl and toss in your dry stuff: flour, yeast, and salt. Give it a quick whisk so they are acquainted. Next, pour in the warm water. Now, you’re just going to mix this with a wooden spoon until it looks like a shaggy mess—that’s what we want! Don’t try to knead it or make it smooth; honestly, do not overmix. We cover that bowl up and let it chill out on the counter for 30 minutes. That little rest period is where the magic starts building flavor, even in this quick loaf.
Shaping the Loaf and Final Rise
After the first rest, flour your counter lightly and turn that dough out. Gently flatten it into a rough rectangle. Then, you’re going to fold it like you’re folding a business letter—in thirds. That action creates the surface tension we desperately need for that glorious oven spring! After folding, gently roll and tuck the dough until you have a tight log shape. Place that loaf seam-side down on parchment paper dusted with cornmeal. Cover it loosely and find a nice warm spot in your kitchen—no drafts! Let it rise until it’s almost doubled, which takes about 45 to 60 minutes. If you’re in a rush, remember we have a shortcut noted below!
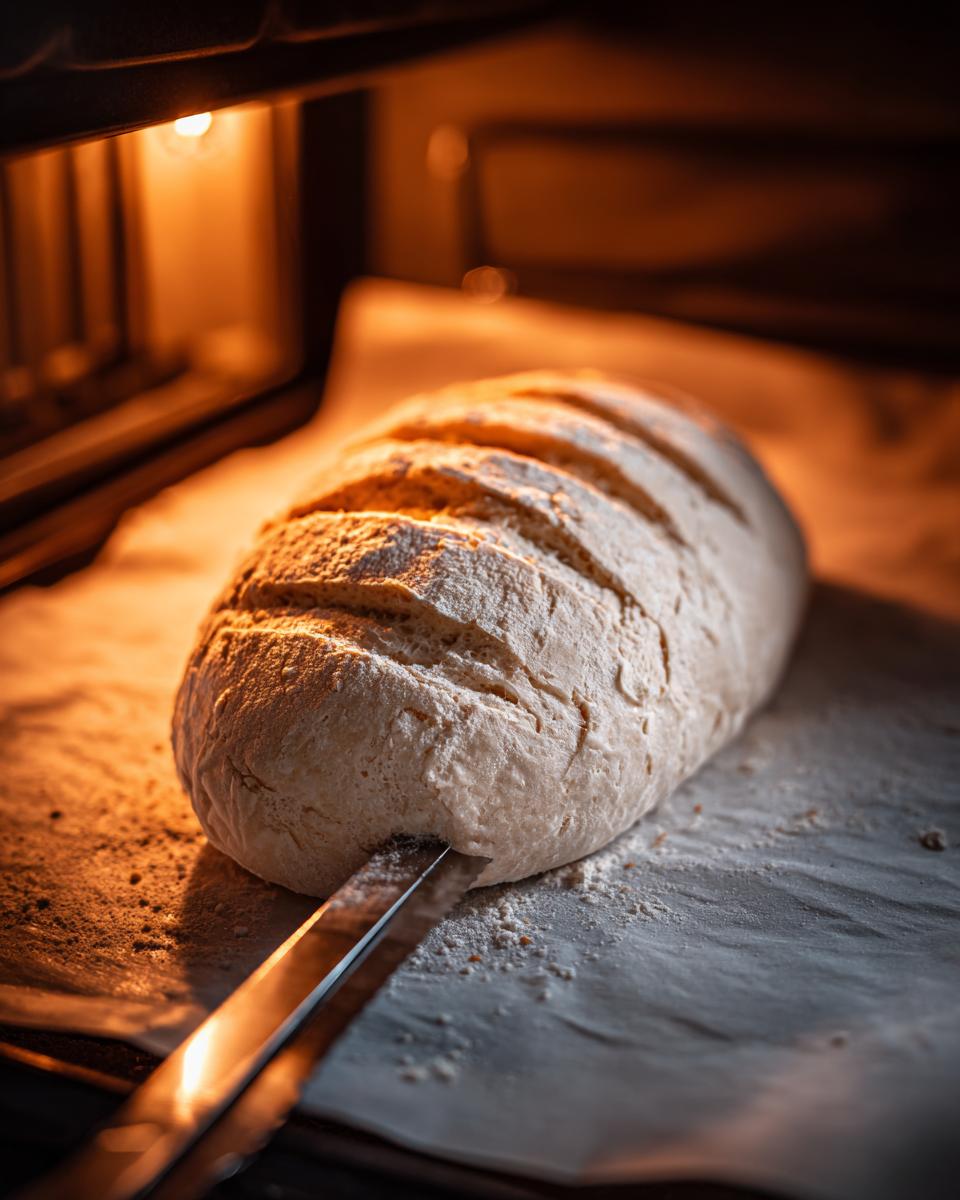
Creating Steam for a Crispy Crust Tutorial
About 20 minutes before the rise is up, crank your oven to 450°F with your baking stone or inverted sheet pan already inside. You also need a shallow metal pan on the bottom rack, mine is just an old cookie sheet. Once it’s scorching hot, use a sharp knife or razor blade to make three or four diagonal slashes across the top of the dough—this helps it bake evenly. Carefully slide the loaf onto the hot surface. Now for the showstopper: pour 1 cup of very hot water into that bottom pan to create instant steam. Bake it this way for 20 minutes! After that, take out the water pan, lower the heat to 425°F, and bake for another 10 to 15 minutes until it’s deep, dark gold. You can see a few other great tips for achieving that perfect crunch over at this site.
Tips for Success with Your Artisan Bread Baking
Okay, friends, we’ve mixed, we’ve shaped, and we’ve steamed—now let’s talk about those little details that take your loaf from good to completely amazing. Achieving true artisan bread baking quality at home is all about confidence and knowing the ‘why’ behind the steps. Trust me, once you nail the temperature control and handling, you’ll be shocked at how professional your french bread looks!
Scoring Your Homemade French Bread Loaf
That beautiful pattern you see on baguettes isn’t just for looks, though it certainly is pretty! When you score the dough—those quick, shallow slashes right before it goes into the oven—you are telling the loaf exactly where it is allowed to expand during that final burst in the heat. If you skip this, the bread will just burst open randomly wherever it’s weakest, which is never pretty. Keep your blade sharp, and try to make those diagonal cuts just about a half-inch deep. You want them shallow but deliberate!
Also, here’s a quick pro tip from my own frantic early baking days: If you want that extra shatter on your crust, right after you put the loaf in (and pour in that steaming water), quickly spray the *inside walls* of the oven one more time with plain water. Just be careful pulling your hand out fast! For more detailed notes on achieving that perfect crunch, take a look at this guide on baguette making guide.
Variations on the Classic French Bread
While this crusty baguette style is my absolute go-to for a classic experience, sometimes you just want to mix things up a little, right? This humble little dough is super forgiving, which is why it’s such a great foundation for all sorts of fun flavors.
If you are looking for a softer result—maybe for easy sandwiches or dipping—you can definitely adapt this french bread! Just skip that whole water-in-the-bottom-pan steam step entirely and reduce the final bake time by about 5 minutes. That simple change keeps the crust from getting too hard.
For flavor boosts, try stirring in things like dried rosemary or Italian seasoning during the last minute of mixing. Or, when you shape the log before the final rise, sprinkle a little grated Parmesan cheese right down the middle of the dough before you roll it up! You’ll find a great recipe for a softer version over at Bex’s Kitchen if you prefer that texture!
Storage and Reheating Instructions for Leftover French Bread
We both know that the absolute best part of this homemade French bread recipe is eating it straight out of the oven. But if you somehow manage to have leftovers—which I highly doubt once your family smells this baking—we need to make sure we protect that crust!
First rule: Do not, under any circumstances, put your beautiful loaf in the refrigerator. Seriously, don’t do it! Refrigeration is the enemy of a good crust; it just sucks the moisture out and turns that crisp shell sad and leathery overnight. If you have any leftovers, the key is air circulation. Pop it in a paper bag, not plastic, and leave it on the counter. It will last maybe a day before getting a little stale, but that’s fine because we have a fix.
To bring that fantastic texture back, you’ve got to reheat it. If you want to revive that crackly exterior, wrap the loaf tightly in aluminum foil—this traps the moisture inside while reheating—and place it in a 350°F oven for about 8 to 10 minutes. Then, unwrap it and pop it back into the hot oven (maybe 425°F) for just 3 more minutes to crisp up the outside again. It comes out tasting freshly baked! If you wanted it soft anyway, like for croutons or French toast, just skip the foil and bake it uncovered until warmed through.
Serving Suggestions for Your No-Fuss French Loaf
Now that you’ve conquered the artisan bread baking world, what are you going to do with this perfect piece of french bread? It’s too good just to sit there, honestly!
For true classic French baking vibes, you absolutely must have this alongside a big, hearty bowl of French Onion Soup or paired with a simple cheese board. Day-old bread gets its second life as the best base for bruschetta—just rub it with garlic and toast it up under the broiler. If you’re thinking about turning it into something even more decadent, you can use it as the base for incredible garlic bread; check out this amazing Garlic Parmesan Herb Bread for inspiration on what rich toppings work!
Frequently Asked Questions About Homemade French Bread Recipe
I get so many fabulous questions sent my way after people try this loaf, and honestly, those questions are just as important as the steps themselves! Getting that first loaf out of the oven perfectly takes a little practice, but understanding these common hurdles really helps.
Can I make this French Bread without a baking stone?
Absolutely, don’t stress if you don’t own a fancy baking stone! A stone just holds heat really well, but you can get nearly the same results for your bakery style bread at home by using an inverted heavy baking sheet. Just make sure that sheet pan is in the oven while it preheats to 450°F. We need that intense heat transfer right under the loaf to get the bottom crust started strong. It works really well for this no-fuss French loaf, I promise!
What is the best way to get an Authentic French Baguette Recipe texture?
That amazing texture really boils down to two things: shaping and steam. For the shaping, make sure you’re really tightening that outer skin when you turn it into a log—that’s what gives you good oven spring. For the texture, you simply cannot skip the steam step. That blast of hot water creates the perfect humid environment right when the bread hits the oven. That moisture keeps the crust from setting too early so the inside can fully puff up, which is key for an authentic French baguette recipe!
If your dough isn’t rising well, check your water temperature during mixing, or make sure your yeast isn’t expired. For a faster option next time, you might check out this easy 90 Minute French Bread guide, but for this classic recipe, patience with the rise is your friend!
Nutritional Information Estimate for This French Bread
Okay, let’s talk numbers for a second. I’m an enthusiastic home cook, not a dietitian, so please take these figures with a grain of salt—or maybe a slather of fresh butter! This information is just an estimate based on the ingredients in this Homemade French Bread Recipe, calculated per slice, considering the recipe yields one large loaf.
When I’m tracking things casually, I always look at the low-fat content, which is a huge win for a baked good like this! Because we use such simple ingredients with no added fats other than what’s naturally in the flour, it keeps things nicely in check. This is certainly better than grabbing a loaf off the shelf that’s loaded with extras!
- Serving Size: 1 slice
- Calories: 150
- Fat: 0.5g
- Saturated Fat: 0.1g
- Carbohydrates: 31g
- Fiber: 1g
- Protein: 4g
- Sodium: 350mg
- Sugar: 0.5g
The sodium level is primarily from the added salt, which is crucial for controlling the yeast and building flavor in your Classic French Baking creation. Enjoying a slice or two of this delicious bread with your dinner is a perfectly reasonable indulgence!
Share Your Experience Baking This French Bread
I’ve shared all my secrets for getting that perfect, crackling crust on your french bread, but now I want to hear from YOU! Baking is a journey, and what works perfectly here might need a little tweak in your kitchen, or maybe you discovered an amazing new trick—I love learning from you all.
Once you pull this beautiful loaf out of the oven, please come back and rate this Homemade French Bread Recipe using the star system below! Five stars means you nailed that bakery-style texture, right? And I absolutely encourage you to leave a comment. Did your dough rise quickly? What did you serve it with?
If you snap a picture of your glorious, golden-brown creation, tag me on social media! Seeing your homemade loaves reminds me why I left that boring marketing job in the first place. Your success is truly the Seventh Flavour I chase in every single recipe I share!
PrintClassic Crusty Homemade French Bread (Baguette Style)

Bake bakery-style French bread at home. This recipe yields a loaf with a crisp, crackly crust and a soft, airy interior using simple ingredients. It is perfect for beginners and results in an authentic French baguette taste.
- Prep Time: 15 min
- Cook Time: 35 min
- Total Time: 1 hour 50 min
- Yield: 1 large loaf 1x
- Category: Bread
- Method: Baking
- Cuisine: French
- Diet: Vegetarian
Ingredients
- 3 cups all-purpose flour
- 1 teaspoon instant yeast
- 1 1/2 teaspoons salt
- 1 1/4 cups warm water (about 105-115°F)
Instructions
- In a large bowl, mix the flour, instant yeast, and salt together.
- Add the warm water to the dry ingredients. Mix with a wooden spoon until a shaggy dough forms. Do not overmix.
- Cover the bowl with plastic wrap and let the dough rest at room temperature for 30 minutes.
- Lightly flour a work surface. Turn the dough out and gently shape it into a rough rectangle. Fold the dough into thirds, like a letter, and then gently shape it into a long, tight log (this creates surface tension for a good crust).
- Place the dough log seam-side down on a baking sheet lined with parchment paper or a baker’s couche dusted heavily with cornmeal or flour.
- Cover the loaf loosely with plastic wrap or a clean kitchen towel. Let it rise in a warm spot for 45 to 60 minutes, or until it has nearly doubled in size.
- About 20 minutes before baking, place a baking stone or an inverted heavy baking sheet on the middle rack of your oven. Place a shallow metal pan on the bottom rack. Preheat the oven to 450°F (232°C).
- Just before baking, use a sharp knife or razor blade to make three or four diagonal slashes across the top of the loaf, about 1/2 inch deep.
- Carefully slide the loaf (still on the parchment paper, if using) onto the preheated stone or baking sheet. Pour 1 cup of hot water into the shallow pan on the bottom rack to create steam.
- Bake for 20 minutes with the steam. Carefully remove the water pan, reduce the oven temperature to 425°F (220°C), and continue baking for another 10 to 15 minutes, until the crust is deep golden brown and sounds hollow when tapped.
- Transfer the French bread to a wire rack to cool completely before slicing.
Notes
- For a crispier crust, spray the inside walls of the oven with water two times during the first 10 minutes of baking.
- If you want a softer loaf for sandwiches, reduce the final baking time by 5 minutes and skip the steam step.
- This recipe can be adapted for a quick 90-minute French bread by using a slightly warmer water temperature (120°F) and allowing a shorter second rise (30 minutes).
Nutrition
- Serving Size: 1 slice
- Calories: 150
- Sugar: 0.5
- Sodium: 350
- Fat: 0.5
- Saturated Fat: 0.1
- Unsaturated Fat: 0.4
- Trans Fat: 0
- Carbohydrates: 31
- Fiber: 1
- Protein: 4
- Cholesterol: 0