
Oh, friends, if you’re looking for a dessert that whisks you right back to summer parties and childhood fun, you’ve found it! There’s nothing quite like the delicious, gritty nostalgia of a truly great oreo dirt cake. This isn’t just some thrown-together pudding dessert; this is *the* ultimate no-bake treat that I have spent countless hours perfecting right here in my Pacific Northwest kitchen. As Aria Sterling, I promise you, every recipe here is tested and real, built on the belief that you deserve incredibly reliable, crowd-pleasing flavors without needing to turn on your oven. You can read more about the heart behind Seventh Flavour right here. Get ready, because this layered cookie dessert is about to become famous at your house!
- Why This is the Best No-Bake Oreo Dirt Cake Recipe
- Gathering Ingredients for Your Oreo Dirt Cake
- How to Assemble Your Layered Cookie Dessert (The No-Bake Method)
- Tips for the Perfect oreo dirt cake Texture
- Serving Suggestions for Your Creamy Oreo Treat
- Storage and Reheating Instructions for oreo dirt cake
- Troubleshooting Common Issues with Dirt Pudding Recipe
- Nutritional Data for the Best Dirt Cake Recipe
- Share Your Favorite Party Dessert Ideas
Why This is the Best No-Bake Oreo Dirt Cake Recipe
Listen, I’ve made a ton of desserts in my life, but this one gets cheered every single time. What sets this easy dirt cake recipe apart is the filling. We aren’t messing around with just plain pudding here! By mixing real softened butter and cream cheese into our base, we create the richest, most luxurious creamy oreo treat you can imagine. Plus, the fact that zero oven time is involved means less stress for you and faster results for that hungry party crowd. It’s truly the simplest way to deliver a massive flavor punch!
Quick Preparation for Your Next Gathering
You truly cannot beat the speed. I timed myself last week, and including crushing the cookies, I was under 20 minutes of active work. That’s it! Because it’s a no bake oreo dessert, all the magic happens in the fridge while you socialize. This makes it the ultimate potluck favorite. If your gathering got sprung on you last minute, this is the guaranteed winner that looks like you spent hours fussing over it. Trust me on this one!
Gathering Ingredients for Your Oreo Dirt Cake
Alright, pulling together what you need for this layered cookie dessert is thankfully straightforward—no specialty store runs required here! We rely on pantry staples plus those classic sandwich cookies. Make sure your cream cheese and butter are truly soft, and grab that whipped topping straight from the freezer and let it thaw before you start mixing! We need about 40 cookies total to make sure we have enough crunchy ‘dirt’ for the layers and that beautiful top dusting.

Ingredient Notes and Substitutions
I want you to feel confident making substitutions if needed! If you’re feeling extra chocolatey, swap out the regular instant chocolate pudding mix for the cookies & cream flavor—it adds such a lovely depth to the pudding layer. Also, if you’re out of cream cheese (oops!), you can substitute it with an equal amount of extra butter, but make sure to add a little extra powdered sugar to keep that creamy thickness you need. This recipe also works perfectly if you use clear plastic cups to make individual dirt pudding recipe servings. No one ever complains when they get their own!
How to Assemble Your Layered Cookie Dessert (The No-Bake Method)
Okay, putting this spectacular oreo dirt cake together is where the fun really begins! Since there’s zero baking involved, the assembly process has to be methodical; we want clean, distinct layers that hold up beautifully. We’ll tackle the creamy filling first, then move onto the layering sequence. Remember, the pudding needs to be thick, and the cream cheese mixture needs dedication so it blends into that silky texture we love so much in this no bake oreo dessert.
Creating the Creamy Base for the oreo dirt cake
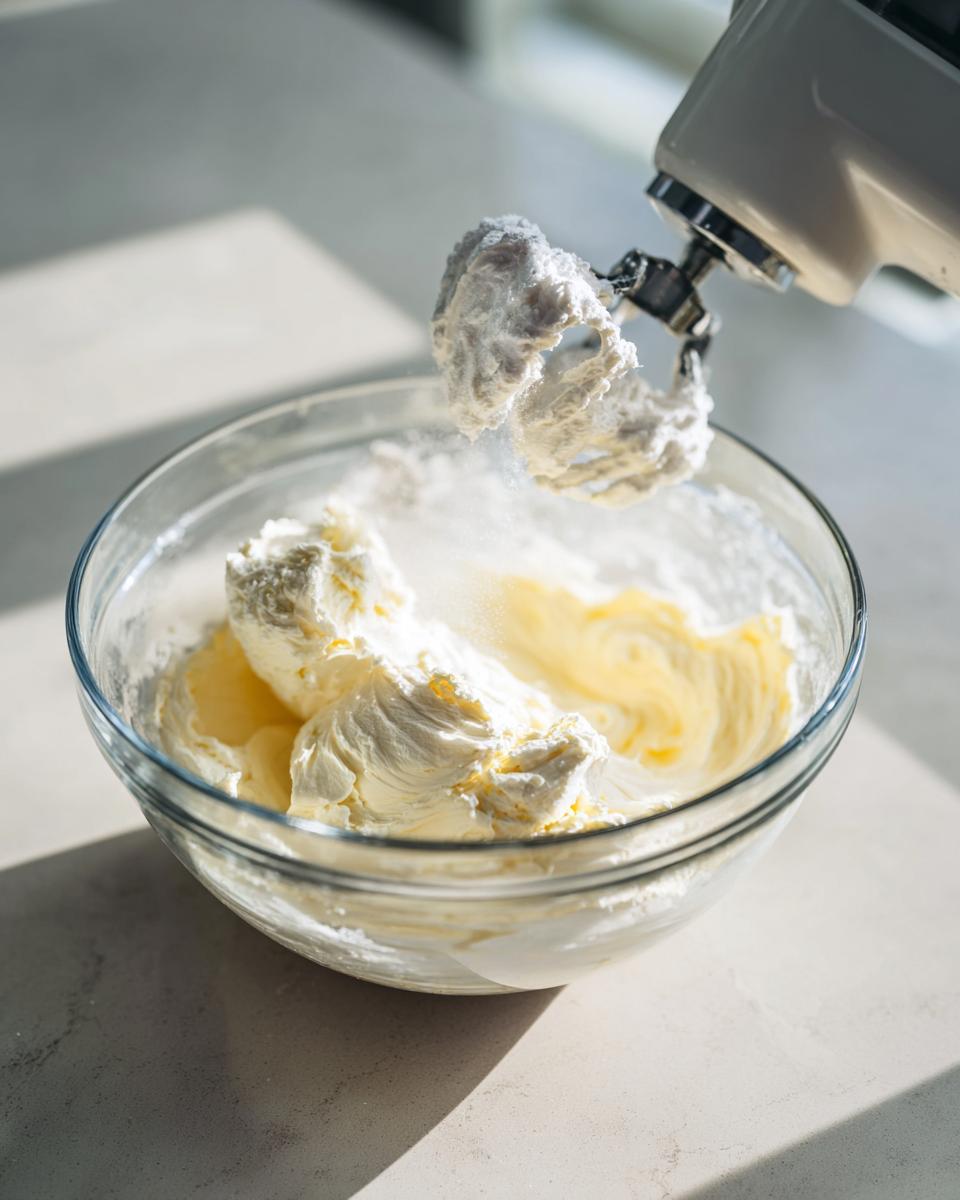
First steps, focus on your fats! In a big bowl, take the time to beat that softened cream cheese, softened butter, and powdered sugar together until it’s completely smooth—no lumps allowed! This takes a minute, but it makes all the difference. Once it looks fluffy and seamless, gently fold in your thawed whipped topping only until it’s just combined. Seriously, don’t overmix this part, we want to keep some air in there! Set that beautiful creamy base aside while you tackle the pudding.
Building the Layers of the dirt pudding recipe
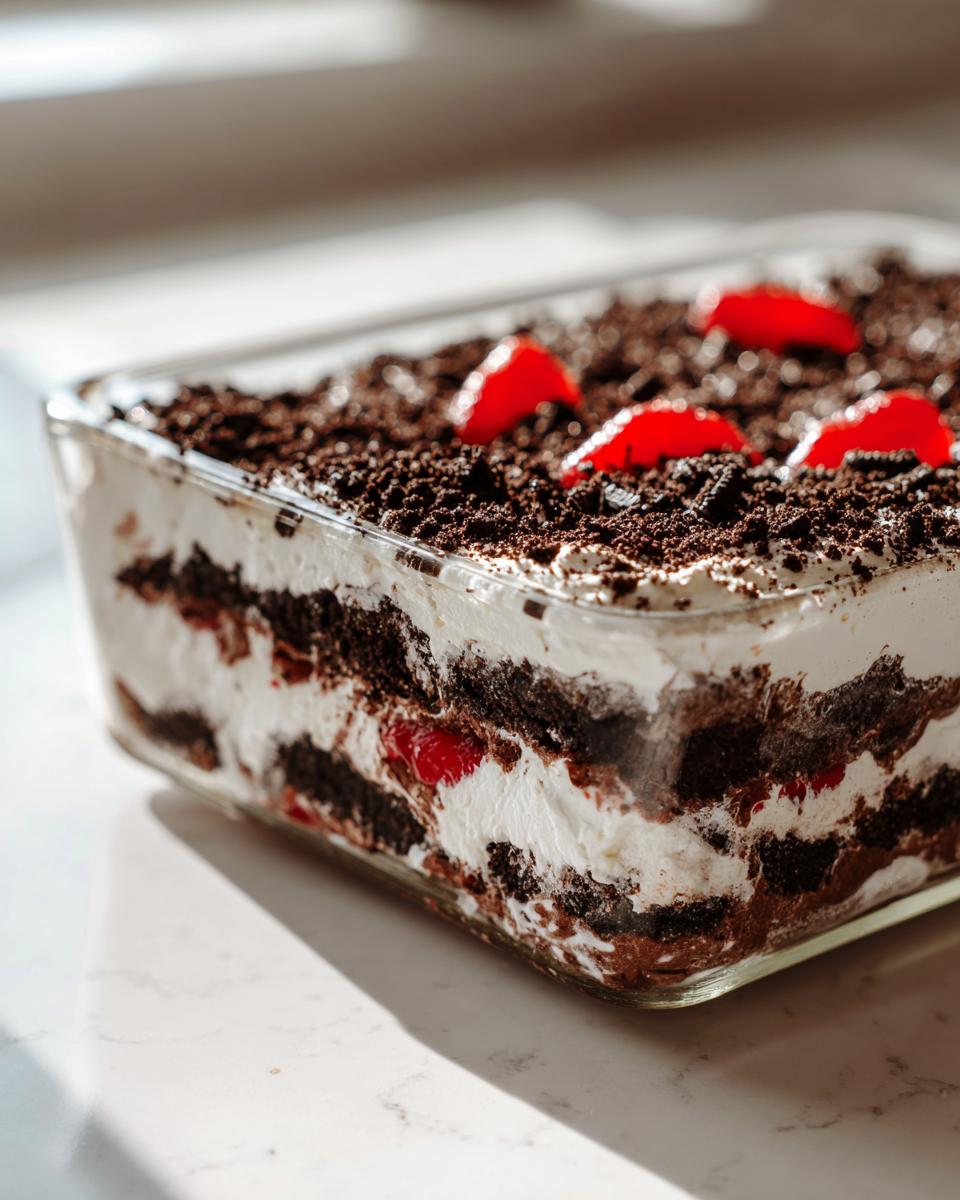
Next, in a separate bowl, whisk that instant chocolate pudding mix with the cold milk for a good two minutes until it thickens up nicely. Now for the layering in your 9×13 dish: spread exactly half of your crushed Oreos right on the bottom. Then, dollop that amazing cream cheese mixture evenly over the cookies. Once that layer is down, pour your prepared chocolate pudding right on top of the cream layer. Finally, spread the rest of your crushed Oreos over the pudding. Reserve about a cup for the top garnish later, and that’s it for the bulk of your dirt pudding recipe layering!
Tips for the Perfect oreo dirt cake Texture
We want this to be the ultimate creamy chocolate crunch experience, and texture is everything when it comes to dessert that mimics dirt! Because we aren’t cooking this, you have to pay attention to how you prep your ingredients. The secret isn’t just in the creaming step—it’s also in treating those Oreos right. Getting the size of the crumbs wrong can make the texture either too sandy or too chunky, and we want that perfect mix of soft filling and crunchy dark cookie bits.
Achieving the Right ‘Dirt’ Consistency
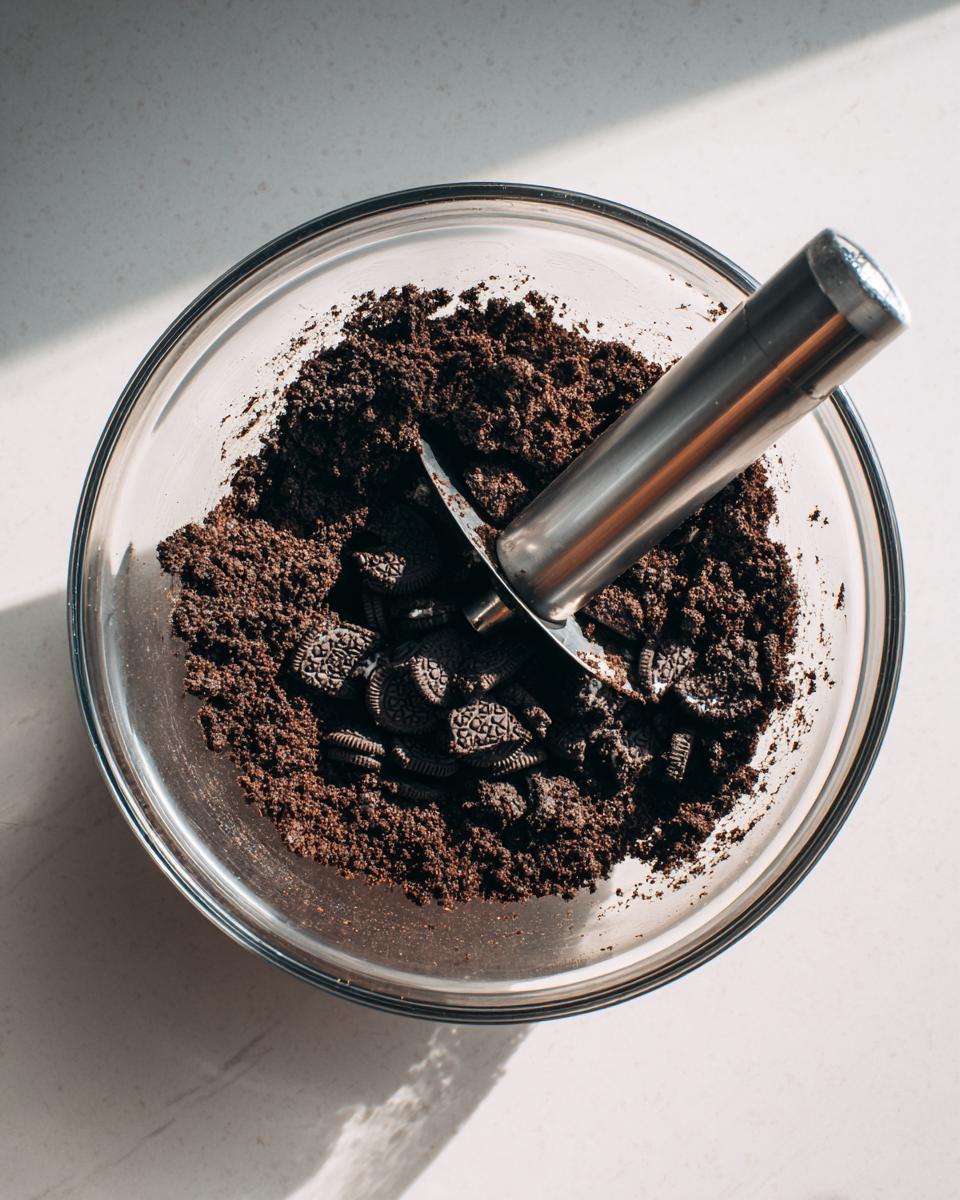
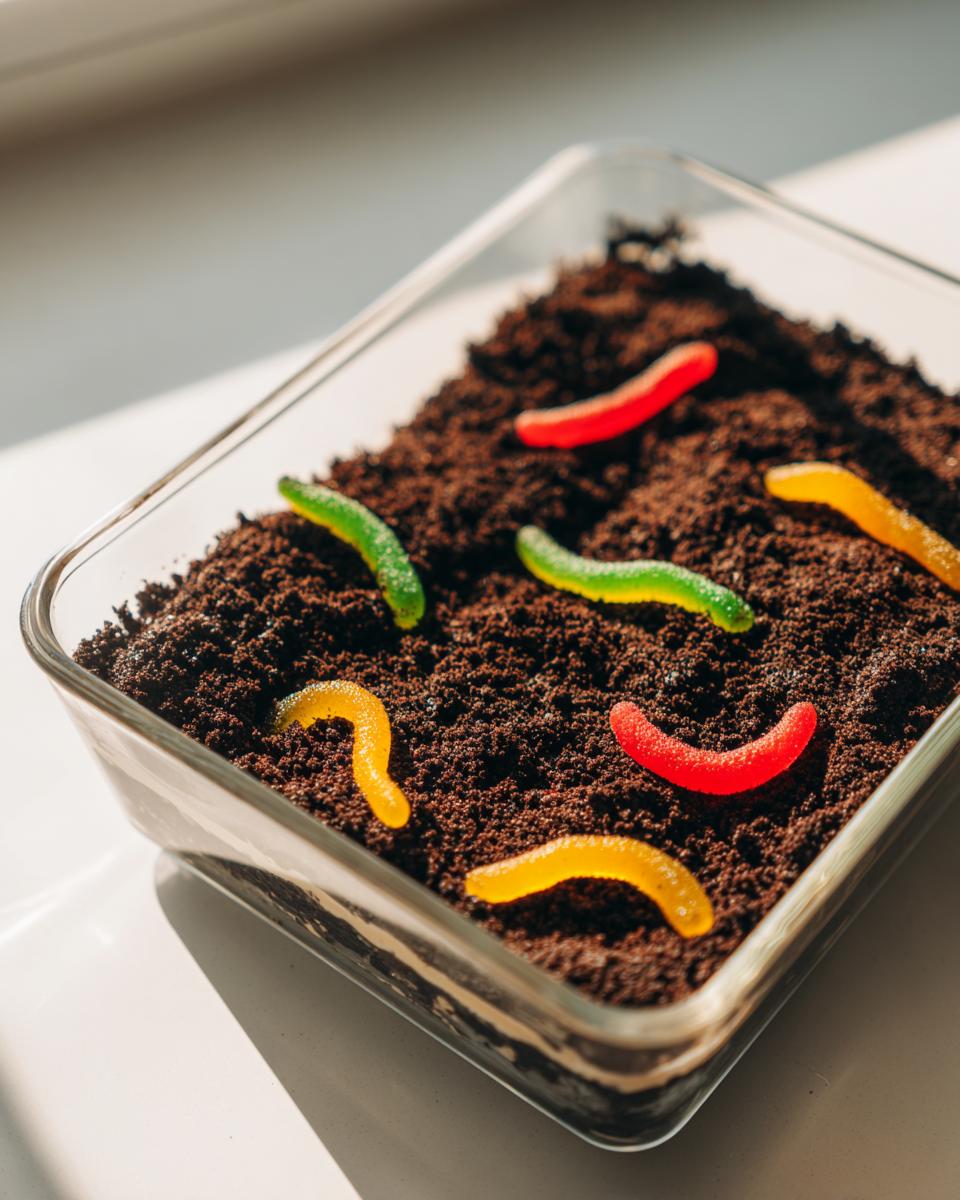
When you crush those Oreos, you have two main ways to go. If you toss them in a good food processor, you get a really fine, uniform powder fast. That’s great for the base layer where you want it to melt into the cream cheese a bit. But honestly, my favorite way is putting the whole cookies in a heavy Ziploc bag and just going at them with a rolling pin! It’s therapeutic, and it gives you those lovely, uneven crumbs. Whatever you do, make sure you set aside about a cup of the coarsest crumbs for the very top layer. If you cover the pudding layer with really fine crumbs, they absorb too much moisture and just disappear overnight. Saving the chunkier bits for last ensures that beautiful, distinctively ‘dirty’ look right before serving!
Serving Suggestions for Your Creamy Oreo Treat
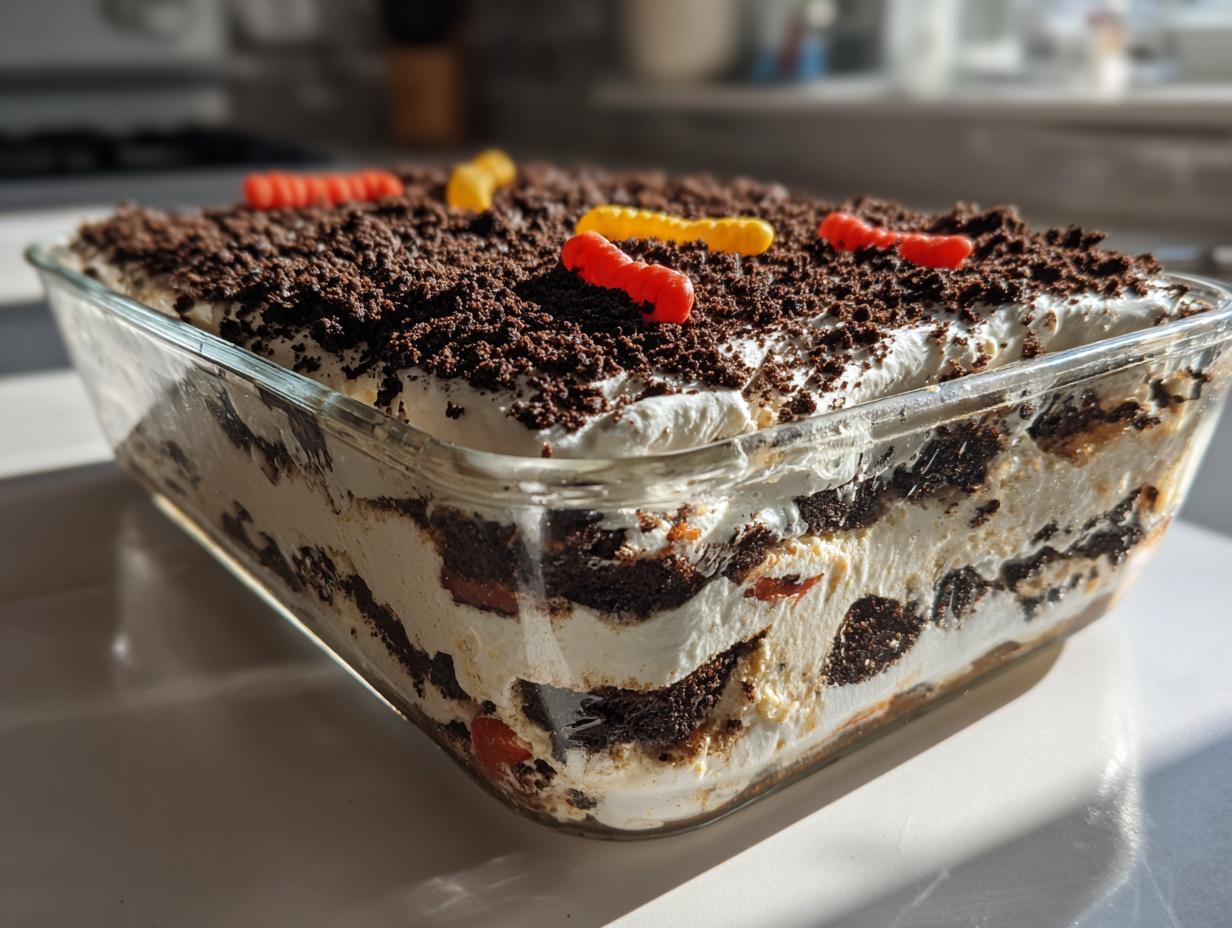
Once you pull this cold, gorgeous creamy oreo treat out of the fridge, the fun really ramps up! Because this is such an easy, kid friendly dessert, the garnish potential is endless. Sure, the gummy worms are non-negotiable for a true ‘dirt’ aesthetic—my niece insists on the red ones popping up like little sunbathers! But honestly, this dessert is fantastic all by itself. If you’re serving it for a big dessert for gatherings, I often keep a small bowl of extra crushed Oreos on the side so people can top off their plate if they want more crunch.
I remember the first time I served this at a neighborhood cookout. I used clear glass trifle bowls instead of the big dish, just to show off the layers. A sweet older gentleman—Mr. Henderson—took one look and said, “Well, now isn’t that something fun!” He thought it was completely hilarious and then admitted he ate two servings before anyone else got a chance! It’s that kind of reaction you want from a great party dessert idea. It breaks the ice, earns you compliments, and tastes like childhood heaven. You can even serve small scoops alongside a scoop of vanilla ice cream if you want to make it extra decadent. For the full scoop on making fun no-bake treats like this, check out some great ideas over here!
Storage and Reheating Instructions for oreo dirt cake
Because this oreo dirt cake is a glorious, refreshing, no-bake masterpiece, we need to respect the chill time. You absolutely must refrigerate this dish for a minimum of four hours before you even think about slicing into it. Honestly, if you can wait overnight, you win! That gives the pudding time to really firm up against the cream cheese layer, which prevents things from getting soupy.
The great news about leftovers is that they usually taste even better the next day, as the flavors really meld together. Just cover your dish tightly with plastic wrap—make sure the wrap isn’t touching the top crushed Oreos if you can help it, or they might get a little damp. This dessert keeps beautifully in the fridge for up to four or five days. You don’t need to worry about reheating at all, since nothing in here is meant to be heated; it’s meant to be icy cold and creamy!
Troubleshooting Common Issues with Dirt Pudding Recipe
Even the simplest dirt pudding recipe can sometimes throw us a curveball, right? That’s why I always test things extra carefully—I want you to feel confident walking into the kitchen! The most common issue I hear about with this no bake oreo dessert is usually related to the pudding layer refusing to firm up properly. If your mixture is looking a little thin after the initial two minutes of whisking, don’t panic and don’t reach for the oven!
The pudding relies entirely on cold milk to activate that instant thickening agent. If your milk was even slightly warm, or if you whisked too gently, it won’t set. My fix is simple: just keep whipping it manually for another minute or two, or stick the bowl in the freezer for 10 minutes, stirring halfway through. It will definitely thicken up! For more troubleshooting on the setting process, I find these tips incredibly helpful here.
Another sticky situation happens during assembly when the layers start mingling when they shouldn’t. If you try to pour that pudding mixture over the cream cheese layer before the cream has had a chance to firm up a bit in the fridge, you end up with a beautiful blob of mixed-up deliciousness instead of distinct layers. The key here is patience! Once you spread that cream cheese layer, let it sit in the cold for at least 30 minutes before pouring the pudding on top. That little bit of chill time creates a stable platform for the next layer of your oreo dirt cake.
Nutritional Data for the Best Dirt Cake Recipe
So, clearly, this best dirt cake recipe isn’t exactly on my light salad rotation—it’s rich and decadent, and that’s exactly what makes it so darn good when you need a treat! Since we are using butter, cream cheese, and plenty of Oreos, we know it hits those higher points on fat and sugar, but I always like to give you a clear idea of what you’re getting so you can plan accordingly.
The figures below reflect an estimated serving size based on cutting the final 9×13 pan into 12 generous portions. Remember, these are general estimates based on the standard brands of pudding mix and Cool Whip I used during my testing phases here at Seventh Flavour. Pantry staples can vary slightly, so take these numbers as a helpful guideline for your family’s favorite oreo dirt cake!
- Serving Size: 1 slice
- Calories: 410
- Sugar: 35g (Yes, that’s a treat serving!)
- Fat: 25g
- Saturated Fat: 14g
- Carbohydrates: 45g
- Protein: 4g
- Sodium: 380mg
It’s certainly a dessert for special occasions or when you need that substantial, comforting hit of creamy chocolate! Don’t let the numbers scare you off—this is meant to be enjoyed fully!
Share Your Favorite Party Dessert Ideas
Now that you’ve mastered this incredible oreo dirt cake, I truly want to know what you thought! Did it disappear in five minutes flat at your last gathering? Did your kids instantly declare it their new favorite? Please, please take a moment to leave a rating down in the comments below and tell me exactly how this easy layered dessert worked out for you.
Sharing your successes is part of the joy here at Seventh Flavour! If you snapped a picture of your beautiful final assembly, especially with those fun gummy worms sticking out of the ‘dirt,’ tag me on social media! I love seeing real results coming out of real kitchens. It’s so encouraging to know that a recipe born from my passion now brings smiles to your family events.
Did you run into a snag I didn’t cover, or maybe you had an amazing idea for a flavor variation? Don’t hesitate to reach out directly! If you have any specific technical questions about ingredient temperatures or layering timing, you can always get in touch with me or my team via the contact page. Happy baking—or should I say, happy chilling!
PrintThe Best No-Bake Oreo Dirt Cake Recipe

Make this easy no-bake Oreo dirt cake featuring creamy layers of pudding, cream cheese, and crushed chocolate sandwich cookies. It is a perfect, quick dessert for parties and family gatherings.
- Prep Time: 20 min
- Cook Time: 0 min
- Total Time: 4 hr 20 min
- Yield: 12 servings 1x
- Category: Dessert
- Method: No-Bake
- Cuisine: American
- Diet: Vegetarian
Ingredients
- 1 (8 ounce) package cream cheese, softened
- 1 cup unsalted butter, softened
- 1 cup powdered sugar
- 1 (12 ounce) container frozen whipped topping, thawed
- 2 (3.4 ounce) packages instant chocolate pudding mix
- 3 cups cold milk
- 1 (14.3 ounce) package Oreo cookies, crushed (about 40 cookies)
- Optional: Gummy worms for decoration
Instructions
- In a large bowl, beat the softened cream cheese, softened butter, and powdered sugar together until the mixture is smooth and creamy.
- Gently fold in the thawed whipped topping until just combined. Set this creamy layer aside.
- In a separate medium bowl, whisk together the instant chocolate pudding mix and cold milk for two minutes until the mixture thickens.
- Crush the Oreo cookies until they resemble coarse dirt. You can do this in a food processor or by placing them in a sealed bag and crushing them with a rolling pin. Set aside about 1 cup of the crushed cookies for the top layer.
- To assemble the dirt cake, spread half of the crushed Oreos in the bottom of a 9×13 inch baking dish.
- Spread the cream cheese mixture evenly over the layer of crushed Oreos.
- Pour the prepared chocolate pudding evenly over the cream cheese layer.
- Top the pudding layer with the remaining crushed Oreos, reserving about 1 cup for the final decoration.
- Cover the dish and chill in the refrigerator for at least four hours, or until firm.
- Before serving, sprinkle the reserved crushed Oreos over the top layer. Add gummy worms if you are using them for decoration.
Notes
- For a richer flavor, use the cookies & cream instant pudding mix instead of plain chocolate.
- If you do not have cream cheese, you can substitute it with an equal amount of softened butter and increase the powdered sugar slightly.
- You can make this dessert in individual clear cups for fun, single-serving dirt pudding treats.
Nutrition
- Serving Size: 1 slice
- Calories: 410
- Sugar: 35g
- Sodium: 380mg
- Fat: 25g
- Saturated Fat: 14g
- Unsaturated Fat: 11g
- Trans Fat: 0.5g
- Carbohydrates: 45g
- Fiber: 1g
- Protein: 4g
- Cholesterol: 45mg