
Oh, that moment hits you, doesn’t it? You’re craving the juicy, savory goodness of your favorite burger—all that beef, that melted cheese, those tangy condiments—but you just don’t have the time for grilling or dealing with messy layers.
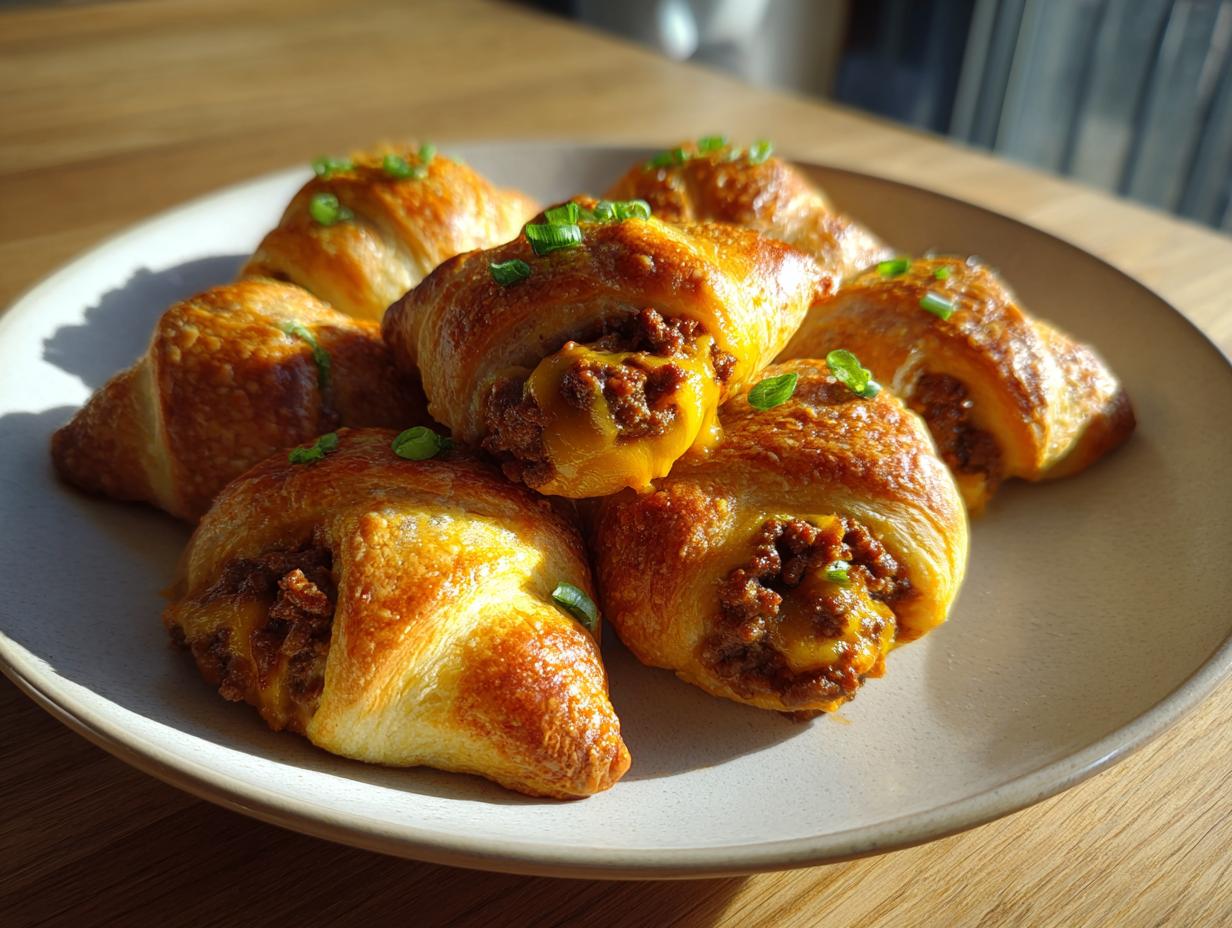
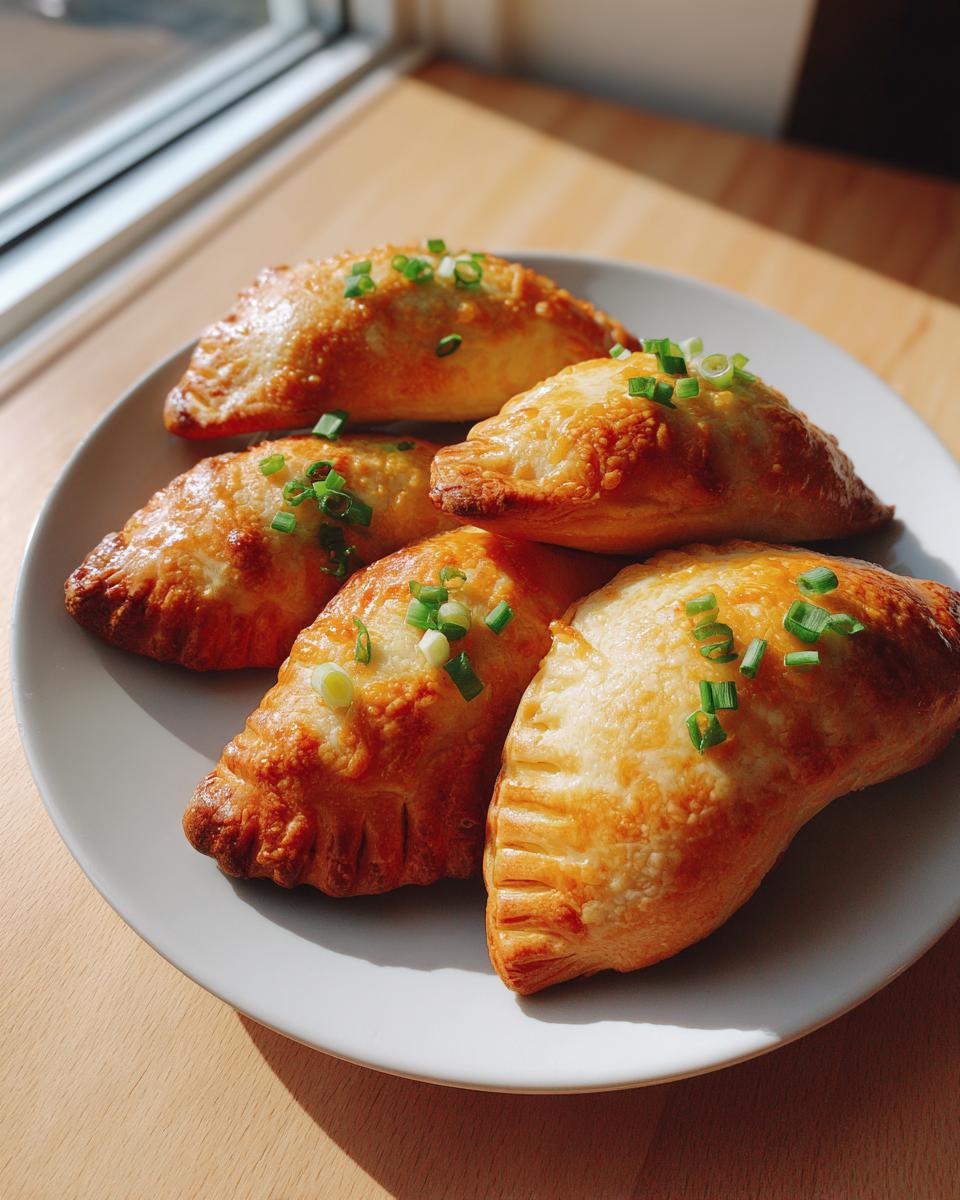
Well, stop dreaming and start assembling! That’s exactly why I developed these incredible cheeseburger pockets crescent rolls. They are my absolute quick fix for comfort food cravings, turning humble refrigerated dough into portable perfection in about 30 minutes total.
In my marketing days, when the day ran long, there was nothing better than returning to the kitchen to make something utterly familiar and satisfying. These pockets encapsulate that feeling—they are reliable, approachable, and taste like pure nostalgia. Trust me, these are the easiest savory pastry treats you’ll ever make.
- Why You Will Love These Cheeseburger Pockets Crescent Rolls
- Essential Ingredients for Perfect Cheeseburger Pockets Crescent Rolls
- Expert Tips for Assembling Your Cheeseburger Pockets Crescent Rolls
- Step-by-Step Instructions for Baked Cheeseburger Pockets
- Baking and Finishing Your Portable Beef and Cheese Pockets
- Making Cheeseburger Pockets Crescent Rolls Ahead of Time
- Variations for Your Ground Beef Crescent Roll Recipes
- Frequently Asked Questions About Cheeseburger Pockets Crescent Rolls
- Nutritional Estimates for Cheeseburger Pockets Crescent Rolls
- Share Your Seventh Flavour Cheeseburger Pockets
Why You Will Love These Cheeseburger Pockets Crescent Rolls
I truly believe food should work for you, not the other way around! When you’re looking for that big burger flavor without the dinner-table fuss, these pockets deliver every single time without fail. They’ve become a staple for my busy weeknights.
- They are incredibly fast, clocking in at only about 15 minutes of prep time before they hit the oven. Talk about a quick dinner crescent rolls solution!
- Zero guesswork here; using pre-made dough means you get reliable, flaky results without needing complicated pastry skills.
- The flavor payoff is huge—you get the seasoned beef, melty cheese, and those classic burger spices all wrapped up beautifully.
- They freeze well! This means you can make a double batch and pull out easy crescent roll appetizers whenever you need them.
- Perfectly portioned for lunchboxes or after-school snacks. They travel beautifully!
- They are so customizable! You can toss in a little extra grilled onion mixture if you happen to have some leftover from chopping.
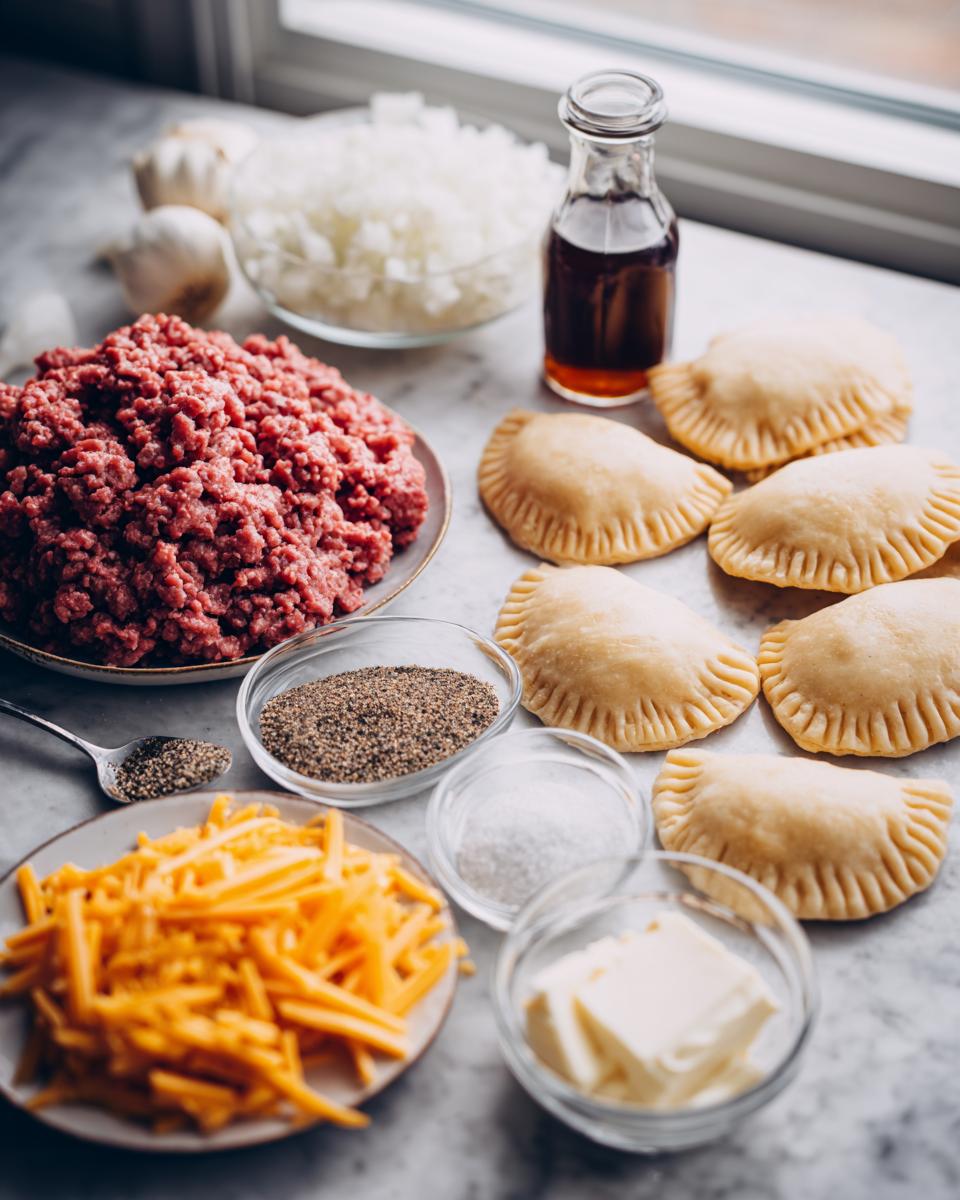
Essential Ingredients for Perfect Cheeseburger Pockets Crescent Rolls
When I create a recipe, especially one leaning on convenience items like pre-made dough, the quality and precision of the other ingredients matter so much. This ensures that even though we’re simplifying dinner, we aren’t cutting any corners on flavor. You want that true, satisfying taste, right?
Here’s exactly what you need to grab at the market for the best results. Don’t substitute the spices—they really push these from being just ‘meat in dough’ to feeling like a real, comforting cheeseburger experience.
- 1 pound ground beef (90/10 works wonderfully here)
- 1/2 cup finely chopped onion
- 1 teaspoon Worcestershire sauce (This is great for adding that deep savory note!)
- 1 teaspoon dry mustard powder
- 1/2 teaspoon garlic powder
- Salt and black pepper to taste
- 1 (8 ounce) package refrigerated crescent roll dough
- 4 slices cheddar cheese, cut in half (totaling 8 small squares)
- 1 tablespoon butter, melted (for brushing the tops)
- Optional toppings: finely chopped pickles, ketchup, mustard
See? It’s a simple list. We’re using familiar pantry spices to elevate that ground beef beautifully before it even meets the dough. That’s my trick for maximizing depth without adding extra kitchen time!
Expert Tips for Assembling Your Cheeseburger Pockets Crescent Rolls
Okay, listen up, because while these are easy, the assembly phase is what separates a perfect, contained pocket from a messy, cheesy disaster tray! My years of testing homemade versions of classic fast food—it’s how I got into perfecting these little pastries—taught me that technique is everything before the oven!
We don’t want soggy bottoms or cheese leaks, ever! If you think a basic turnover seals well, think again when cheese is involved. For foolproof results, you need to treat those seams with respect. These pockets are designed to be handheld, which means we need them structurally sound, almost like a delicious, portable simple savory pastry recipe.
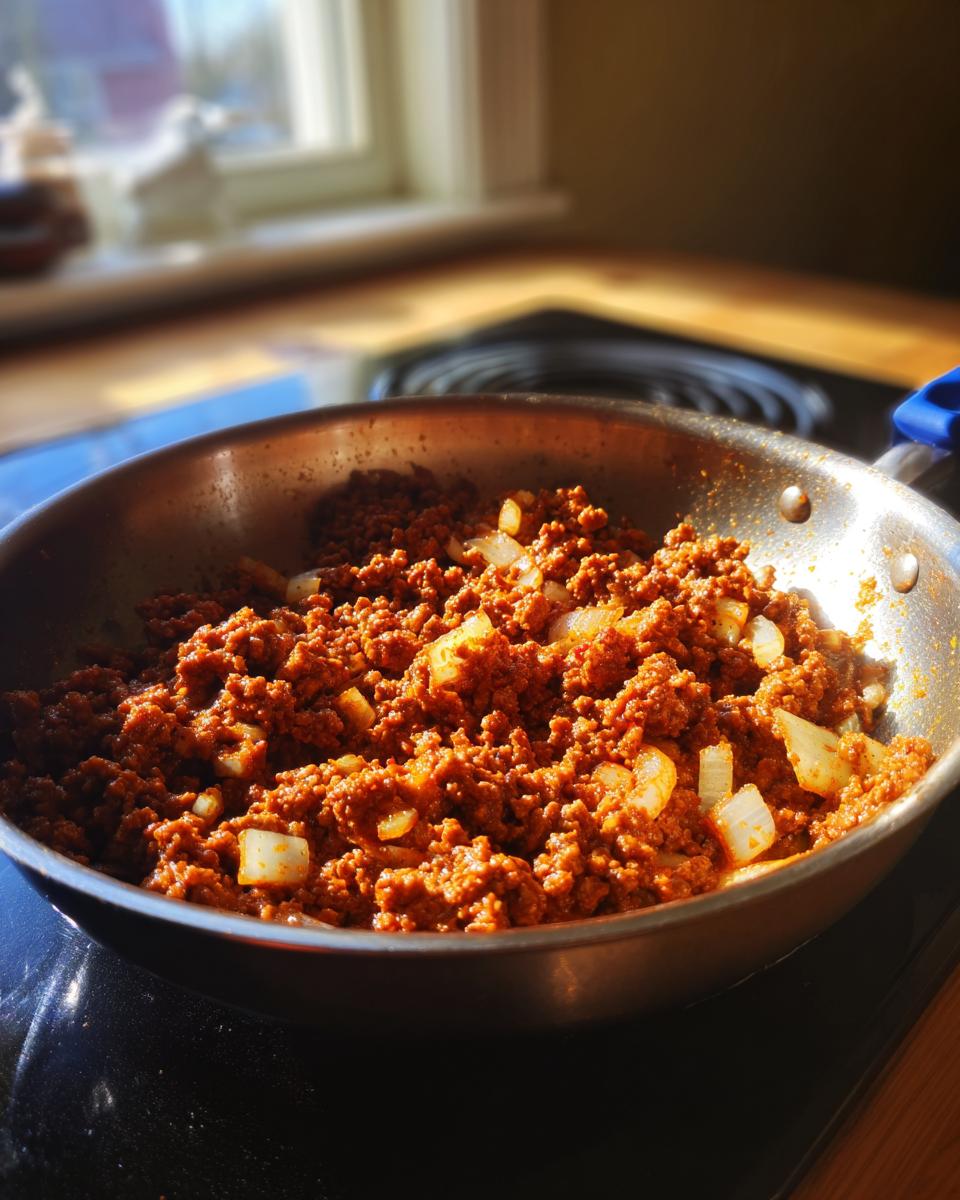
Preparing the Ground Beef Filling
When cooking the one pound of ground beef and those onions, you need to be ruthless about draining the grease. Set the cooked beef mixture aside in a strainer for a good minute or two—don’t rush this! Excess oil will soak right into the delicate crescent dough and ruin that flaky texture we’re aiming for. Once drained, stir in your Worcestershire sauce, that little bit of dry mustard powder, and the garlic powder. The mustard powder works magic here; it cuts through the richness of the beef just like it does in a great burger sauce!
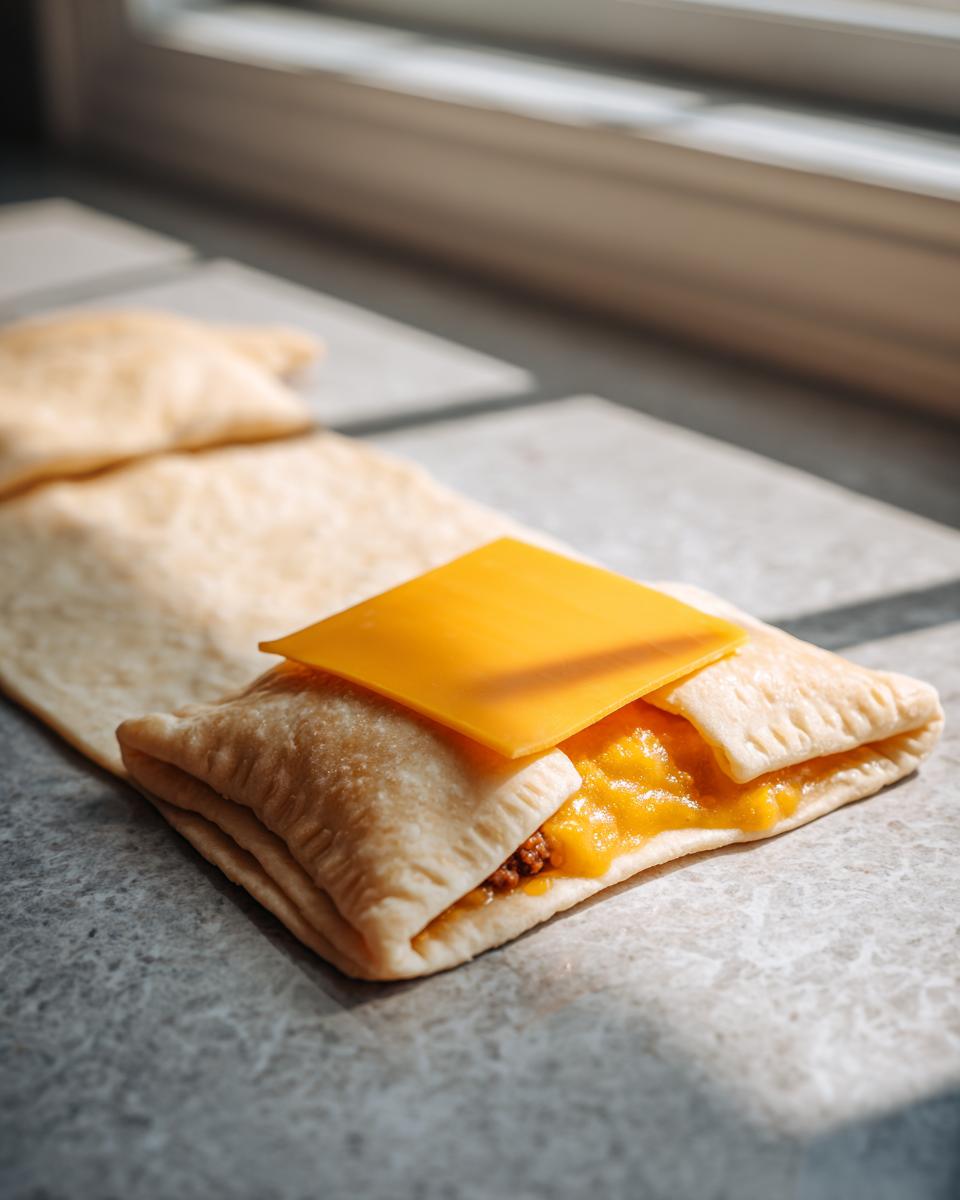
Sealing the Cheeseburger Pockets Crescent Rolls Securely
This is the most important part, so pay attention! Once you layer that cheese square and spoon the cooled meat mixture onto the wide end of each dough triangle, you have to be thorough. Fold the narrow tip over the filling and start rolling up to the wide base where you started. When you get to the end, pinch those edges together really tightly. I mean it—squish them! If you see any gaps, grab a fork and gently crimp the edges all the way around. Placing the sealed pockets seam-side *down* on your baking sheet is the final security measure. Trust me, this simple crimping step prevents any cheese escape while baking.
Step-by-Step Instructions for Baked Cheeseburger Pockets
Following these steps precisely is how we guarantee a perfect golden-brown crust and a melty interior every single time. Remember what I said about sealing them tightly in the last section? Make sure you carry that careful technique right through to placing them on the tray!
- First things first, get that oven going! You need to preheat it to 375 degrees Fahrenheit. While it’s heating up, line a sturdy baking sheet with parchment paper. This makes cleanup a dream later.
- Take the cooked and drained ground beef and onion mixture—it needs to be slightly cooled down by now—and return it to the skillet for just a moment. Stir in your Worcestershire sauce, mustard powder, garlic powder, salt, and pepper. Let that cook for just one minute so those flavors really meld together nicely. Then, pull it off the heat.
- Now for the fun part: take your 8 triangles of crescent roll dough and lay them out flat. Gently place one square of cheddar cheese right near the wide end of each dough piece.
- Spoon about two tablespoons of your cooled beef mixture carefully over the cheese. Don’t overfill! That’s how things start to go sideways.
- Fold the narrow point of the dough over the filling and start rolling tightly all the way to the wide end where you began. Now, pinch those long seams together really hard to seal them up tight.
- Place the sealed pockets seam-side down on that prepared parchment-lined baking sheet. This position really helps lock everything inside.
- Brush the tops lightly with that melted butter we prepared. This gives them that signature golden sheen.
- Bake them for 12 to 15 minutes. Look for that deep, beautiful golden brown color, which tells you the dough is definitely cooked through. If you’re looking for a deeper dive on making similar beef and bread delights, check out my guide on homemade hot pockets beef for inspiration!
- Once they come out, resist the urge to grab one immediately! Let them rest for a few minutes so the filling settles before you serve them up with your favorite toppings.
Baking and Finishing Your Portable Beef and Cheese Pockets
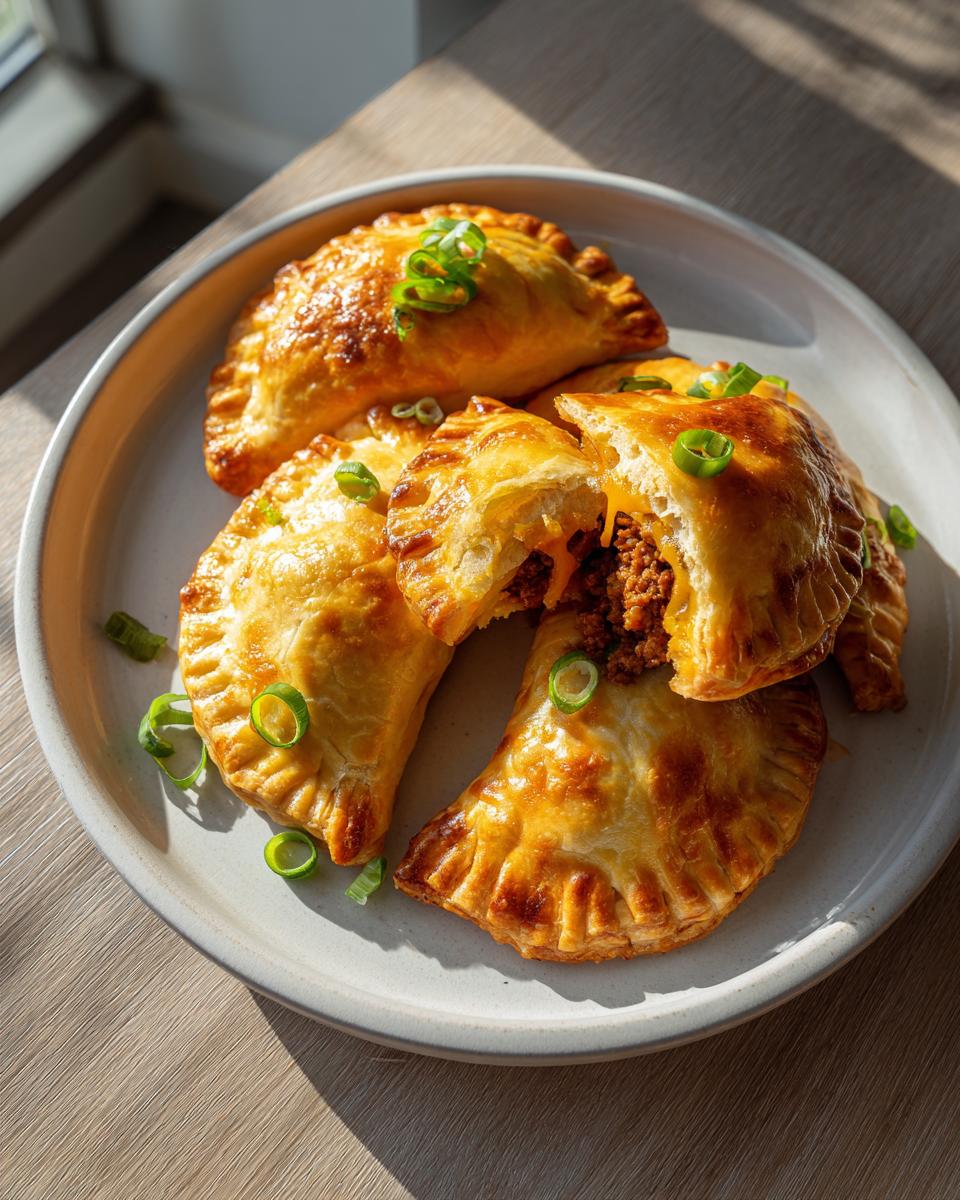
We’ve seasoned the meat, we’ve meticulously sealed the pockets—now it’s time for the magic in the oven! This is where all that careful sealing pays off and you get that glorious, flaky crust. Remember, when we talk about achieving the perfect baked cheeseburger pockets, the final look is everything.
Before they even go in, make sure you’ve given the tops a light brush—I love melted butter for that rich, slightly crispy finish—but if you want them ultra-shiny and professional-looking, quickly whisk one egg with a splash of water and brush that on instead. It’s my favorite little secret for making them look homemade but perfectly styled!
Set your oven temperature to 375°F. They don’t need long in there, which is honestly the best part of relying on crescent rolls instead of making pastry completely from scratch. You’re aiming for 12 to 15 minutes. Keep an eye on them after the 12-minute mark. You’re looking for that deep golden brown color; that’s your signal that the dough is cooked all the way through and those cheeseburger pockets crescent rolls are ready to come out.
I know, I know, you want to tear into that gooey interior immediately, but you absolutely must let them rest. Seriously, give them at least five minutes sitting right there on the baking sheet. This allows the melted cheese and beef filling to stabilize a bit so when you bite in, you get that perfect pull rather than having the filling immediately run out onto your plate. Once they’ve cooled slightly, they’re ready to dip in any extra sauce you might have made—perhaps something from my ideas for an easy burger sauce recipe!
Making Cheeseburger Pockets Crescent Rolls Ahead of Time
Life happens, and sometimes knowing you have dinner ready to go—even if it’s just waiting in the fridge—is a massive stress reliever! I love prepping these on a slower Sunday afternoon so that Tuesday evening feels like a mini-vacation when I realize I just have to pop them in the oven.
The great news is that these beef and cheese pockets are fantastic for making ahead. They hold up really well in the refrigerator, and honestly, sometimes the chilling process helps the dough stay firm while rolling. If you’re planning ahead, think of your assembly process steps 1 through 7, but skip the baking and butter brushing for now. You can find more tips in my guide on make ahead crescent pockets if you are planning several different recipes for the week!
You assemble them exactly as we discussed: ground beef mixture, cheese, roll, pinch, and seal them seam-side down on your parchment-lined baking sheet. Cover the entire pan tightly with plastic wrap or foil. You can safely keep these assembled pockets in the refrigerator for up to four hours. That gives you plenty of time to run errands or help with homework before dinner rush.
Now, here’s the important part about baking from cold: timing changes slightly. Because the dough starts out chilled instead of room temperature, the heat needs a little extra time to penetrate the pastry layers. If you are baking them straight from the fridge, you’ll want to add about 2 to 3 minutes to the total baking time. So, instead of stopping around 14 minutes, start checking them closer to 16 or 17 minutes, ensuring they are still deeply golden brown on top before pulling them out!
Variations for Your Ground Beef Crescent Roll Recipes
Even though these cheeseburger pockets crescent rolls are designed to be totally reliable, I love seeing how people make them their own! Sometimes you look in the fridge and realize you’re low on cheddar, but that’s okay! The core structure of this savory pastry is so solid that it handles flavor swaps beautifully. My goal is always to give you the foundation, and then encourage you to experiment a little bit.
When I was first testing out different versions—trying to mimic that classic flavor profile you get at a diner—I swapped out the cheese constantly. You can absolutely use Monterey Jack for a slightly milder flavor, or even Provolone, which gets wonderfully gooey and stretchy. If you use Provolone, you might even want to add a tiny pinch more dry mustard to keep that tangy edge present.
My favorite variation, which is fantastic if you’re serving these to kids who might push aside toppings, is incorporating the toppings *inside* the pocket! You know how much I love sneaking nutrition where no one notices, right? For a real flavor punch, finely dice up a few cornichons or small dill pickles. Drain them really well, pat them dry with a paper towel, and mix those little guys right in with your cooled ground beef mixture before you spoon it into the dough.
You end up with this fantastic burst of pickle tang in every single bite! It makes them taste even more like a true, classic cheeseburger! If you’re looking to capture those burger flavors in completely different formats—maybe when you’re tired of pastry altogether—you should definitely take a look at how I build my cheeseburger bowl recipe. It hits all the same savory notes in a totally different package!
Remember, the secret to any great bake is knowing when to stick to the rules (like sealing those edges!) and when it’s safe to play around with the flavor profile. Feel free to swap cheeses or try bacon bits in place of onion one night—it’s your kitchen, after all!
Frequently Asked Questions About Cheeseburger Pockets Crescent Rolls
I always get so many questions after posting this recipe because everyone wants to know how to tweak it just right for their family. It’s wonderful to see how passionate everyone is about getting the perfect, non-leaking cheeseburger pockets crescent rolls!
I’ve gathered the common questions I hear most often, especially from people trying to turn these into healthy snack ideas or just trying to fit them into a busy schedule. If you’re looking for ways to simplify your repertoire of ground beef crescent roll recipes, this FAQ should help you nail the technique!
Can I use ground turkey instead of ground beef in these cheeseburger pockets crescent rolls?
Yes, you absolutely can! Ground turkey or even ground chicken works totally fine here. When you make the swap, remember that poultry is leaner than ground beef, so you might find the filling seems a little drier after cooking. I suggest bumping up the flavor profile slightly—maybe add an extra half-teaspoon of Worcestershire sauce or even a tiny splash of beef broth if things look dry before you start adding the cheese. It keeps that savory depth we want in our portable beef and cheese pockets.
What is the best temperature and time for air frying these easy crescent roll appetizers?
Air frying is such a brilliant way to get these crispy fast! If you’re using a basket-style air fryer, you’ll need to work in batches, which is important so you don’t overcrowd the basket—overcrowding steams the dough instead of crisping it. Set your air fryer to 350°F. You’re going to cook them for about 10 to 12 minutes. Start checking at 10, because every machine is different, but you’re looking for that beautiful golden color all over. These turn out like fantastic little handheld turnovers when air-fried!
How do I keep the cheese from leaking out of my crescent roll dinner?
Oh, the dreaded cheese leak! This is where you need to channel your inner pastry chef for security. Remember what I stressed during assembly: you must press those seams together very firmly. Don’t just use your fingertips; grab a fork and actually crimp those edges together. If you can see any daylight between the dough layers where the filling could escape, pinch it shut again. Finally, the kicker: always place the assembled pockets seam-side down onto the baking sheet before brushing them with butter. That gravity is on your side, holding everything snug while the dough sets in the heat!
Nutritional Estimates for Cheeseburger Pockets Crescent Rolls
Now, I always want to be super honest about what we’re eating, even with comfort food classics like these! While these cheeseburger pockets crescent rolls are incredibly satisfying and easy to make for a weeknight meal, keeping track of what goes into our bodies is important. I ran these through a standard calculator just so we have a general idea of the breakdown.
Keep in mind, these numbers are truly estimates! The fat content, for example, will change wildly depending on whether you use 80/20 beef or drain your 93/7 blend perfectly. Also, if you decide to use a different cheese or add extra toppings like a drizzle of mustard or ketchup, those figures will shift. These totals are based strictly on the recipe core as written.
- Serving Size: 1 pocket
- Calories: 280
- Fat: 16g (with 7g of that being Saturated Fat)
- Carbohydrates: 18g
- Protein: 15g
- Sugar: 2g
- Sodium: 450mg
- Cholesterol: 55mg
See? For a meal that feels like a hearty, classic American dish, getting 15 grams of protein in under 30 minutes of total time is pretty fantastic! If you are monitoring sodium, be sure to look for lower-sodium crescent roll dough packages, as that accounts for a good chunk of the 450mg listed here. It’s all about making mindful swaps when you need to!
Share Your Seventh Flavour Cheeseburger Pockets
Whew! We made it through the whole process, from browning the beef to that final brush of butter. Honestly, seeing these cheeseburger pockets crescent rolls come out of the oven—golden, puffy, and smelling exactly like a backyard barbecue wrapped in pastry—is the best part of my kitchen week.
Now the Seventh Flavour truly comes alive when you share it, and I am dying to know how yours turned out! Did they seal perfectly? Did you add a little extra Worcestershire sauce like I sometimes do? I put so much love and testing into making sure these instructions feel foolproof, but I always want to hear about your real-life results.
Seriously, if you made a batch, pop over and leave a quick rating right below this section. Five stars if they cured your craving! And if you snapped a picture of those beautiful, portable moments—maybe the kids tearing into them for a quick lunch or them sitting perfectly sealed on your counter—please tag me or send it my way! I absolutely adore seeing my recipes turn into your family’s favorite kid friendly beef crescent treats.
Don’t be shy with the comments; they help me continue testing and refining these recipes for all of us. Happy baking, and thank you for bringing this Seventh Flavour into your home!
PrintEasy Cheeseburger Pockets with Crescent Rolls

Make quick, satisfying cheeseburger pockets using crescent roll dough filled with seasoned ground beef and melted cheese. These are perfect for a fast weeknight dinner or a portable snack.
- Prep Time: 15 min
- Cook Time: 15 min
- Total Time: 30 min
- Yield: 8 pockets 1x
- Category: Lunch
- Method: Baking
- Cuisine: American
- Diet: Low Lactose
Ingredients
- 1 pound ground beef
- 1/2 cup finely chopped onion
- 1 teaspoon Worcestershire sauce
- 1 teaspoon dry mustard powder
- 1/2 teaspoon garlic powder
- Salt and black pepper to taste
- 1 (8 ounce) package refrigerated crescent roll dough
- 4 slices cheddar cheese, cut in half (8 small squares total)
- 1 tablespoon butter, melted (for brushing)
- Optional toppings: finely chopped pickles, ketchup, mustard
Instructions
- Preheat your oven to 375 degrees Fahrenheit. Line a baking sheet with parchment paper.
- Cook the ground beef and onion in a skillet over medium heat until the beef is fully browned and the onion is soft. Drain off any excess grease.
- Return the beef mixture to the skillet. Stir in the Worcestershire sauce, dry mustard powder, garlic powder, salt, and pepper. Cook for one minute, stirring constantly. Remove from heat and let the mixture cool slightly.
- Unroll the crescent roll dough on a clean surface. Separate the dough into 8 triangles.
- Place one square of cheese near the wide end of each triangle. Spoon about 2 tablespoons of the cooled beef mixture over the cheese.
- Fold the narrow point of the dough over the filling and roll up toward the wide end, sealing the edges tightly. Pinch the seams together to close the pocket completely.
- Place the sealed pockets seam-side down on the prepared baking sheet.
- Brush the tops of the pockets lightly with melted butter.
- Bake for 12 to 15 minutes, or until the crescent dough is golden brown and cooked through.
- Remove from the oven and let cool for a few minutes before serving with optional ketchup, mustard, or chopped pickles.
Notes
- To prevent leakage, press the edges of the dough together firmly after filling. You can crimp them with a fork for extra security.
- If you want a shiny finish, brush the tops with an egg wash (1 beaten egg mixed with 1 teaspoon water) instead of butter before baking.
- You can prepare these ahead of time; assemble the pockets, place them on the baking sheet, cover, and refrigerate for up to 4 hours before baking. Add 2-3 minutes to the bake time if baking directly from the refrigerator.
Nutrition
- Serving Size: 1 pocket
- Calories: 280
- Sugar: 2
- Sodium: 450
- Fat: 16
- Saturated Fat: 7
- Unsaturated Fat: 9
- Trans Fat: 0.5
- Carbohydrates: 18
- Fiber: 1
- Protein: 15
- Cholesterol: 55