
Oh, if there’s one thing I understand from my old marketing days, it’s realizing what people truly crave. And right now? People crave desserts that feel incredibly decadent but don’t require heating up the kitchen. Trust me, after years spent building campaigns, my kitchen suddenly became my true creative headquarters. That’s where the magic of a truly great, no-fuss sweet happens!
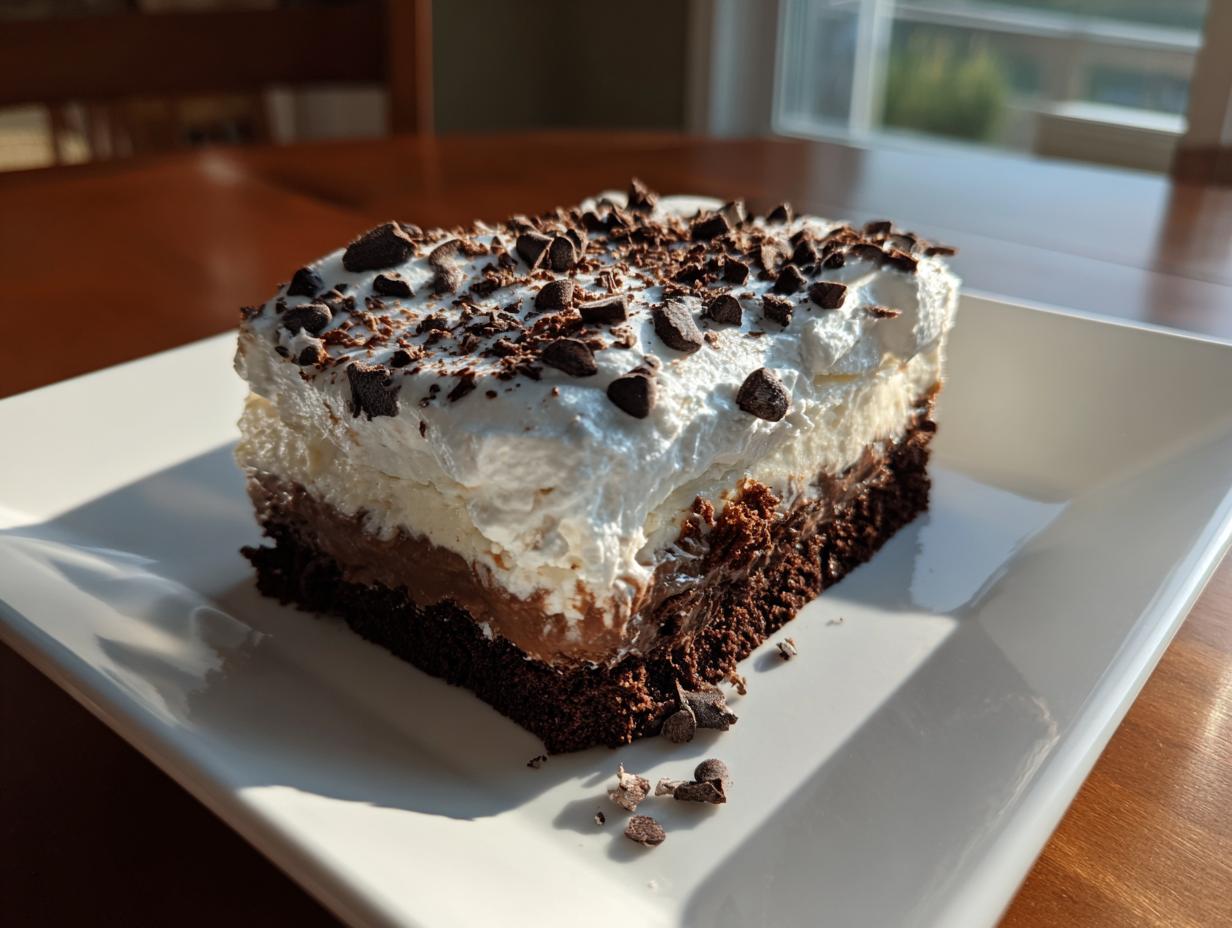
That desire led me straight to perfecting what I now call the ultimate make-ahead indulgence: the brownie refrigerator cake. Forget complicated steps; this layered chocolate delight is everything you want. It’s rich, it’s fudgy, it’s creamy, and best of all? The only thing “baking” involved is the initial setup of those delicious brownies. It’s the kind of dessert that screams quality and effort, even though the fridge does most of the heavy lifting!
This recipe isn’t just about cold layers; it’s about connection—that Seventh Flavour we chase. I started bringing this to work potlucks when I was still in the corporate world because it was so reliable. Now, I’m thrilled to share it with you, hoping it brings the same quiet joy to your table that it brings to mine.
Since this is a complex build, make sure you check out my full guide on easy dessert recipes if you need more confidence for quick sweets!
- Why This Brownie Refrigerator Cake is Your New Favorite Easy Refrigerator Dessert
- Assembling Your Decadent Brownie Refrigerator Cake: Ingredients You Need
- Step-by-Step Instructions for the No Bake Brownie Cake
- Tips for Success When Making Your Brownie Refrigerator Cake
- Storage and Reheating Instructions for This Chilled Chocolate Cake
- Frequently Asked Questions About the Brownie Refrigerator Cake
- Serving Suggestions for Your Layered Chocolate Dessert
- Nutritional Estimate for One Serving of Brownie Refrigerator Cake
- Share Your Experience Making This Easy Layered Cake
Why This Brownie Refrigerator Cake is Your New Favorite Easy Refrigerator Dessert
I’m telling you, if you need an impressive dish that requires minimal morning-of fuss, this is it. The reason this brownie refrigerator cake has become my go-to is simple: it’s the definition of an easy refrigerator dessert. You assemble it, and then you forget about it until you need it! That’s the trick to surviving busy weeks and hosting obligations.
- It’s a true no-oven-needed dessert experience once the base is done.
- It holds up beautifully, making it one of the best potluck desserts cold you can bring.
- The layers actually integrate and taste better the next day!
You can find more helpful kitchen shortcuts, like my famous mayo recipe, over here if that’s something you need!
The Magic of a Make Ahead Chocolate Dessert
That chilling time? It’s not optional; it’s where the flavor truly develops. When you let this sit overnight, the moisture from the pudding layers seeps slightly into the fudgy brownies, creating that perfectly cohesive, rich texture. It transforms from just stacked layers into one unified, decadent treat. I brought this to a big event last year when I was completely swamped, and people raved—it looked stunning and wasn’t stressful at all. It’s genuinely one of the best party ready desserts available.
Assembling Your Decadent Brownie Refrigerator Cake: Ingredients You Need
Okay, let’s talk about the building blocks for this showstopper! Remember, since this is a brownie refrigerator cake, the appearance relies entirely on clean layers. We are going for rich, decadent, and beautifully defined layers here. Since we are assembling immediately after baking the base, you’ll want that 9×13 pan ready to go.
You’re going to need the works for this one, but don’t panic; it all comes together faster than you think. The key is quality in that base, so if you can swing it, grab the best fudgy brownies you can find, or use your own amazing fudgy brownies recipe if you have one whipped up!
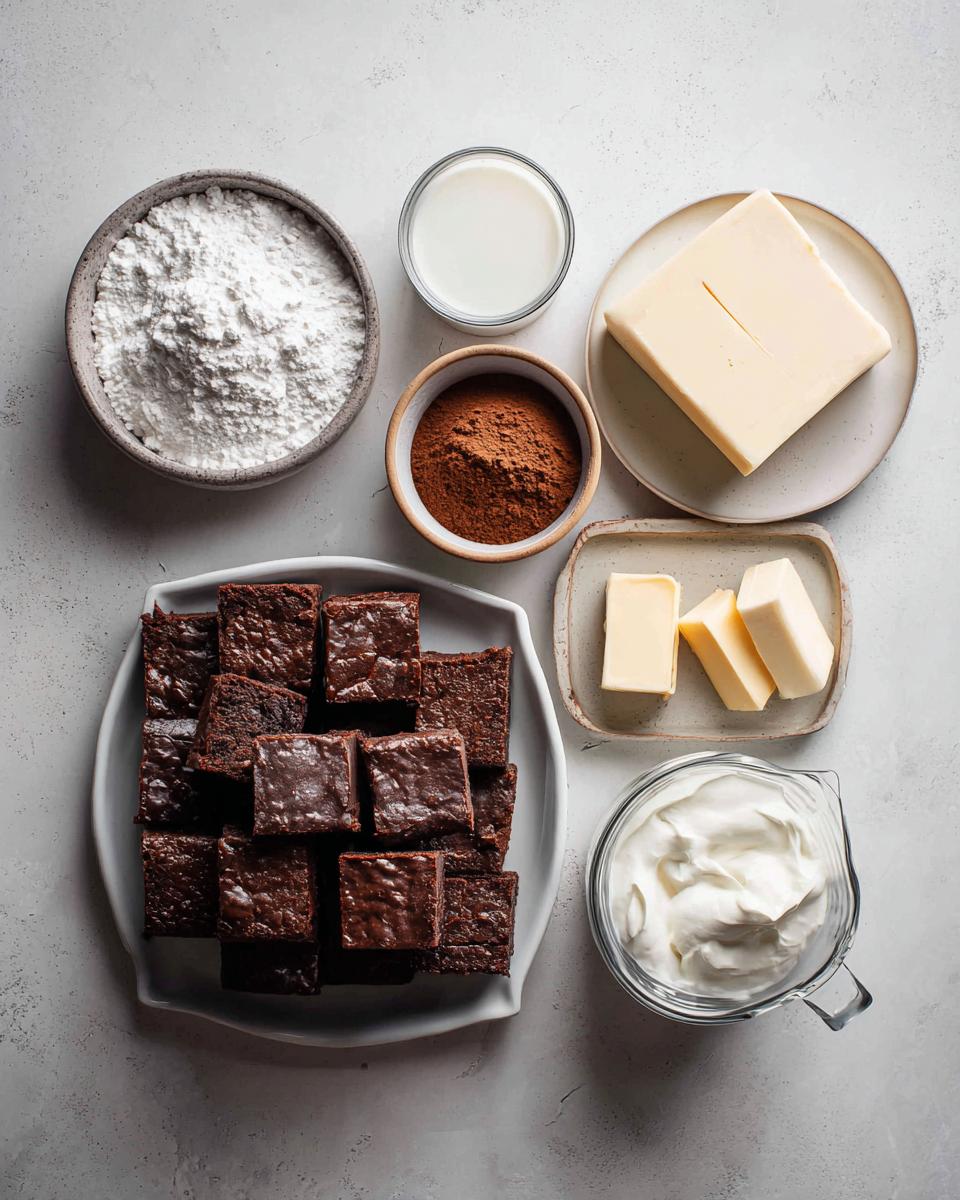
- 1 box (18.3 ounces) fudge brownie mix, plus ingredients listed on box (usually eggs, oil, water)
- 1 package (8 ounces) cream cheese, softened
- 1 cup powdered sugar
- 1/2 cup unsalted butter, softened
- 1 teaspoon vanilla extract
- 1 package (3.4 ounces) instant vanilla pudding mix
- 2 cups cold milk
- 1 package (3.4 ounces) instant chocolate pudding mix
- 2 cups cold milk
- 2 cups frozen whipped topping, thawed (or homemade whipped cream)
- 1/2 cup chocolate chips or shavings, for topping
Ingredient Notes and Substitutions for Your Brownie Refrigerator Cake
A few quick notes so you don’t run into trouble, okay? First, make sure the cream cheese and butter for that amazing middle layer are truly softened, or you’ll end up with lumps—nobody wants a lumpy creamy no bake dessert! Also, you absolutely must use the *instant* pudding mixes; the cook-and-serve kind won’t set up correctly in the fridge.
If you use store-bought, make sure they are a dense, fudgy variety. If you bake your own, let them cool completely, completely! We need structural integrity before we start layering this layered chocolate dessert.
Step-by-Step Instructions for the No Bake Brownie Cake
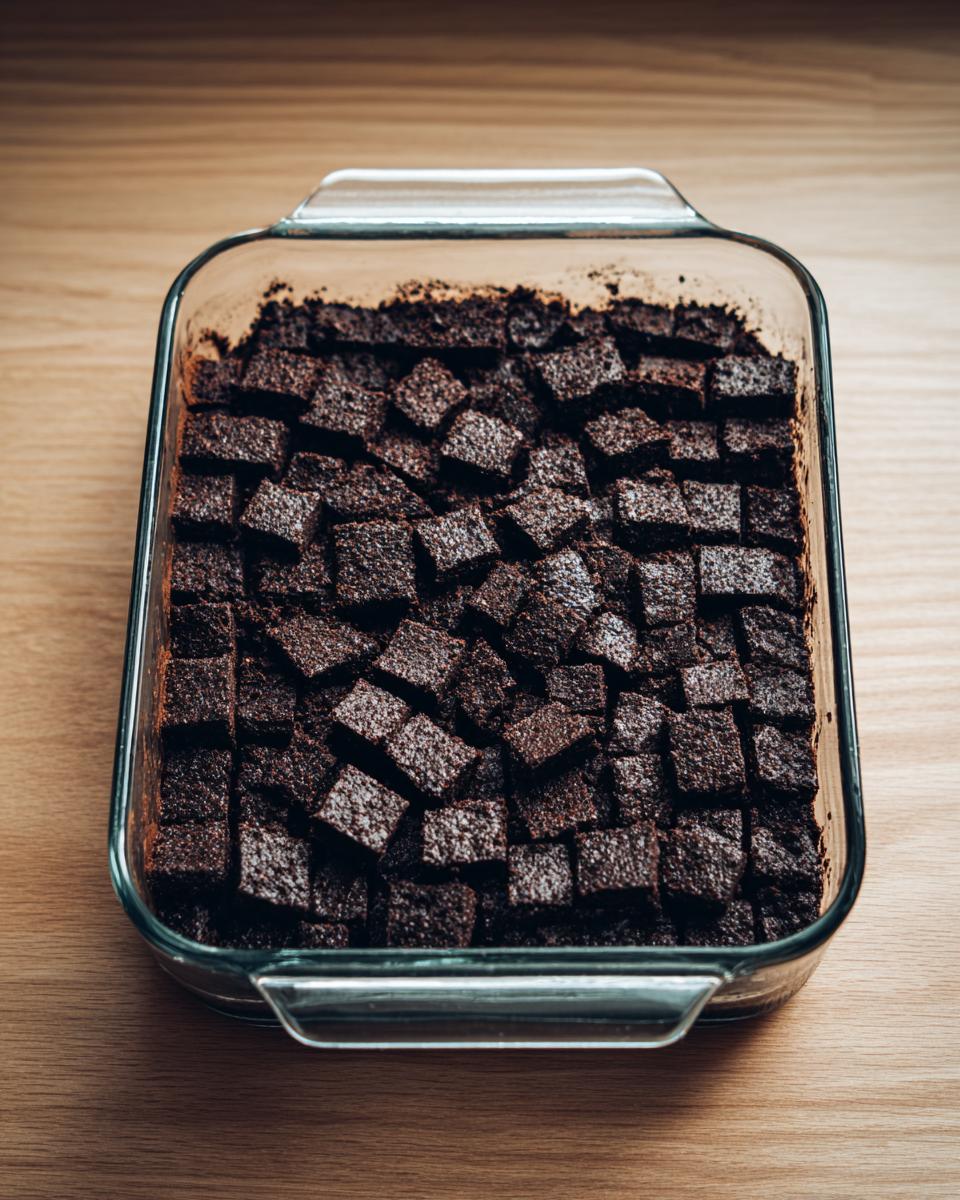
Alright, time to get hands-on! Even though this is an easy refrigerator dessert, following the sequence matters. First thing, and I mean *first*: Bake your brownies according to the box instructions in your 9×13 pan. Don’t try to get ahead of me here—they MUST be cooled completely. I mean room temperature cool, or better yet, slightly chilled. If they are even a little warm, your gorgeous cream cheese layer will melt right into them, and we can’t have that!
Once they are totally cool, cut them into uniform squares. You want to nestle these pieces tightly together to create that solid bottom layer that will anchor your whole brownie refrigerator cake. Arrange them snugly in the serving dish. After that, you get to start the fun part: the layering!
If you are looking for quick ideas to start your day before tackling this masterpiece, swing by my guide on easy breakfast recipes.
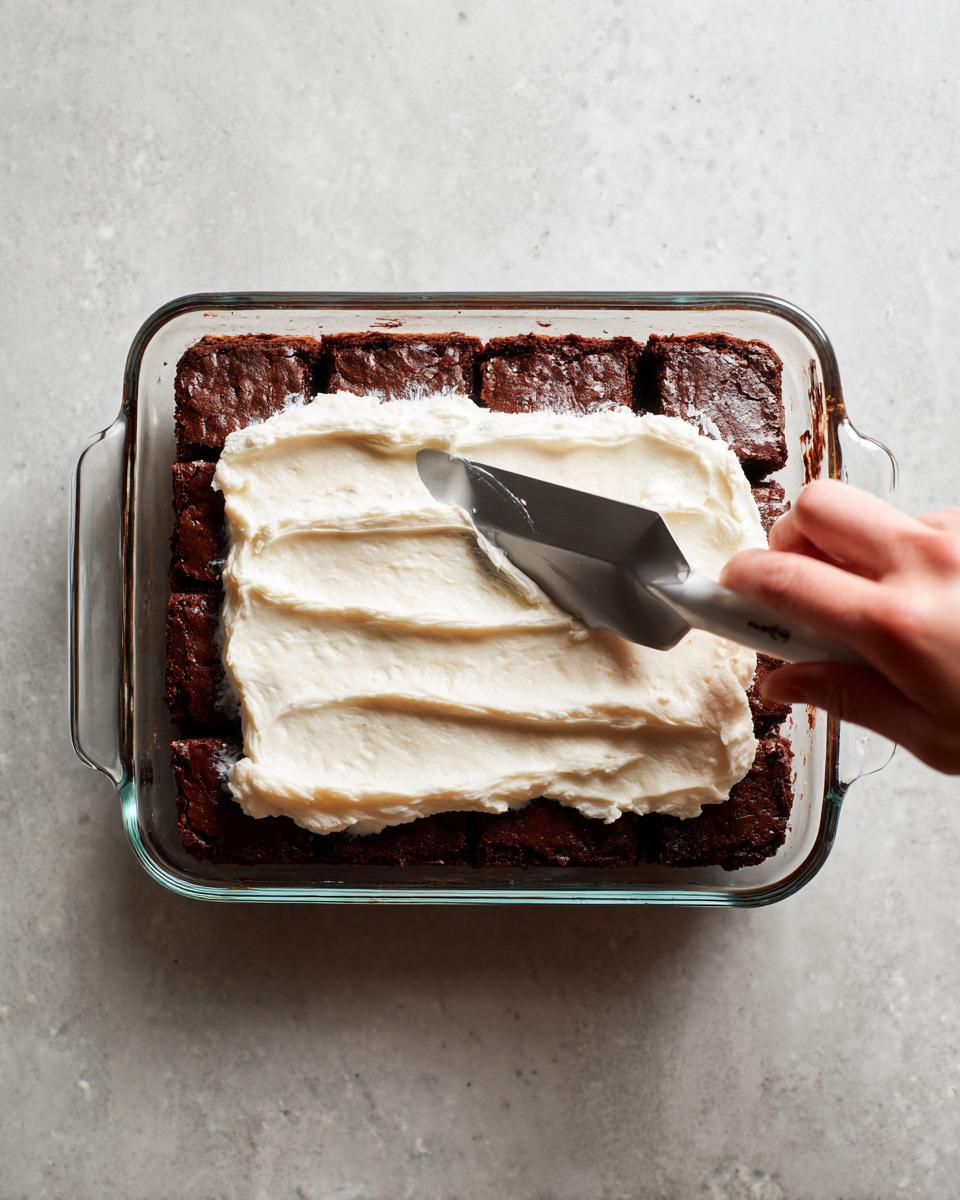
Building the Creamy No Bake Dessert Layers
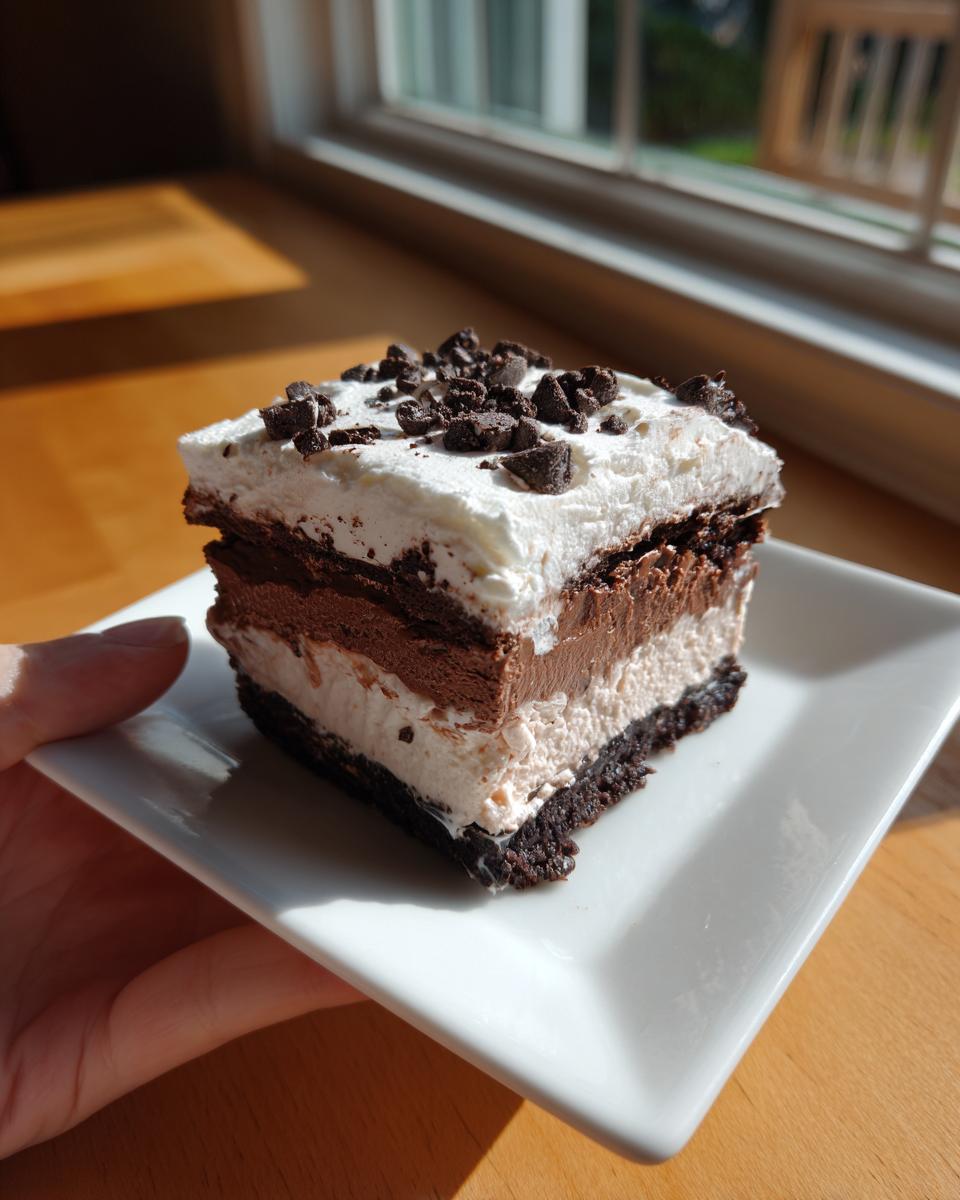
This is where the visual appeal happens for this layered chocolate dessert! Remember our creamy base from the ingredient list? Spread that first layer of cream cheese mixture evenly over the brownies. Take your time here; a smooth canvas makes the next layer look professional. Next up, whisk a pudding, spread it, then whisk the other pudding, and spread that one gently over the top.
The final touch before chilling is that fluffy topping—spread that on last. Make sure every layer is completely covered right to the edges. If you do this right, when you go to cut a slice later, you’ll see beautiful, distinct lines of chocolate and cream. It’s so satisfying!
Crucial Chilling Time for the Brownie Refrigerator Cake
Listen up, this is non-negotiable for any true icebox cake recipe: it needs time to relax and set. Cover your dish tightly with plastic wrap. You must chill this for a minimum of six hours, but I am begging you, let it go overnight if you can. That extended time is what transforms the separate layers into that perfect, sliceable structure we are after. Patience here means you get a perfect slice later!
Tips for Success When Making Your Brownie Refrigerator Cake
I’ve made this brownie refrigerator cake enough times now that I know exactly where people can trip up. My main goal is always a clean slice—no sliding layers, no gooey messes when you try to serve it at a party or potluck! The 9×13 pan really is your best friend here because it offers a nice, wide surface area, which means thinner layers that set up faster.
However, if you’re serving just a few people or want those perfect wedge shapes, grab a springform pan instead. Just line the bottom really well! The key to keeping things neat is making sure those rich pudding layers don’t mix too much with the brownie base or the top layer. If you’re into making rich, decadent sauces, my recipe for creamy Alfredo sauce uses a similar principle of careful layering to keep things smooth!
Also, don’t skimp on that initial cooling time for the brownies. If they are even slightly warm, that cream cheese layer melts instantly, turning your structured layered chocolate dessert into soup. Be patient; the fridge loves doing the hard work for you!
Storage and Reheating Instructions for This Chilled Chocolate Cake
Once this wonderful brownie refrigerator cake is set, you need to treat it right! Always keep it covered tightly with plastic wrap or a sealed lid while in the fridge. Because of all that pudding and cream, it keeps beautifully cold for about three to four days. We want this chilled chocolate cake to stay firm!
Now, can you freeze it? You absolutely can, but know that the whipped topping might weep a little when thawing. If you do freeze it, thaw it overnight in the refrigerator first. Seriously though, it tastes best when enjoyed cold within the first couple of days!
Frequently Asked Questions About the Brownie Refrigerator Cake
I always get so many great questions when people try making my layered desserts for the first time! That’s totally fair, because you want this brownie refrigerator cake to turn out perfectly, right? I’ve pulled together the most common things folks worry about when they are building this easy layered cake. Don’t hesitate to reach out if you have more questions; you can always find my details on the Contact Page!
Can I use homemade fudgy brownies recipe instead of a mix for this brownie refrigerator cake?
Oh, please do! If you have a killer fudgy brownies recipe you already love, that will only make this rich creamy cake better. The only rule is that no matter what you bake them in, they have to be completely, 100% cooled down before they ever touch that first layer of cream cheese filling. Warm brownies equal melty disaster!
What is the best way to cut this rich creamy cake cleanly?
This is the eternal question for any chilled chocolate cake! My trick? Don’t try to cut it until it’s been cold for at least eight hours—overnight is best. When you’re ready to serve, use a long, sharp knife dipped into very hot water. Wipe the blade totally dry between every single cut. That hot blade melts just enough of the chilled layers so they separate cleanly instead of dragging!
Serving Suggestions for Your Layered Chocolate Dessert
Now that you’ve created this masterpiece, you want to make sure you present it like the showstopper it is! Since this brownie refrigerator cake is so rich and intensely chocolatey, sometimes you need just a little brightness to cut through that decadence. Fresh raspberries or strawberries are absolutely perfect alongside a slice. They add that pop of color and tartness that just cleanses the palate between bites.
For the adults, this serves wonderfully beside a strong cup of coffee or an espresso. It’s a perfect centerpiece for any dessert table! If you’re planning a spread where you need savory options too, you have to check out my recipe for Cowboy Caviar—it’s always a huge hit!
Nutritional Estimate for One Serving of Brownie Refrigerator Cake
I always like to give a little heads-up on what’s in this rich dessert, although honestly, taste is the most important metric here! Based on the standard ingredients and the recipe yielding 12 generous slices, here is an approximate look at what’s in one piece of this chilled fudge cake.
Please keep in mind, these are just estimates, as the exact numbers depend heavily on the brand of brownie mix and pudding you choose. This is based on standard preparation only.
- Serving Size: 1 slice
- Calories: 410
- Fat: 22g
- Saturated Fat: 11g
- Carbohydrates: 52g
- Protein: 5g
It’s a decadent treat, for sure, but knowing those numbers helps when you’re deciding between a slice now or saving room for later!
Share Your Experience Making This Easy Layered Cake
Now that you’ve successfully built this amazing brownie refrigerator cake, I really want to know what you think! Did it set up perfectly for you? Did people love the layers?
Please leave a rating right here on the page and tell me all about it in the comments below. I truly rely on your feedback to know I’m serving up reliable recipes. If you took a fabulous photo of that perfect slice, tag me on social media—I absolutely love seeing your creations! If you’re curious about how I handle your data when you comment, you can check out my Privacy Policy.
PrintDecadent Brownie Refrigerator Cake: No-Bake Layered Chocolate Dessert
Make this rich, creamy Brownie Refrigerator Cake without turning on your oven. This easy, make-ahead dessert features layers of fudgy brownies, a smooth cream cheese mixture, chocolate pudding, and whipped topping. It is a guaranteed crowd-pleaser for parties or potlucks.
- Prep Time: 30 min
- Cook Time: 35 min
- Total Time: 7 hours 5 min
- Yield: 12 servings 1x
- Category: Dessert
- Method: No Bake/Chilling
- Cuisine: American
- Diet: Vegetarian
Ingredients
- 1 box (18.3 ounces) fudge brownie mix, plus ingredients listed on box (usually eggs, oil, water)
- 1 package (8 ounces) cream cheese, softened
- 1 cup powdered sugar
- 1/2 cup unsalted butter, softened
- 1 teaspoon vanilla extract
- 1 package (3.4 ounces) instant vanilla pudding mix
- 2 cups cold milk
- 1 package (3.4 ounces) instant chocolate pudding mix
- 2 cups cold milk
- 2 cups frozen whipped topping, thawed (or homemade whipped cream)
- 1/2 cup chocolate chips or shavings, for topping
Instructions
- Prepare and bake the brownies according to the package directions for a 9×13 inch pan. Let the brownies cool completely in the pan.
- Once cool, cut the brownies into uniform squares or rectangles. You will need enough pieces to cover the bottom of your serving dish (a 9×13 inch dish works well for layering). Arrange the brownie pieces tightly in a single layer in the bottom of the dish.
- Prepare the cream cheese layer: In a medium bowl, beat the softened cream cheese, powdered sugar, softened butter, and vanilla extract until the mixture is smooth and creamy. Spread this mixture evenly over the layer of brownies.
- Prepare the vanilla pudding layer: Whisk the instant vanilla pudding mix with 2 cups of cold milk until it thickens, about 2 minutes. Spread this layer over the cream cheese layer.
- Prepare the chocolate pudding layer: Whisk the instant chocolate pudding mix with 2 cups of cold milk until it thickens. Gently spread this layer over the vanilla pudding layer.
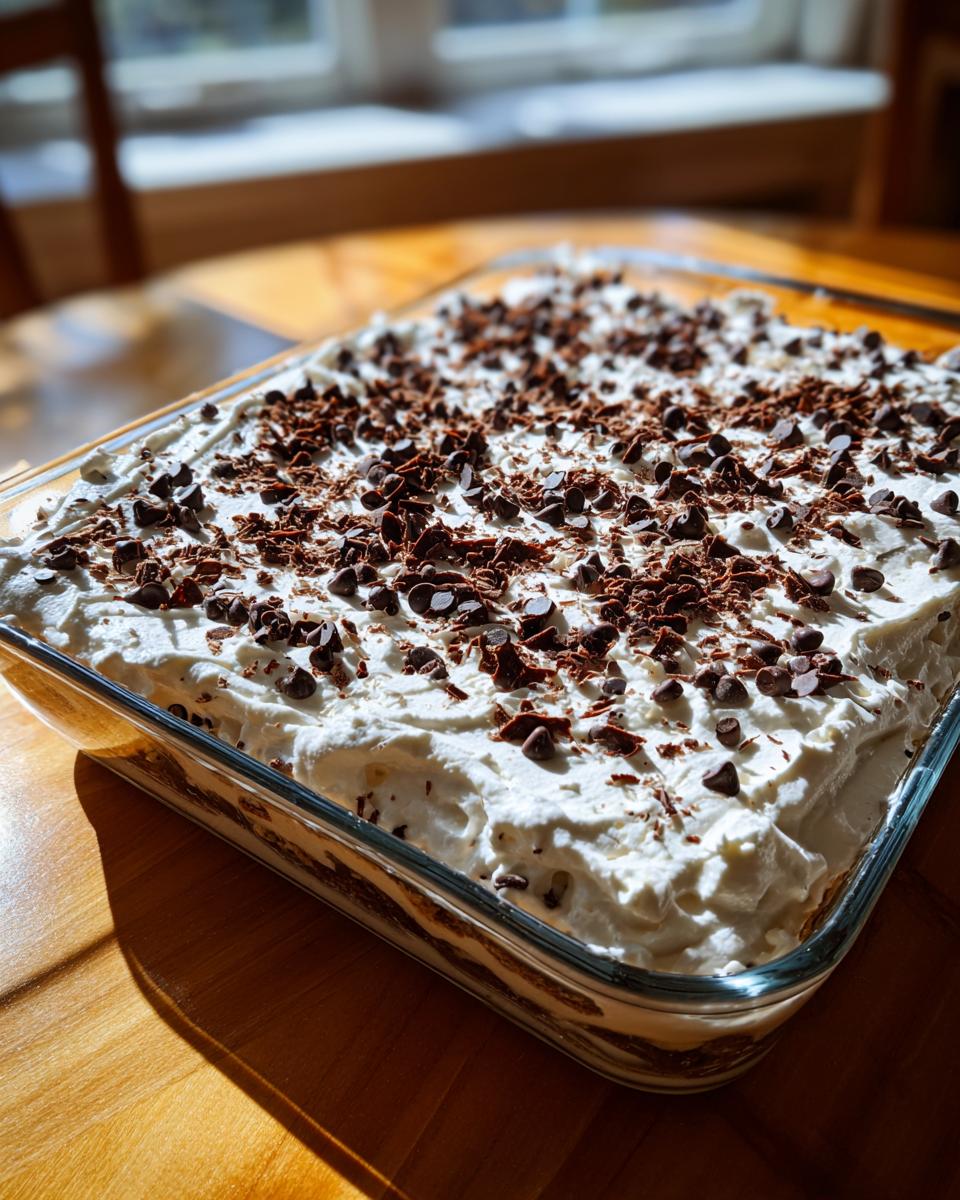
- Spread the thawed whipped topping evenly over the chocolate pudding layer.
- Sprinkle the top evenly with chocolate chips or shavings.
- Cover the dish tightly with plastic wrap and refrigerate for at least 6 hours, or preferably overnight, to allow the layers to set firmly.
- Slice and serve this chilled chocolate cake cold.
Notes
- For an even richer flavor, use store-bought fudgy brownies instead of baking from a mix.
- If you prefer a stronger chocolate flavor in the middle layer, substitute the vanilla pudding for an additional layer of chocolate pudding.
- You can use a springform pan for easier slicing and serving of clean wedges.
- This dessert tastes best when chilled for the full overnight period.
Nutrition
- Serving Size: 1 slice
- Calories: 410
- Sugar: 45g
- Sodium: 250mg
- Fat: 22g
- Saturated Fat: 11g
- Unsaturated Fat: 11g
- Trans Fat: 0.5g
- Carbohydrates: 52g
- Fiber: 2g
- Protein: 5g
- Cholesterol: 45mg