
When a chilly evening rolls around, or honestly, any time I need a taste of pure, unadulterated comfort, nothing beats a bowl of warm pudding. Forget those sad, thin packets; we’re talking about the real deal. This recipe for the ultimate creamy, old-fashioned stovetop rice pudding is what I turn to again and again. It’s rich, it’s perfectly nostalgic, and it proves that the best desserts require real connection—that’s the Seventh Flavour I talk about! After years of testing recipes in my own kitchen, I promise this method results in a wonderfully tender grain every single time. If you’re looking for easy dessert recipes that taste like a gentle memory, you’ve found it.
- Why This Creamy Rice Pudding Recipe is a Family Favorite Dessert
- Ingredients for Your Ultimate Creamy Rice Pudding Recipe
- How to Make Easy Stovetop Rice Pudding Step-by-Step
- Tips for Success with Your Homemade Pudding
- Serving Suggestions for Cinnamon Vanilla Pudding
- Storage and Make Ahead Dessert Instructions for Rice Pudding
- Frequently Asked Questions About Traditional Rice Pudding
- Estimated Nutritional Data for This Rice Pudding
- Share Your Experience Making This Rice Pudding
Why This Creamy Rice Pudding Recipe is a Family Favorite Dessert
I’ve tried baked versions, I’ve tried instant versions, but nothing brings that deep sense of cozy satisfaction like this stovetop classic. It truly embodies the spirit of a perfect Comfort Food Dessert because it feels so wonderfully slow-made, even though it comes together fast. People always ask me what makes my rice pudding different, and honestly, it’s the reliability of the texture. It’s never gluey! If you love simple and sweet, you can find more easy dessert recipes right here on the blog.
- It hits that sweet spot of being totally nostalgic without feeling dated.
- It’s shockingly simple—you don’t need fancy equipment for these Nostalgic Dessert Recipes.
- It tastes amazing warm right off the stove, but it’s just as good cold the next day.
Achieving the Best Old Fashioned Rice Pudding Texture
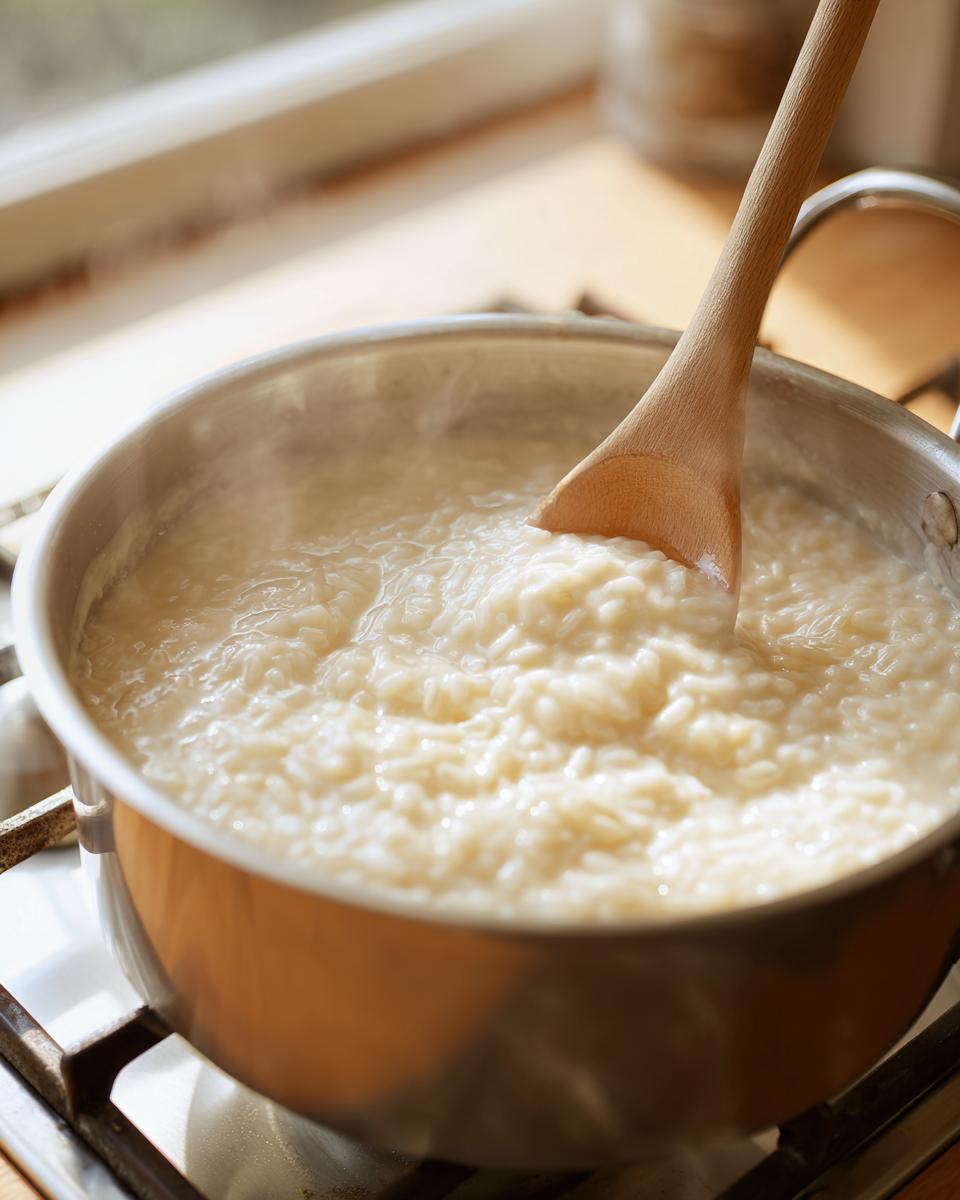
The secret sauce, if you can even call it that, is two-fold. First, you absolutely must use short-grain rice—Arborio works beautifully if you have it, or any medium-grain rice. Those stubby little grains release starch perfectly. Second, you have to commit to the gentle simmer. I watch the pot like a hawk during that 30-minute cook time. That low, slow heat encourages the rice to break down just enough, thickening the whole batch into that signature velvety rice pudding heaven.
Ingredients for Your Ultimate Creamy Rice Pudding Recipe
Okay, let’s talk about what you need for this utterly perfect bowl of comfort! I purposefully kept this list short because making something this rich and satisfying shouldn’t be complicated. We’re relying on full-fat ingredients here, totally embracing the classic nature of this dessert. Remember, these measurements are what gives us that truly irresistible spoonful every time. Don’t skimp on the milk; that’s where the magic—and the creaminess—comes from!
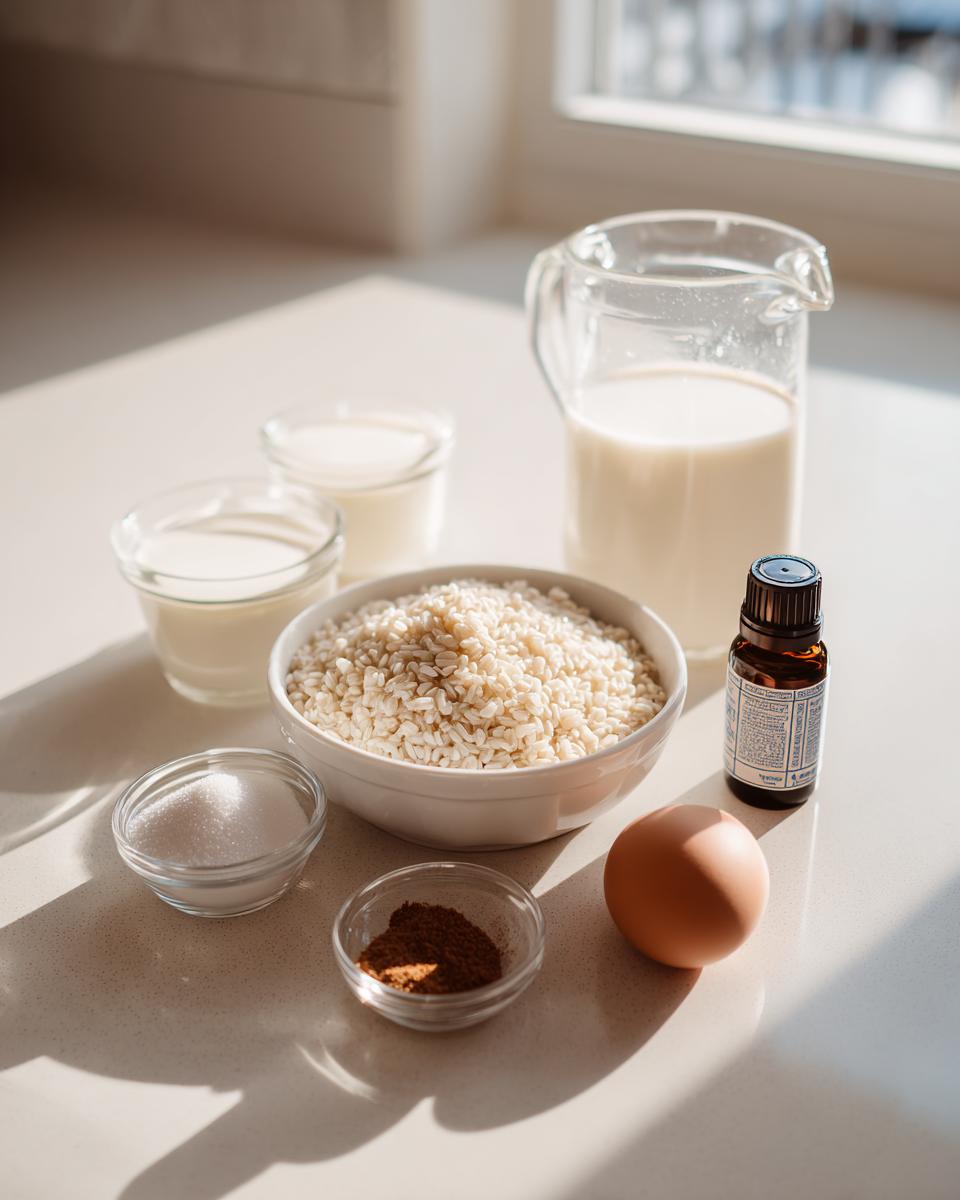
You will need:
- 1 cup of short-grain white rice (seriously, Arborio or medium-grain works so much better than long-grain varieties),
- 4 whole cups of whole milk—yes, use that whole milk!,
- 1/2 cup of simple granulated sugar,
- Just 1/4 teaspoon of salt to balance the sweetness,
- 1 teaspoon of pure vanilla extract,
- 1/2 teaspoon of ground cinnamon for warmth (we add more later!),
- And, if you want that extra velvety richness, 1 large egg, which needs to be lightly beaten before you start cooking.
Ingredient Notes and Substitutions for Perfect Rice Pudding
I need to chat briefly about the rice and the egg. For the absolute best texture in this homemade pudding, stick to short or medium-grain rice. Long-grain varieties just don’t break down correctly to give you that creamy hug. If you’re running late, you can cheat slightly by using 2 cups of cooked rice instead of the uncooked cup, but then you cut that cooking time way down—just simmer those cooked grains with the milk until thick!
Now, the egg. It’s totally optional, so if you’re vegan or just don’t want to deal with tempering, skip it! But wow, when you include that single, tempered egg, it adds a luxurious mouthfeel that takes this from great to heavenly.
How to Make Easy Stovetop Rice Pudding Step-by-Step
Making my version of rice pudding on the stovetop is pure meditation for me. It’s active cooking, but it’s low stress because you just need to pay attention to the heat. Start by tossing your rice, milk, sugar, and salt right into a heavy-bottomed saucepan. I emphasize heavy-bottomed because if you use thin metal, you’ll end up with scorched rice stuck to the base, and cleaning that up is the opposite of cozy! We want this to be one of your favorite easy breakfast recipes when served warm in the morning, too!
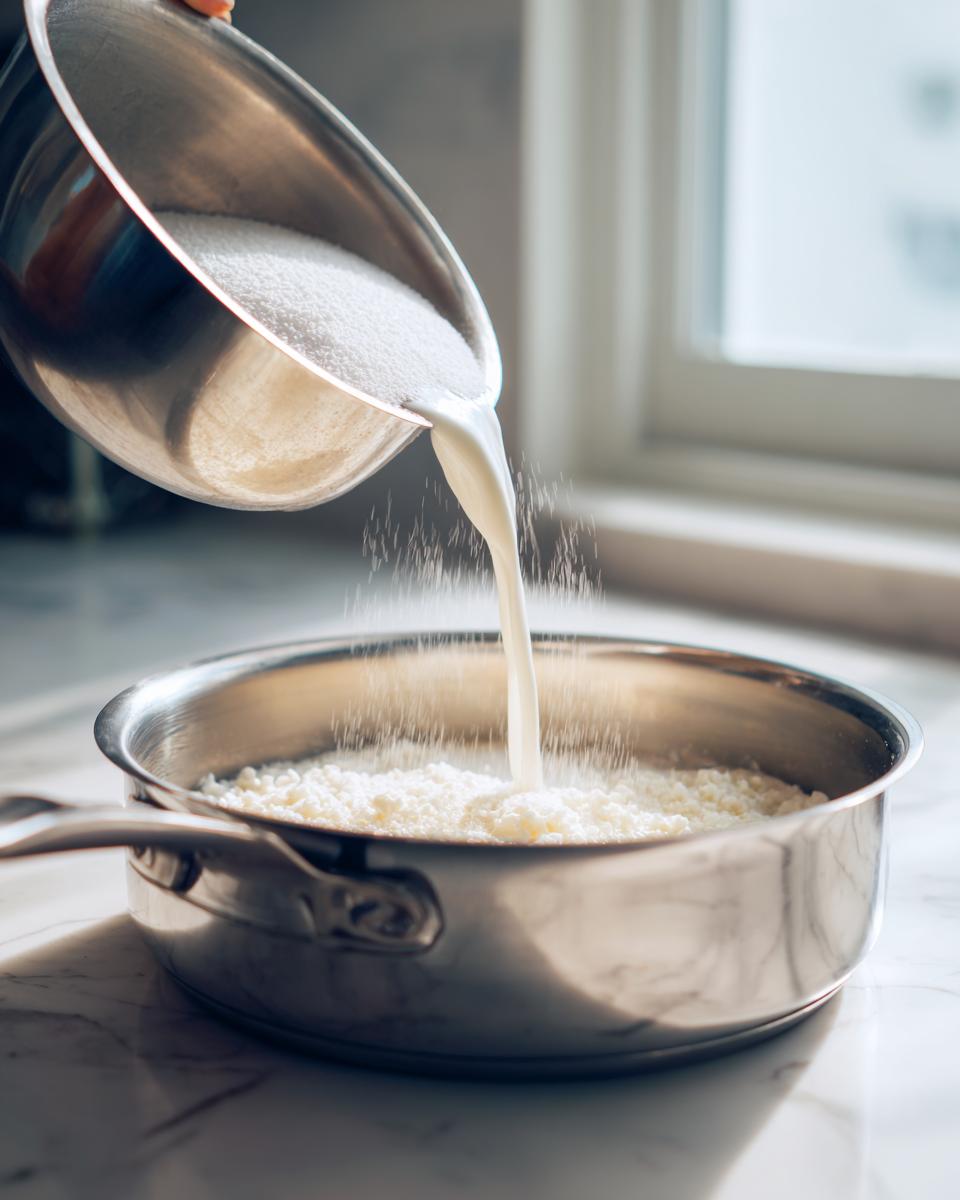
Get this over medium heat initially. You must stir frequently—I mean it! You’re stirring to keep that gorgeous starch moving and prevent it from deciding to cement itself to the bottom of the pan. Once it hits a gentle simmer, immediately drop that heat way down to low. Now we cook, stirring often, for about 30 to 40 minutes. Keep going until the rice is wonderfully tender and the pudding looks thick. Remember, it thickens a lot more when it cools, so don’t overcook it while it’s hot—that’s a classic mistake!
Once it’s perfect, pull it off the heat and stir in your vanilla extract. If you want to see the true depth of flavor this recipe offers, always use quality vanilla. If you’re making my optional addition, this is where things get interesting!
Tempering the Egg for Rich Dessert Ideas
If you decided to whip up that optional egg for extra richness, you need to treat it gently! This ensures you get unbelievably silky Rich Dessert Ideas and not scrambled bits floating around. This process is called tempering, and it’s super easy if you move slowly.
Take just about half a cup of the hot pudding mixture—the liquid part, not the solid rice bits—and whisk it slowly, bit by bit, into your beaten egg in a separate bowl. Keep whisking constantly as you pour that hot liquid in. Once that egg mixture is warmed up, slowly pour the whole thing back into the saucepan while stirring the main pot nonstop. Crucially, return the pan to tiny, tiny low heat for just one minute, stirring the whole time. Stop immediately! Don’t let it boil once that egg is in, or you’ll lose that beautiful smooth texture you just worked so hard for.
Tips for Success with Your Homemade Pudding
Getting that perfect, almost liquid-gold consistency when it’s hot is one thing, but I’ve learned a few tricks over the years to guarantee the absolute best result when serving your Homemade Pudding. A lot of my foolproof techniques come from solving problems I’ve run into myself—like when I thought making my own mayonnaise was too hard, only to realize that technique-sharing works across all creamy recipes!
When you take the pot off the burner, it’s tempting, absolutely tempting, to just walk away and let it cool on the counter, right? Oops! I once rushed this part, trying to get dinner on the table fast, and I ended up with a thick skin across the top the size of a dinner plate. So here is my fix: to prevent that skin from forming while it cools slightly, always lay a piece of plastic wrap directly onto the surface of the pudding. It doesn’t touch the sides of the bowl, just the top layer, and it traps just enough moisture to keep things smooth. If you learned anything from my easy homemade mayonnaise recipe, it’s that covering your creamy mixtures is key!
Also, remember what I said earlier? It thickens as it cools. So, if you pull it off the heat and it looks just slightly runnier than you think it should be, trust the process! It will firm up beautifully. If you pull it off and it’s already thick as cement, don’t panic; just stir in a splash of milk or cream when you reheat it later. That’s why I always keep a carton handy!
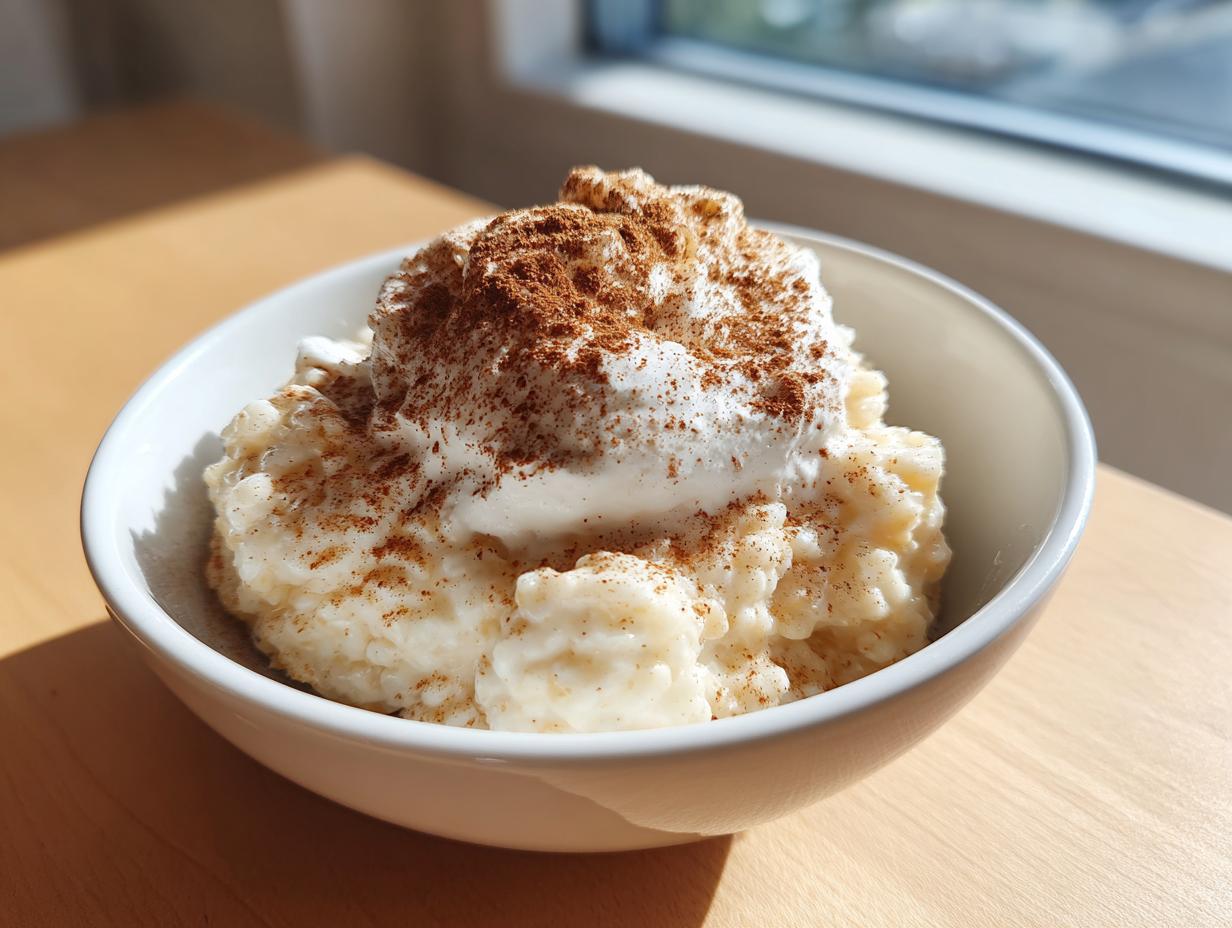
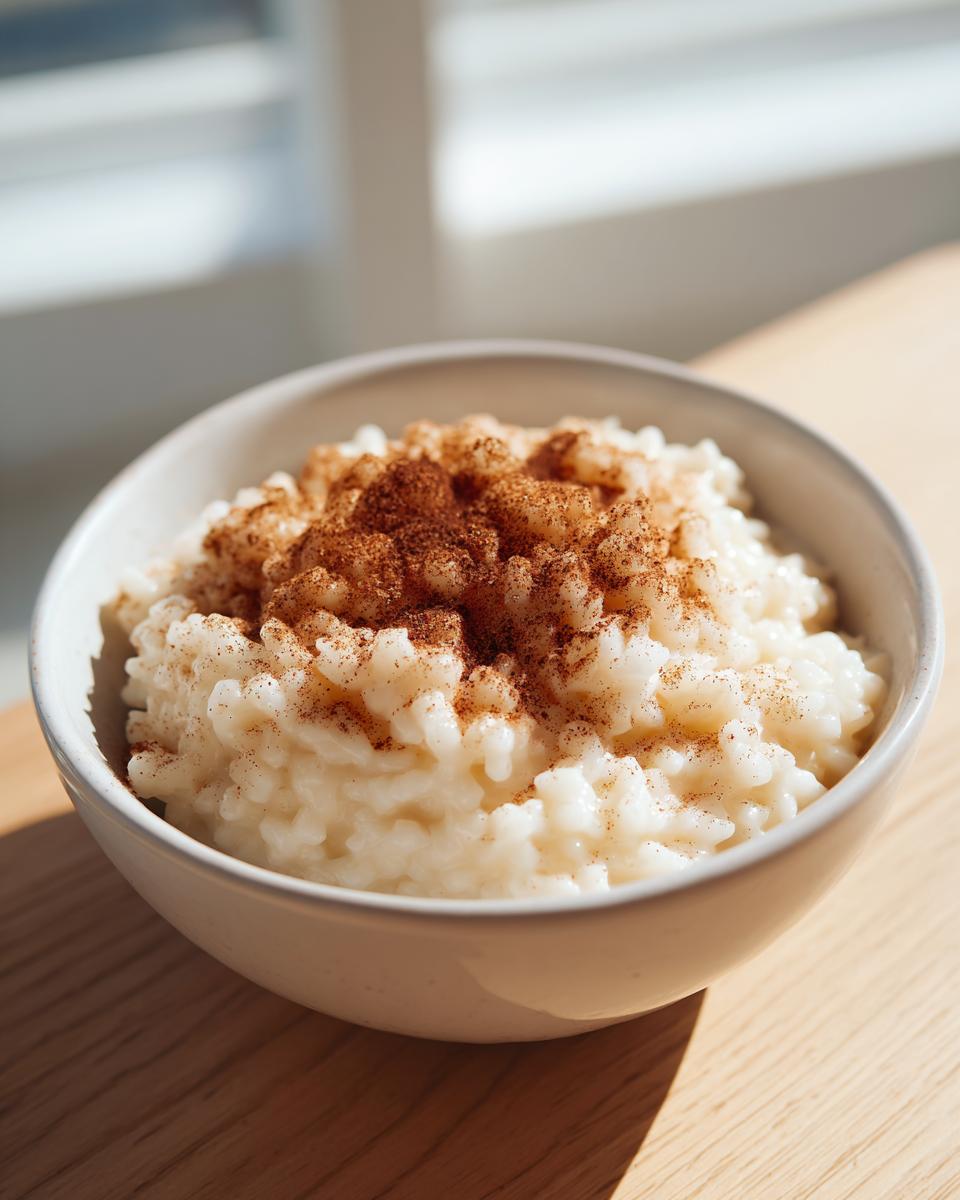
Serving Suggestions for Cinnamon Vanilla Pudding
This is one of those truly versatile desserts, which I love! You can certainly ladle out a big bowl of this classic cinnamon roll recipe companion when it’s still warm—the vanilla smell just blooms in the air, and it’s utter heaven. But honestly, I think the flavor compounds settle in if you chill it completely, making my Cinnamon Vanilla Pudding even better the next day. When serving it chilled, it sets up a little firmer, too.
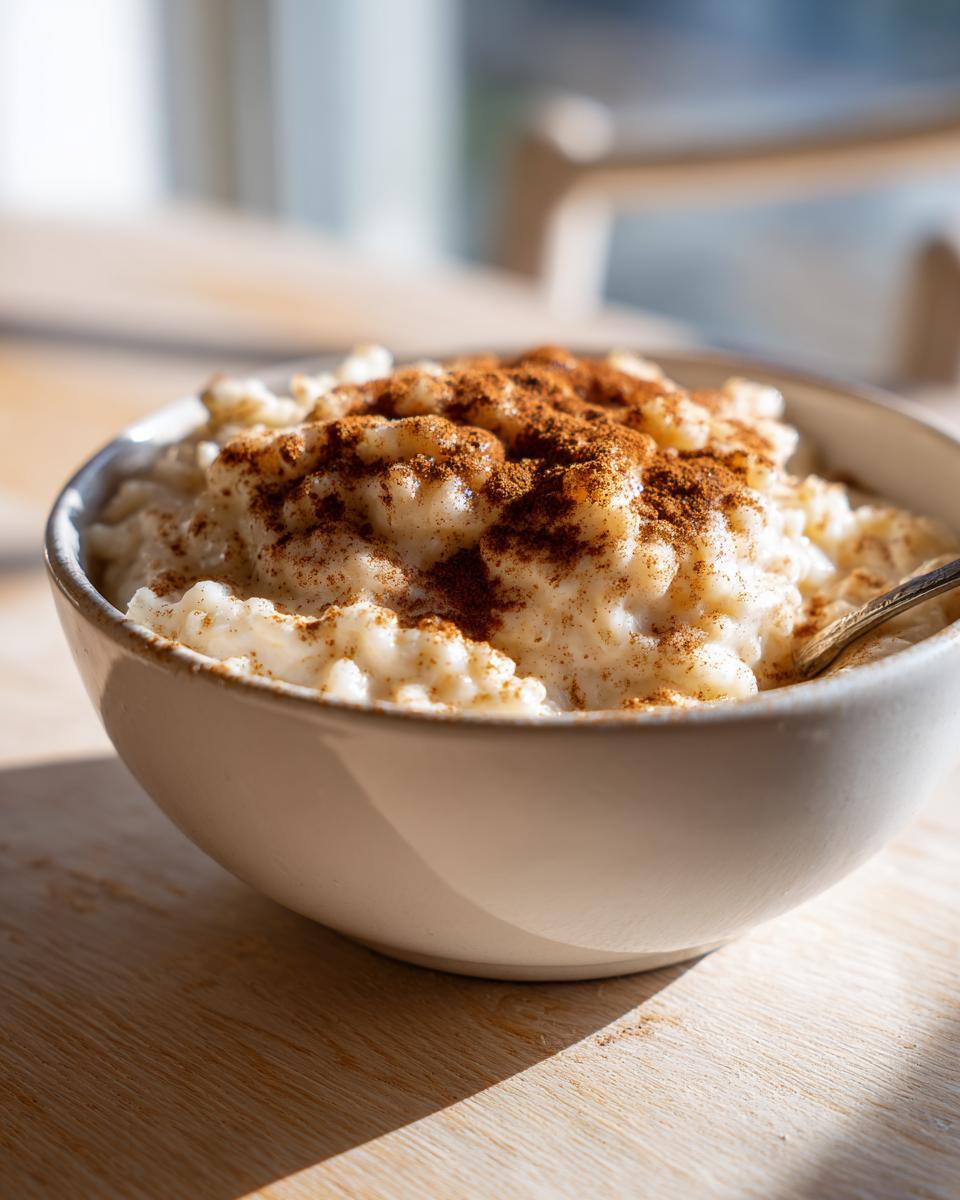
Don’t stop there with the toppings, though! A simple dusting of ground cinnamon, as I mention in the recipe, is traditional, but a tiny drizzle of maple syrup or maybe some toasted nuts works wonders for texture. It’s all about making that simple bowl feel special for a cozy night dessert!
Storage and Make Ahead Dessert Instructions for Rice Pudding
The best part about this rice pudding? It’s totally brilliant for making ahead! This absolutely falls into that category of a perfect make ahead dessert that saves you time when guests arrive. You can cook this up completely, let it cool down slightly, and move it right into the fridge. I’ve kept mine sealed up tight for up to four days, and it still tastes fantastic. Remember that plastic wrap trick I mentioned? Make sure you lay it right on top before chilling to keep that skin away. When you’re ready to serve, if you want it warm again, just heat it gently on the stove over low heat, stirring carefully, or microwave it in short bursts. It might need a tiny splash of milk because it will set up firm while resting, but that just means it’s ready for those cozy nights!
Frequently Asked Questions About Traditional Rice Pudding
I get so many emails asking about the little details when making this, and that’s wonderful! It shows you care about making the very best bowl of Traditional Rice Pudding. Here are a few things people often wonder about when testing out my stovetop method.
Can I use long-grain rice for this comforting dessert?
Honestly, you really shouldn’t for this specific recipe. I know it might seem easier to grab what you have, but long-grain rice, like Basmati or Jasmine, just doesn’t release the right amount of starch during cooking. That starch is what creates that essential creamy texture we are chasing. Stick to short-grain or Arborio if you can for the best results in this cozy dessert.
What is the trick for preventing a skin from forming on top?
This is the number one question about making Homemade Pudding! As soon as you pull the pot off the heat, take a sheet of plastic wrap and lay it directly on the surface of the pudding—I mean, touch it right onto the surface. Don’t let it sag down into the milk; just a direct cover. This traps the necessary steam and keeps that skin from hardening up while it cools. Works every single time!
Can I make this rice pudding in an Instant Pot or oven?
My recipe is specifically developed for the stovetop because that gentle, constant heat near the bottom of the pot is how we get the creaminess balanced with the tender rice grain. While you can certainly find recipes adapted for the Instant Pot or the oven, I can only highly guarantee the texture and timing in my contact section methods! For this classic, stick to the stove.
Is this recipe suitable for batch preparation as a make-ahead dessert?
Yes, absolutely! It’s fantastic for making ahead. Make it completely, let it cool a bit, and store it airtight in the fridge. Just plan on needing to stir in a little splash of milk when you reheat it, as it always gets a little thicker overnight!
Estimated Nutritional Data for This Rice Pudding
Now, before we get to the fun part of serving this delicious dessert, I have to give you my standard disclaimer, because I know you’re all health-conscious (even when indulging!).
Because I use whole milk and the optional egg for that true, rich texture, the numbers will vary depending on the exact brands of milk or sugar you swap in. Think of this as guidance, not gospel! I haven’t gone into the deep lab testing for this batch, so please treat these figures as estimates only. I’m focusing on the joy of a truly comforting bowl, not calorie counting!
Share Your Experience Making This Rice Pudding
Okay, now I need to hear from you! Did you enjoy this comforting serving of rice pudding? Please rate the recipe down below—Five Stars if it warmed your soul! I always love hearing how you customize your bowls. Did you serve it piping hot or did you let it chill completely? Drop a comment and tell me what toppings you added, too. I promise I read every story!
If you want to learn more about the story behind Seventh Flavour, come check out my ‘About’ page!
PrintThe Ultimate Creamy, Old-Fashioned Stovetop Rice Pudding

This recipe delivers a rich, smooth, and comforting old-fashioned rice pudding made easily on the stovetop. It uses simple ingredients to achieve a wonderfully creamy texture, perfect for a nostalgic dessert served warm or chilled.
- Prep Time: 5 min
- Cook Time: 40 min
- Total Time: 45 min
- Yield: 4 servings 1x
- Category: Dessert
- Method: Stovetop
- Cuisine: American
- Diet: Vegetarian
Ingredients
- 1 cup short-grain white rice (Arborio or medium-grain works well)
- 4 cups whole milk
- 1/2 cup granulated sugar
- 1/4 teaspoon salt
- 1 teaspoon vanilla extract
- 1/2 teaspoon ground cinnamon (plus extra for topping)
- 1 large egg, lightly beaten (optional, for extra richness)
Instructions
- Combine the rice, milk, sugar, and salt in a heavy-bottomed saucepan.
- Place the saucepan over medium heat. Stir frequently to prevent the rice from sticking to the bottom.
- Bring the mixture to a gentle simmer. Reduce the heat to low once simmering.
- Cook, stirring often, for 30 to 40 minutes, or until the rice is tender and the pudding has thickened to your desired consistency. The pudding will thicken more as it cools.
- Remove the saucepan from the heat. Stir in the vanilla extract.
- If using the egg for extra richness: Temper the egg by slowly whisking about 1/2 cup of the hot pudding mixture into the beaten egg. Then, slowly pour the tempered egg mixture back into the saucepan while stirring constantly. Return the pan to very low heat for 1 minute, stirring, but do not allow it to boil after adding the egg.
- Remove from heat immediately. Stir in the 1/2 teaspoon of cinnamon.
- Serve the rice pudding warm, or cover the surface directly with plastic wrap to prevent a skin from forming, and chill completely before serving cold.
- Sprinkle with extra cinnamon before serving.
Notes
- For a quicker version, you can substitute 2 cups of cooked rice for the uncooked rice, reducing the cooking time significantly.
- If you prefer a thinner consistency, add a splash more milk while reheating.
- This recipe is excellent for make-ahead dessert preparation; it stores well for up to four days in the refrigerator.
Nutrition
- Serving Size: 1 serving
- Calories: 350
- Sugar: 25g
- Sodium: 150mg
- Fat: 8g
- Saturated Fat: 4g
- Unsaturated Fat: 4g
- Trans Fat: 0g
- Carbohydrates: 60g
- Fiber: 1g
- Protein: 10g
- Cholesterol: 45mg