
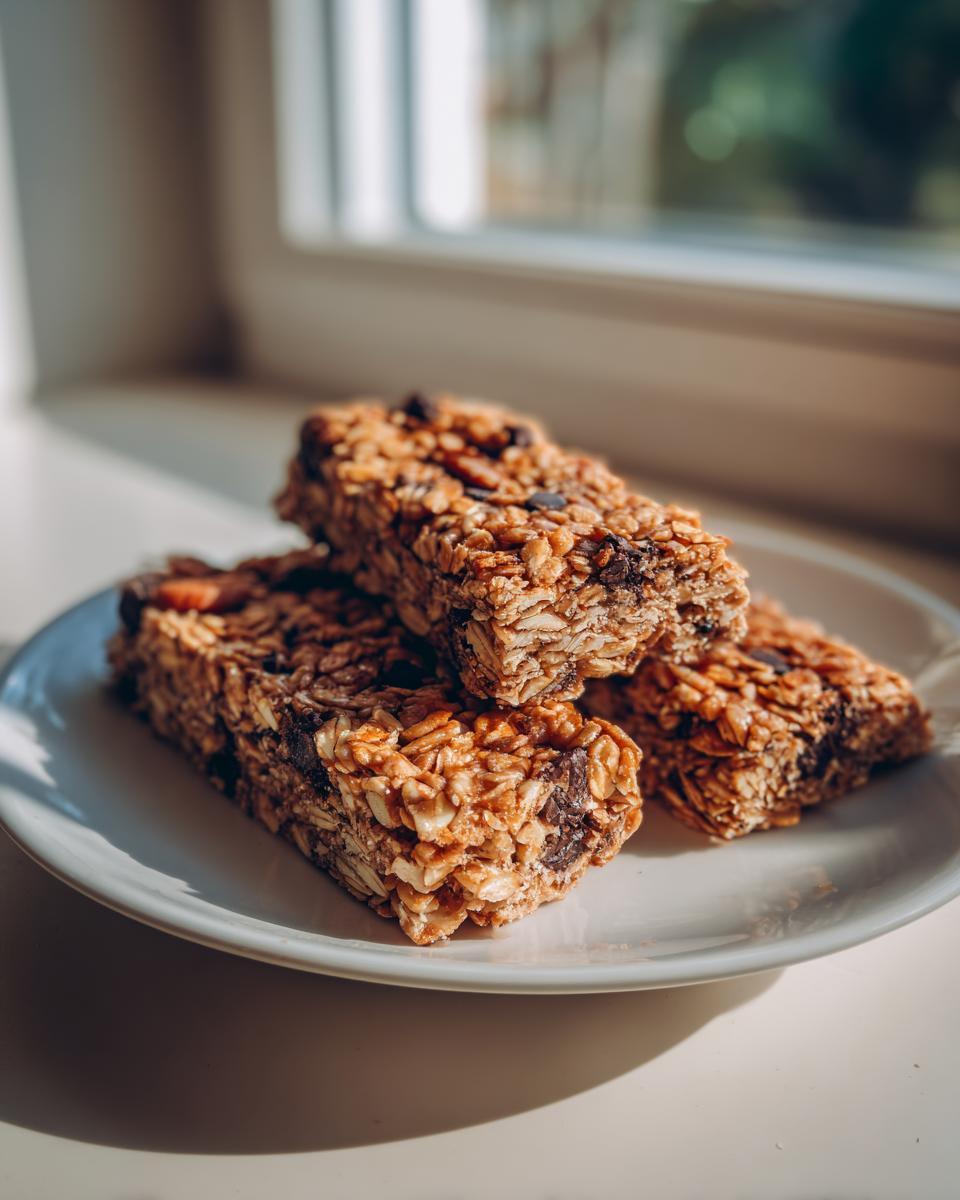
Look, let’s be honest: those store-bought bars taste like cardboard wrapped in corn syrup, don’t they? I spent years grabbing those convenience snacks when I was deep in my marketing hustle, only to feel completely let down by the ingredients list. That’s why I developed this recipe for the **best homemade granola bars** you’ll ever taste. Forget the weird stabilizers and refined sugars! Here at Seventh Flavour, we chase that Seventh Flavour—that feeling of comfort—and nothing screams comfort like a snack made with pure intention.
I promise you, once you master this simple baking technique, you will never go back. We are focusing on bars that are truly chewy, deliciously satisfying, and naturally sweetened. Making these little powerhouses from scratch is one of the most rewarding kitchen moments you can have. You control everything, and trust me, the aroma alone is worth the effort!
When you make these at home, you’re not just saving a trip to the store; you’re building confidence. Want to sneak in some extra flaxseed for the kids? Go for it! The recipe is incredibly flexible for healthy snack ideas. Let’s jump in and create some wholesome breakfast bars that actually taste like a treat.
- Why This Chewy Granola Bar Recipe Stands Out
- Gathering Ingredients for Your Homemade Granola Bars
- Step-by-Step Instructions for Baked Homemade Granola Bars
- Tips for Success with Your Easy Homemade Granola Bars
- Making No Bake Granola Bars Variations
- Serving Suggestions for Oatmeal Snack Bars
- Storage and Make Ahead Freezer Snacks for Homemade Granola Bars
- Frequently Asked Questions About Homemade Granola Bars
- Estimated Nutritional Data for This Recipe
Why This Chewy Granola Bar Recipe Stands Out
Seriously, I don’t know how I lived before finding the perfect ratio for these. What makes these **best homemade granola bars** so different is that they hit that sweet spot between soft and sturdy. They resist that sad, sugary crumble you get from anything pre-packaged. They truly satisfy that craving for **healthy snack bars** without tasting like cardboard, which is my highest compliment!
- They use natural sweeteners, skipping that refined sugar crash.
- They hold together beautifully once cooled—no more dusty backpack crumbs!
- They are loaded with wholesome oats and your favorite mix-ins.
- The flavor just tastes *real*, like actual food.
Achieving the Perfect Chewy Granola Bar Recipe Texture
It all comes down to the binder, honestly. If you use too much honey, they turn rock hard. Too little sticky stuff, and your **homemade granola bars** fall apart when you look at them sideways. We use a perfect balance of warm nut butter and honey (or maple syrup) that coats every oat just right. This ensures the final texture is springy and satisfyingly chewy every single time you bake a batch.
Gathering Ingredients for Your Homemade Granola Bars
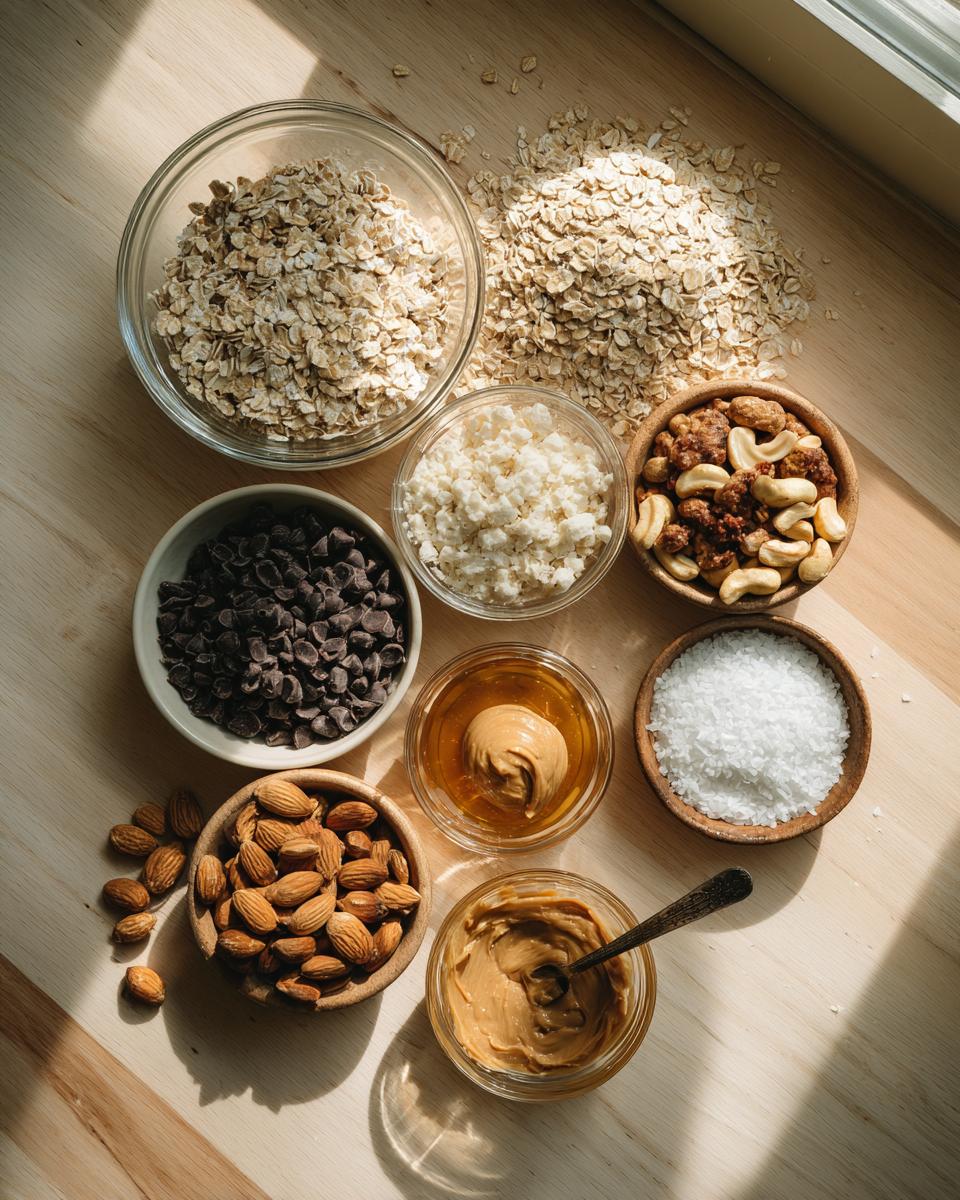
Okay, ingredient gathering time! This is where the magic starts, but honestly, there’s nothing stressful here. Everything you need for these truly **best homemade granola bars** is probably already in your pantry. We’re keeping the list short because simple is better, especially when aiming for those perfect **kid friendly snacks**.
- 2 cups rolled oats (the regular kind works best!)
- 1 cup crispy rice cereal
- 1/2 cup chopped almonds or walnuts
- 1/2 cup mini chocolate chips
- 1/2 cup natural peanut butter or almond butter
- 1/3 cup honey or maple syrup
- 1 teaspoon vanilla extract
- 1/4 teaspoon salt
Ingredient Notes and Substitutions for Customizable Snack Bars
This recipe is built for adapting! That’s what makes for the best **customizable snack bars**. If you have a nut allergy, swap the peanut butter for sunflower seed butter—it binds just as nicely. For sweetness, you can use agave instead of honey or maple, though you might need a smidge less since agave is sweeter. Don’t skip the salt, though! It really wakes up those oat flavors in your **homemade granola bars**.
Step-by-Step Instructions for Baked Homemade Granola Bars
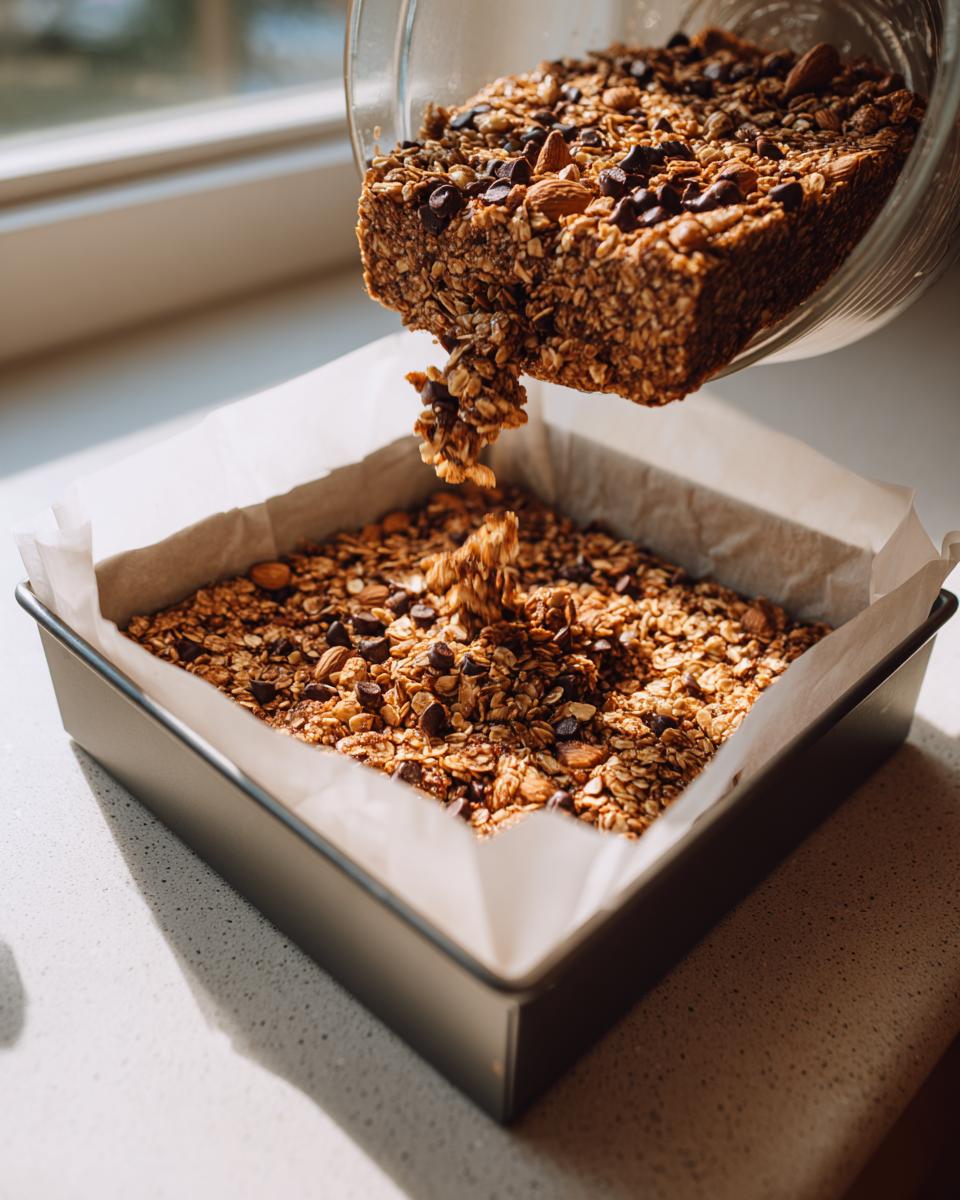
Alright, let’s get these babies into the oven! The baking method is what gives us that slightly crispy-on-the-outside, chewy-on-the-inside texture that makes these vastly better than the store-bought versions. First things first, get your oven warming up to 350°F (175°C). Line an 8×8 inch pan, and I mean *really* line it with parchment paper, leaving those nice overhang flaps—those are your handles later!
In a big bowl, just toss all your dry stuff together: oats, cereal, nuts, and chips. Give it a quick stir so everything gets introduced. Then, we move to the wet ingredients, and here’s where we build flavor before we bake our **homemade granola bars**.
If you’re looking for more wholesome ways to start the day, you can check out my guide to easy breakfast recipes for inspiration!
Preparing the Wet Binder Mixture
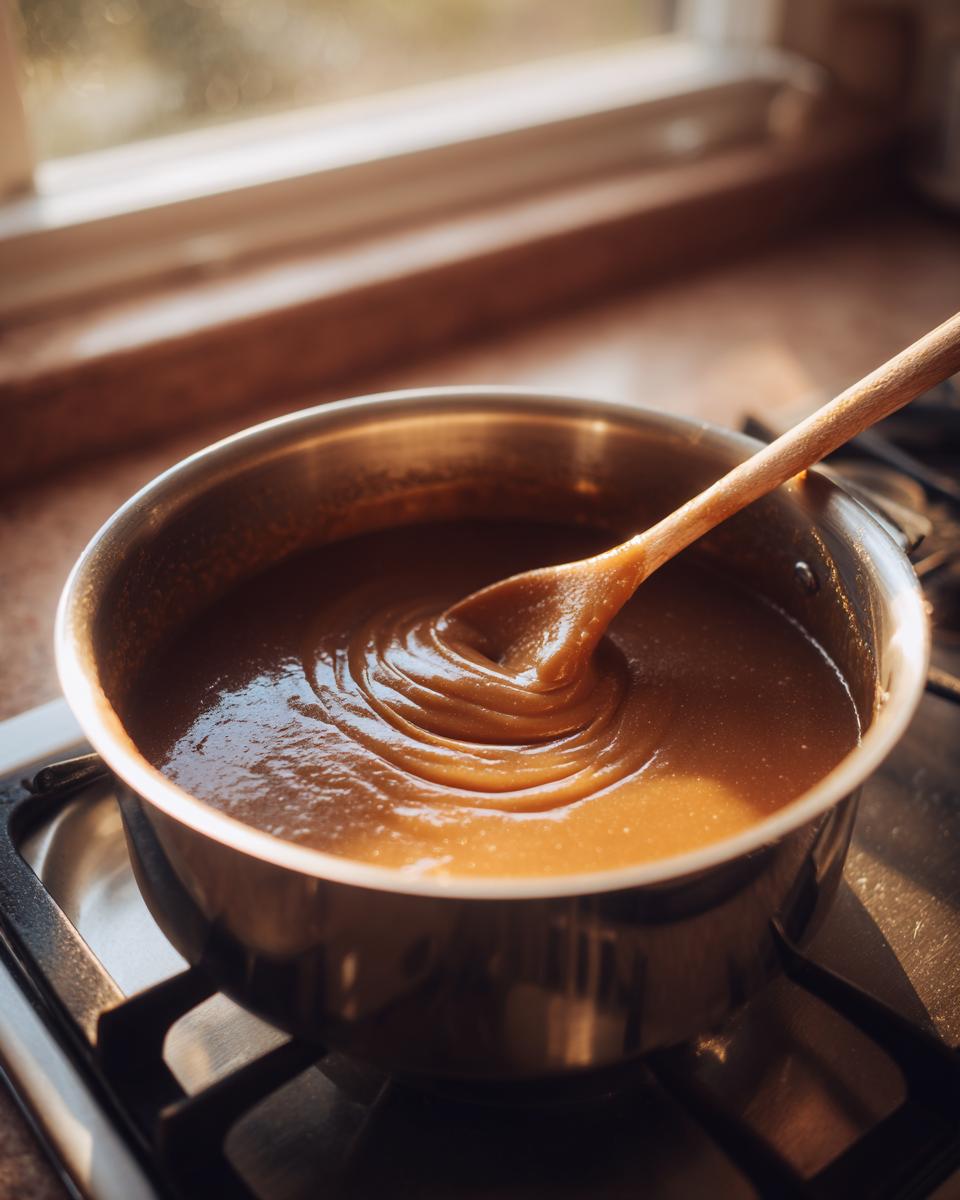
This is crucial for binding! In a small saucepan over low heat—low heat is the key here, folks—you’re going to warm up the nut butter, honey (or maple syrup), vanilla, and salt. We are gently melting it until it’s silky smooth and easily runny. Do **not** let this boil! Boiling changes the sugar structure and can make your finished bars brittle instead of beautifully chewy. We want smooth, warm liquid gold that coats everything evenly.
Baking and Cooling the Homemade Granola Bars
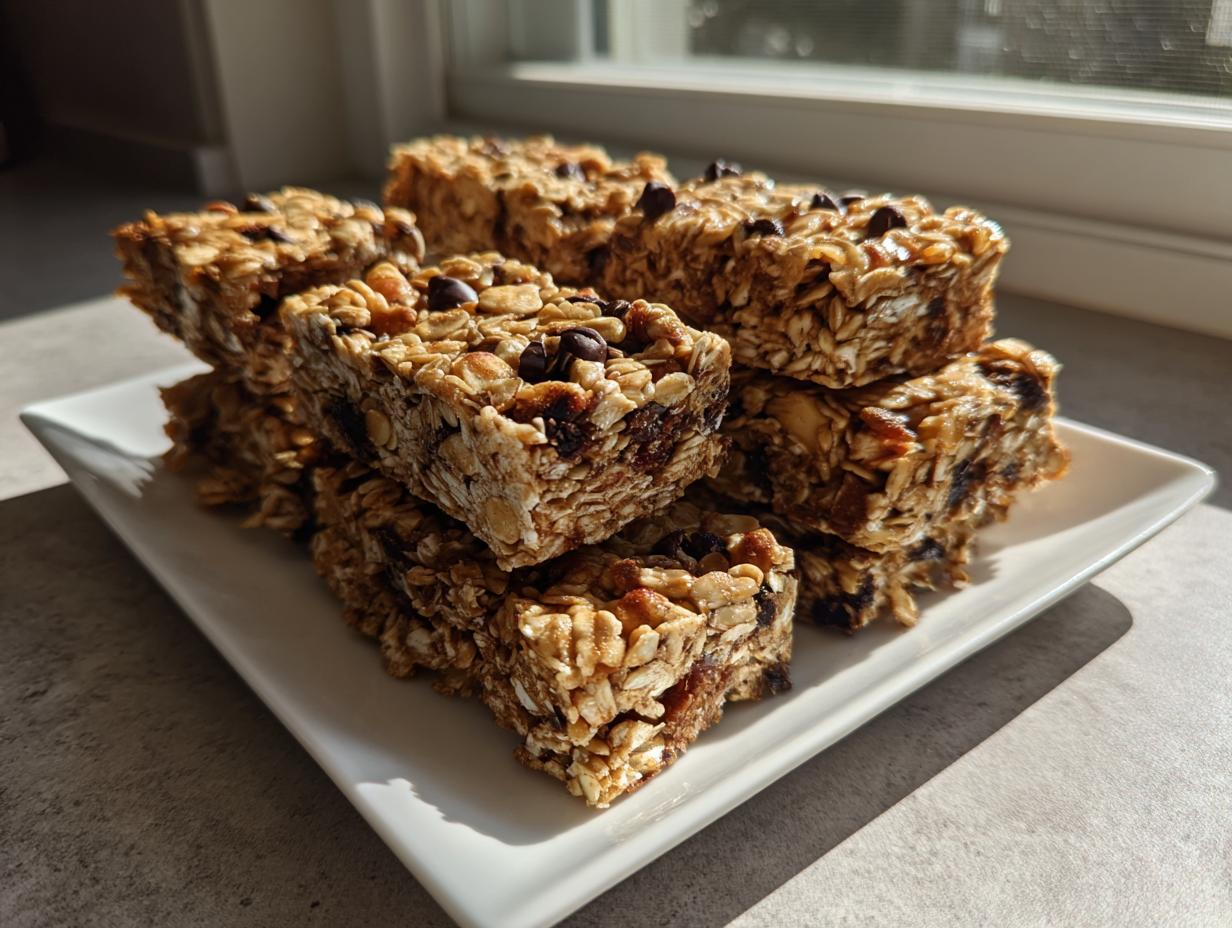
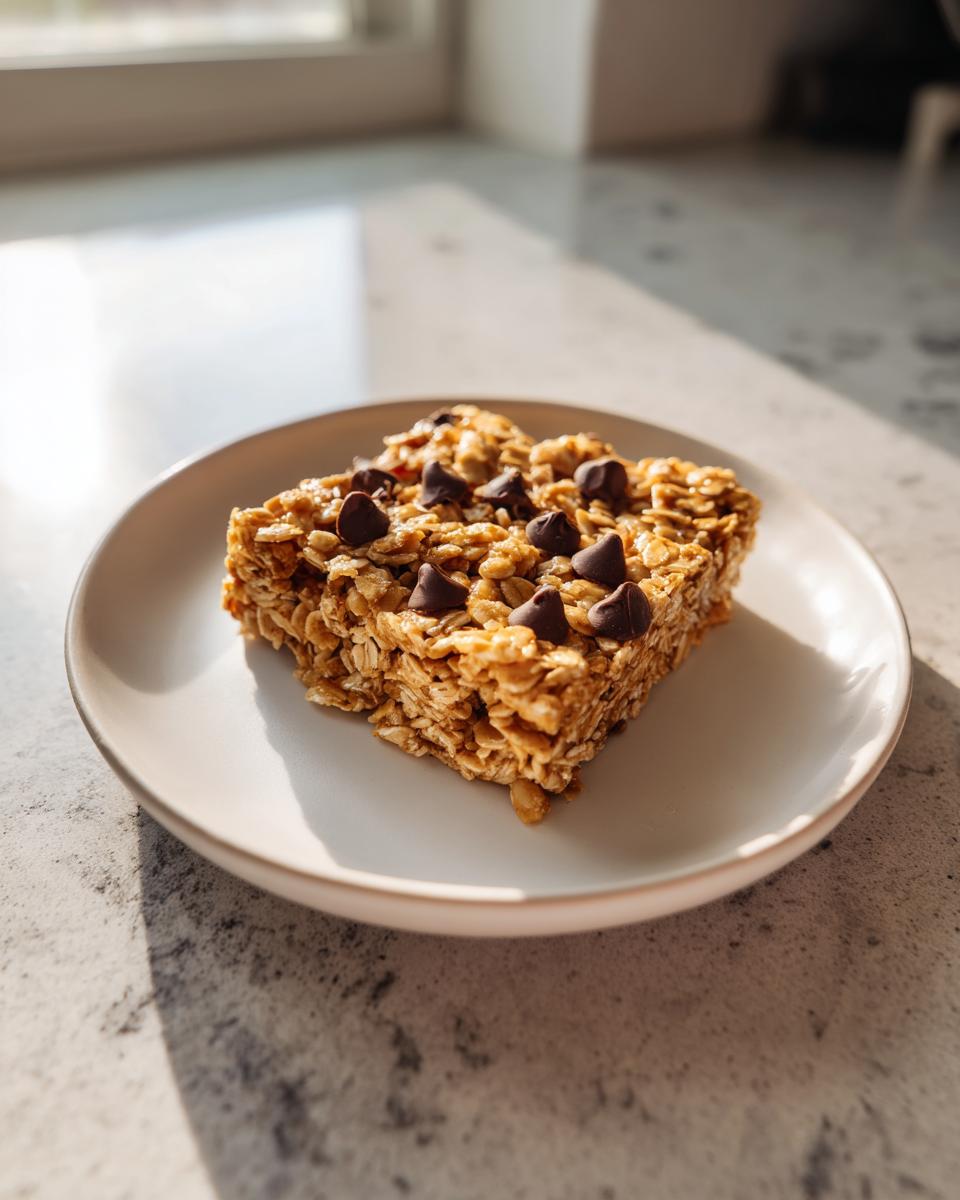
Pour that warm binder over your oat mix and stir immediately until every single oat flake looks glossy and coated. Then, transfer it to your prepared pan. You absolutely must press this mixture down super firmly! I use the back of a flat spatula or another piece of parchment paper to really compact it—this step is non-negotiable if you want bars that stick together. Bake for about 15 to 18 minutes until you see those edges get just lightly golden brown. Then, remove them and let them cool completely in that pan. Seriously, don’t rush this cooling part for your **homemade granola bars**; it sets the structure for perfect cutting.
Tips for Success with Your Easy Homemade Granola Bars
Even with a foolproof recipe for **homemade granola bars**, sometimes things can go a little sideways. I want to save you the headache of crumbly bars, so here are the hard-won lessons from my own kitchen testing. The biggest secret? Pressing! You can’t be shy when packing the mixture into that pan. Seriously, use your weight to compact it down evenly. That compression is what keeps these otherwise soft **easy homemade granola bars** intact.
Another thing to watch out for is your sweetener temperature. Remember how I stressed not boiling the honey mixture? If it gets too hot, the sugar crystallizes weirdly during cooling, making things brittle. If you’re looking for other simple, dependable kitchen hacks—believe me, I have a few of those for easy homemade mayonnaise too!
Finally, use room temperature nut butter. Cold butter or peanut butter won’t blend properly with the warm honey, leading to streaks of unmixed ingredients. Those unmixed spots become weak points where your beautiful **homemade granola bars** will snap apart later.
Making No Bake Granola Bars Variations
Now, I know some mornings are just too chaotic for turning on the oven, right? Maybe you’re worried about the kids messing with the pilot light, or maybe it’s just a scorching hot summer day and adding more heat to the house seems criminal. Good news! These **homemade granola bars** are fantastic when made completely **no bake granola bars** style.
The adaptation is super simple, but where we bake to firm things up, the no-bake method relies entirely on cold time to set the binder. You’ll skip steps one and four in the instructions above—no preheating and no baking time.
You’ll still gently warm that peanut butter and honey mixture until it’s pourable—don’t skip warming it, or it won’t coat the oats evenly! Once everything is mixed in the bowl, press it down *extremely* firmly into that parchment-lined pan. I mean, press it like you mean it! If you want extra guidance on how to make the absolute easiest, tastiest no bake granola bars that use only five ingredients, I have a quick guide linked right here.
Once it’s packed in tightly, cover the pan and stick it right into the refrigerator. You need to let those bars chill out and firm up for at least two full hours. Honestly, I leave mine in overnight for the absolute best cutting result. When they are totally firm from the cold, use those parchment overhangs to lift the block out, and slice them into your perfect **chewy granola bar recipe** portions!
This method is a lifesaver for meal prep, turning your **homemade granola bars** into fantastic **make ahead freezer snacks** for busy weeks!
Serving Suggestions for Oatmeal Snack Bars
Okay, now that you have these glorious, perfectly chewy **oatmeal snack bars** cooling, it’s time to think about eating them! Sometimes the best part of baking isn’t just the making; it’s figuring out the best way to enjoy the spoils. Since these **homemade granola bars** are so wholesome, they work for practically any time of day.
For a true wholesome breakfast bar moment, I love slicing one up and crumbling a little bit over a bowl of Greek yogurt, maybe drizzled with a tiny bit of honey if you’re feeling indulgent. They add such a fantastic crunch!
If you’re packing these for lunch boxes, they are perfect as-is, but if you’re enjoying one right away with your coffee, try warming your bar up for just ten seconds in the microwave. It softens the peanut butter just enough that you get that lovely, gooey texture again. It’s like eating a warm oatmeal cookie, only way better because you made it!
If you’re looking for other hearty, feel-good breakfasts that use oats, you simply have to check out my recipe for banana oatmeal pancakes—they are lifesavers on weekend mornings!
Also, don’t forget that since these crackers are naturally sweetened and packed with good fats, they make a surprisingly great base for an afternoon pick-me-up alongside a crisp apple or a handful of grapes. They just keep everything balanced, which is what we aim for with any great snack!
Storage and Make Ahead Freezer Snacks for Homemade Granola Bars
This is one of my favorite parts about making a big batch of **homemade granola bars**: knowing that a healthy snack is waiting for me all week long! The great thing about the binding ingredients we used—that warm peanut butter and honey mixture—is that they are actually quite stable. I rarely have to worry about these falling apart before I eat them.
For everyday storage, you just need an airtight container. I usually use a glass container with a tight lid, and I try to separate the layers with a small square of parchment paper just to make sure they don’t stick together once they start warming up in the kitchen air. Stored this way at cool room temperature, these **homemade granola bars** stay perfectly chewy and fresh for a solid week. Honestly, they rarely last that long in my house, but that’s the guideline!
If you are thinking ahead—because that’s what the best home cooks do, right?—these are absolutely fantastic **make ahead freezer snacks**. Throw them into a freezer-safe zip-top bag or container, making sure to separate layers with parchment or wax paper again. They freeze beautifully!
The best part? You don’t even have to defrost them fully if you’re in a hurry. I’ll often grab a frozen bar on the way out the door, and by the time I reach my desk or the carpool line, it has thawed just enough to be perfectly firm but slightly soft—like a cold, chewy treat. It’s honestly the easiest way to stock up on **kid friendly snacks**!
Frequently Asked Questions About Homemade Granola Bars
I get so many questions about customizing these recipes, and I love hearing how you’re all tweaking them! Since there are so many possibilities for these **homemade granola bars**, I wanted to tackle the most common things folks ask me when they are aiming for the absolute **best homemade granola bars**.
Why are my homemade granola bars crumbly?
Oh, that’s the classic heartbreak! Usually, crumbling happens for two reasons: either you didn’t pack the mixture down firmly enough into the pan—remember, press it like you mean it!—or you didn’t let them cool completely before cutting. If you try to slice them while even slightly warm, the binder hasn’t fully set, and you end up with a mess. For a truly **chewy granola bar recipe**, patience during the cooling stage is everything.
How can I make these gluten-free?
This is super easy for **healthy snack bars**! The oats are the main ingredient to watch out for. Make sure you use certified gluten-free rolled oats. Everything else—the honey, the peanut butter, the nuts—is naturally gluten-free. Just swap those standard oats for GF ones, and you’ve got perfect **wholesome breakfast bars** that everyone can enjoy!
Can I use different additions to make them kid friendly snacks?
Absolutely! That’s the beauty of this recipe; it’s designed to be flexible. If your kids aren’t big fans of nuts, just swap them out for sunflower seeds or pumpkin seeds. You can increase the **chocolate chip granola bars** factor by adding more chips or using dried fruit like raisins or chopped apricots for a different flavor profile. They become the best **kid friendly snacks** when they include things they actually *like*!
If you ever have another question about technique or need a suggestion for another recipe, please don’t hesitate to reach out through my contact page—I absolutely love hearing from my fellow home cooks!
Estimated Nutritional Data for This Recipe
Okay, let’s talk numbers for our amazing **homemade granola bars**. I always keep an eye on this when I’m making **healthy snack bars**, especially when I know the kids are going to eat three of them in one sitting! I’ve done the calculations based on using natural peanut butter and honey for a standard 12-bar yield.
Keep in mind, because these are **customizable snack bars** and you might swap peanut butter for almond butter or use a different sweetener, these numbers are just a guide. They’re a great starting point for tracking, but your actual nutrition will depend on what you toss in there!
- Serving Size: 1 bar
- Calories: 210
- Fat: 10g
- Saturated Fat: 3g (It’s the butter/nut butter working, friends!)
- Trans Fat: 0g (Yes!)
- Cholesterol: 0mg
- Sodium: 95mg
- Carbohydrates: 30g
- Fiber: 3g
- Protein: 6g
- Sugar: 10g (Mostly natural sugars from fruit/honey, not refined!)
That 6 grams of protein is why these **wholesome breakfast bars** keep you full until lunch! They are genuinely a much better choice than anything factory-made. Enjoy knowing exactly what you’re fueling your body with!
PrintChewy, Naturally Sweetened Homemade Granola Bars

Make easy, chewy homemade granola bars that are naturally sweetened and perfect for healthy snacking or lunch boxes. This customizable recipe is better than store-bought.
- Prep Time: 10 min
- Cook Time: 18 min
- Total Time: 28 min
- Yield: 12 bars 1x
- Category: Snack
- Method: Baking
- Cuisine: American
- Diet: Vegetarian
Ingredients
- 2 cups rolled oats
- 1 cup crispy rice cereal
- 1/2 cup chopped nuts (almonds or walnuts)
- 1/2 cup mini chocolate chips
- 1/2 cup natural peanut butter or almond butter
- 1/3 cup honey or maple syrup
- 1 teaspoon vanilla extract
- 1/4 teaspoon salt
Instructions
- Preheat your oven to 350°F (175°C). Line an 8×8 inch baking pan with parchment paper, leaving an overhang on the sides for easy removal.
- In a large bowl, combine the rolled oats, crispy rice cereal, chopped nuts, and mini chocolate chips. Mix these dry ingredients well.
- In a small saucepan over low heat, warm the peanut butter, honey (or maple syrup), vanilla extract, and salt until smooth and easily pourable. Do not let it boil.
- Pour the warm wet mixture over the dry ingredients. Stir everything together until all the dry ingredients are evenly coated.
- Transfer the mixture to the prepared baking pan. Press the mixture down firmly and evenly into the pan using the back of a spatula or another piece of parchment paper. Pressing firmly helps the bars hold together.
- Bake for 15 to 18 minutes, or until the edges are lightly golden brown.
- Remove the pan from the oven and let the bars cool completely in the pan on a wire rack. Cooling is important for texture.
- Once completely cool, use the parchment overhang to lift the block of granola out of the pan. Cut into 12 to 16 bars.
Notes
- For a softer, no-bake version, skip step 1 and 4. Warm the wet ingredients slightly, mix with dry ingredients, press into the pan, and chill in the refrigerator for at least 2 hours before cutting.
- Customize your bars by substituting dried fruit, seeds, or different types of chocolate chips for the nuts or cereal.
- Store your homemade granola bars in an airtight container at room temperature for up to one week, or freeze them for longer storage.
Nutrition
- Serving Size: 1 bar
- Calories: 210
- Sugar: 10g
- Sodium: 95mg
- Fat: 10g
- Saturated Fat: 3g
- Unsaturated Fat: 7g
- Trans Fat: 0g
- Carbohydrates: 30g
- Fiber: 3g
- Protein: 6g
- Cholesterol: 0mg