
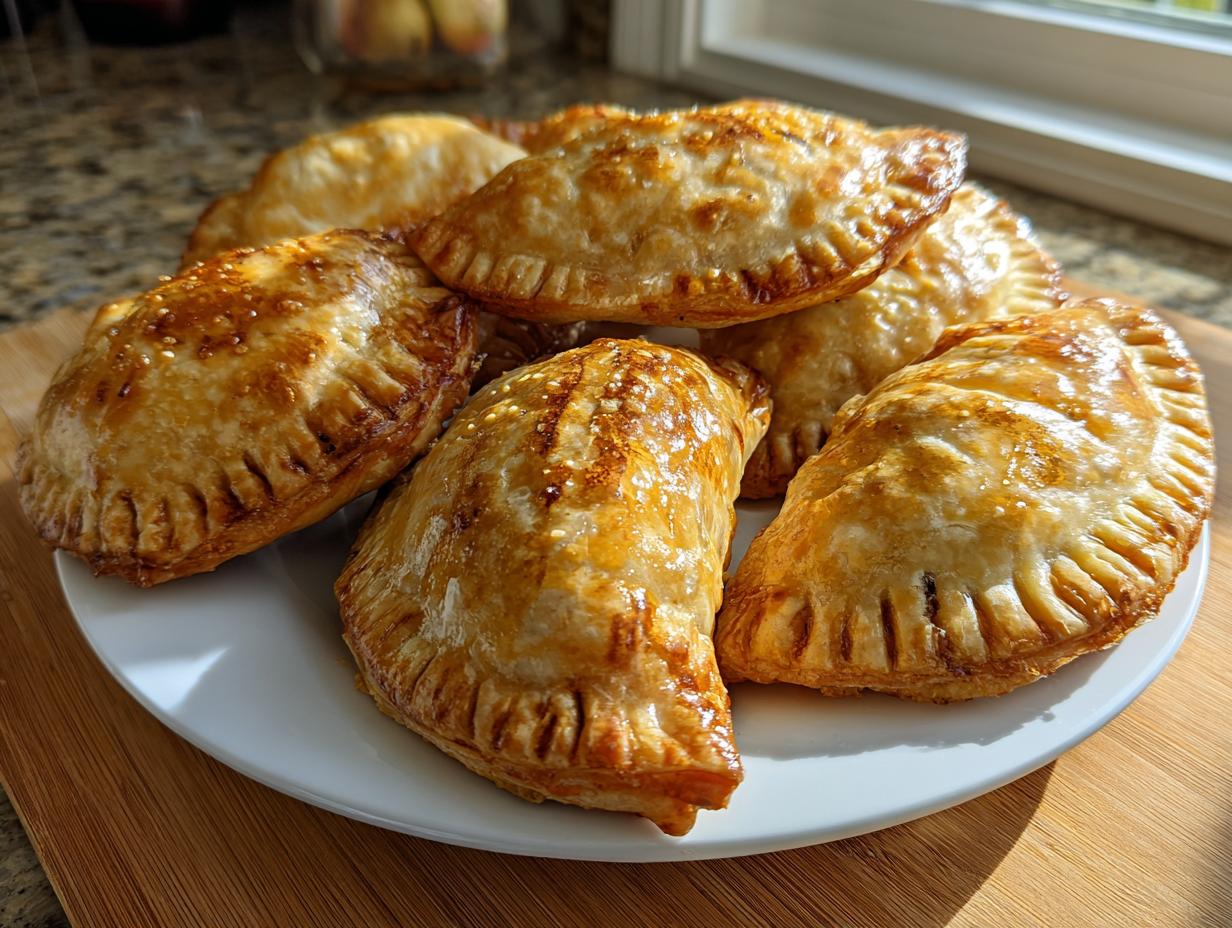
If you’ve ever stared down a Sunday afternoon with big plans for watching the game but zero enthusiasm for making a complicated meal, I know exactly how you feel. That’s why the creation of these amazing puff pastry cheeseburger pockets is one of my proudest moments in the kitchen! This recipe came straight out of my own home testing sessions, long before Seventh Flavour was even a thought. For years, I was stuck in that marketing grind, always looking for shortcuts that didn’t taste like compromises. These handheld cheeseburger bites—tasty beef wrapped in buttery, flaky layers—are the answer! They are so reliable, and honestly, they just make people happy when they take that first bite.
You can read a little more about my journey leaving the corporate world to focus on real, approachable cooking right here: my Seventh Flavour story. Trust me, if I can make these perfectly flaky pockets after a 10-hour workday, you definitely can!
- Why You'll Love These Puff Pastry Cheeseburger Pockets
- Essential Ingredients for Perfect Puff Pastry Cheeseburger Pockets
- Expert Tips for Assembling Your Ground Beef Pockets Recipe
- Step-by-Step Instructions for Baked Savory Pastries
- Making Puff Pastry Appetizers: Storage and Freezing Tips
- Serving Suggestions for Quick Dinner Pockets
- Frequently Asked Questions About Cheeseburger Pockets
- Nutritional Estimates for Your Homemade Cheeseburger Pockets
- Share Your Experience Making Puff Pastry Cheeseburger Pockets
Why You’ll Love These Puff Pastry Cheeseburger Pockets
We’re talking about pure comfort food tucked into a ready-made crust. It’s the ultimate blend of convenience and incredible flavor. Here’s the quick breakdown of why every busy cook needs this in their rotation:
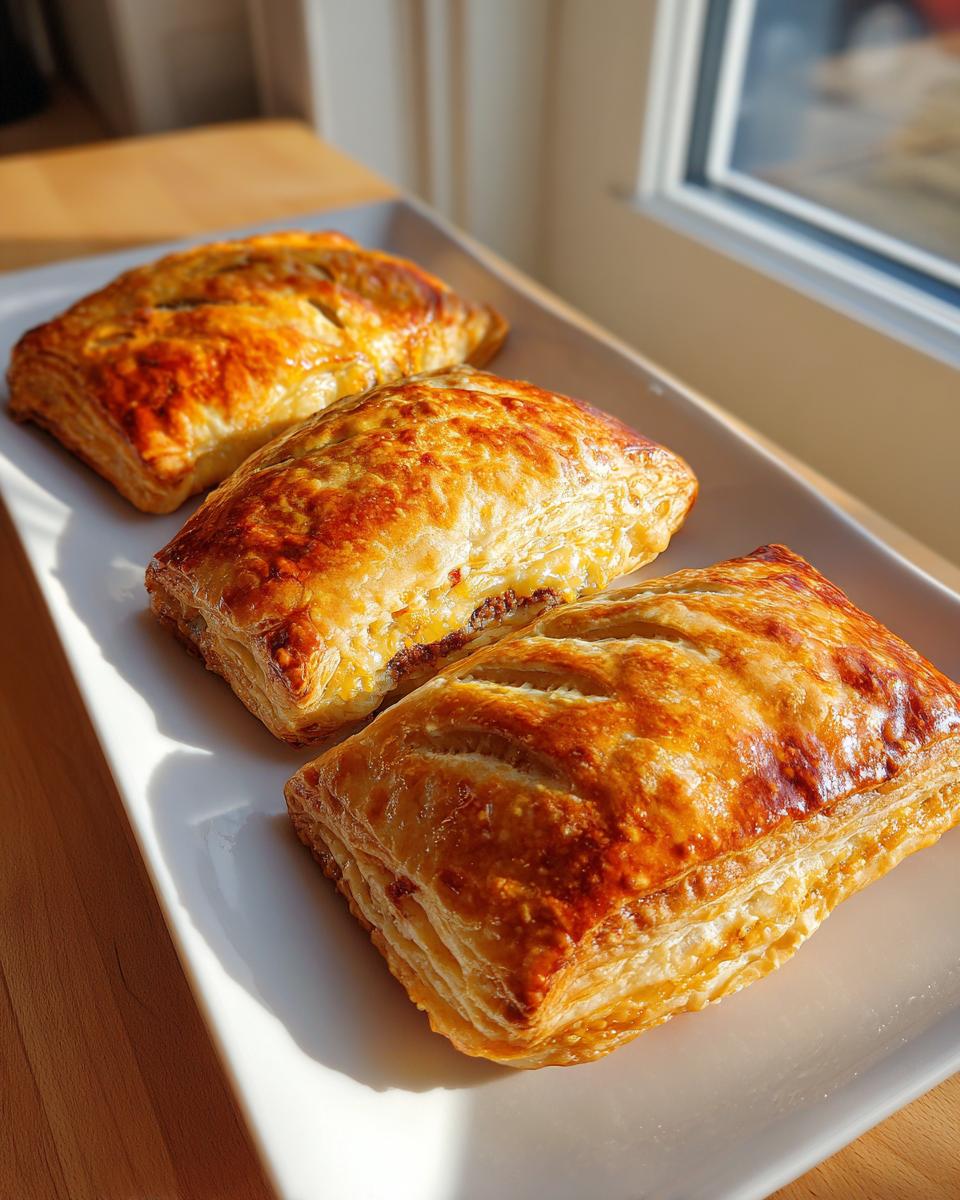
- They taste exactly like your favorite cheeseburger, but without ever needing a grill or a slightly messy bun.
- The puff pastry provides that beautiful, golden, flaky texture that just melts in your mouth—it’s worth buying the sheets!
- These puff pastry cheeseburger pockets are completely portable, making them perfect for lunchboxes or parties.
- Prep is shockingly fast once the beef is cooked. Check out some other quick ideas over on my healthy snacks page if you need more inspiration!
Essential Ingredients for Perfect Puff Pastry Cheeseburger Pockets
I don’t mess around with the classics here. To get that authentic, savory cheeseburger flavor wrapped snugly in pastry, you need the right components. I tested versions with fancy mustard and fancy cheese, but honestly, keeping it simple with good quality basics is what makes this such a reliable Ground Beef Pockets Recipe.
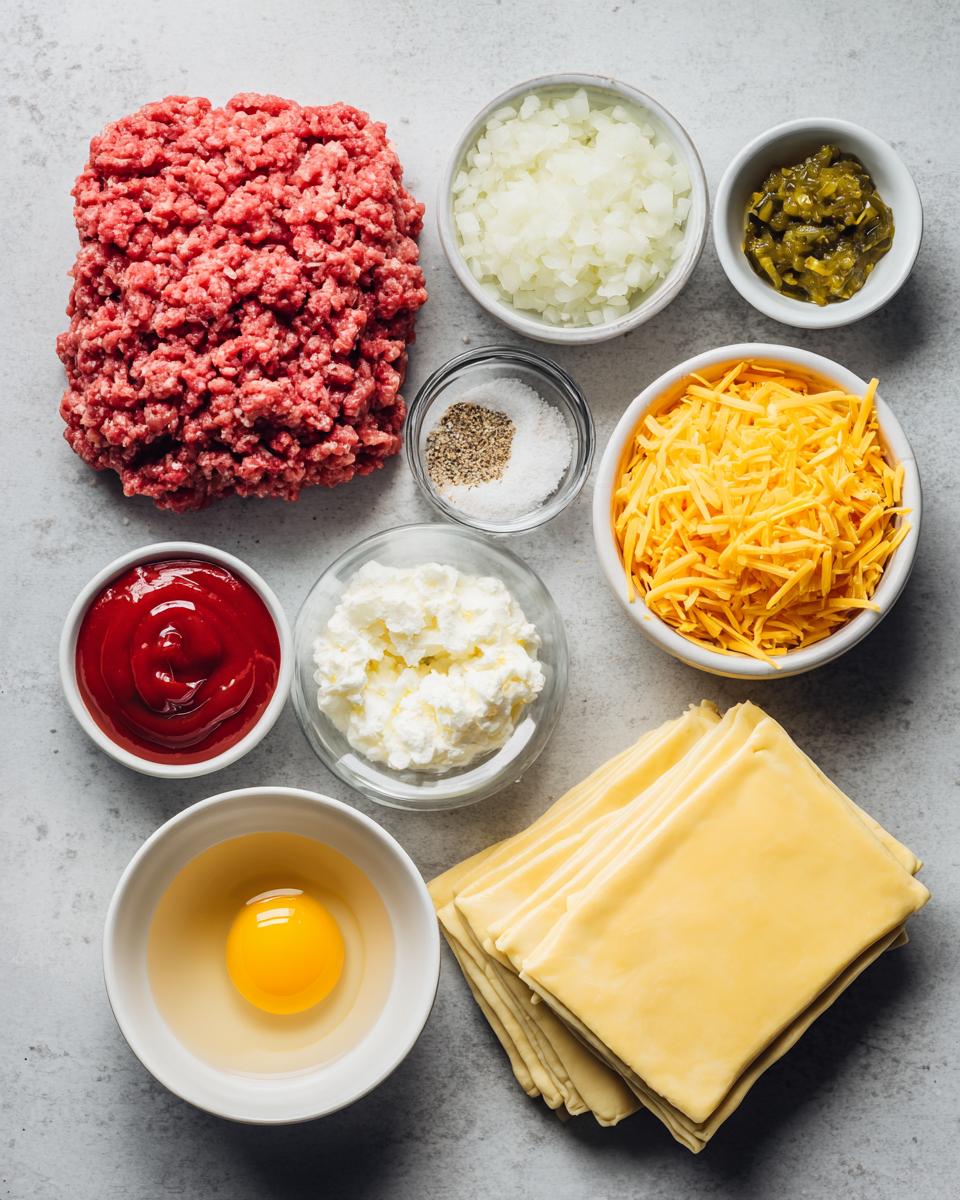
Here’s what you’ll need to gather up:
- One pound of good quality ground beef.
- Half a cup of onion, chopped really fine—we want flavor, not big chunks!
- A splash of Worcestershire sauce and simple seasonings: garlic powder, salt, and pepper.
- One cup of cheddar cheese, shredded—make sure it’s real cheese that melts nicely!
- For that classic tang: yellow mustard, ketchup, and a little pickle relish.
- Two sheets of frozen puff pastry, thawed, of course. Don’t try to rush thawing them, please!
- One beaten egg, just for brushing the top to get that beautiful, deep golden color.
If you are looking for a killer homemade version of that salty/tangy topping sauce, you might want to save my easy burger sauce recipe for dipping later!
Expert Tips for Assembling Your Ground Beef Pockets Recipe
Assembling these is almost the fun part, but a few tricks I learned from ruining batches early on will save you a lot of hassle. We are aiming for crispy pastry, not soggy bottoms filled with molten cheese lava everywhere.
Cooling the Filling: The Secret to Crisp Puff Pastry Cheeseburger Pockets
This is my number one, non-negotiable rule for any savory pastry filling. If you put hot, steamy filling onto cold puff pastry, you are essentially steaming the bottom layer of dough. That means it won’t puff, and you’ll get heavy, doughy bottoms on your otherwise perfect puff pastry cheeseburger pockets. Seriously, let that cooked beef cool for at least ten minutes until it’s just warm, not hot. It doesn’t need to be fridge cold, but it shouldn’t be steaming!
Sealing and Crimping for Handheld Cheeseburger Bites
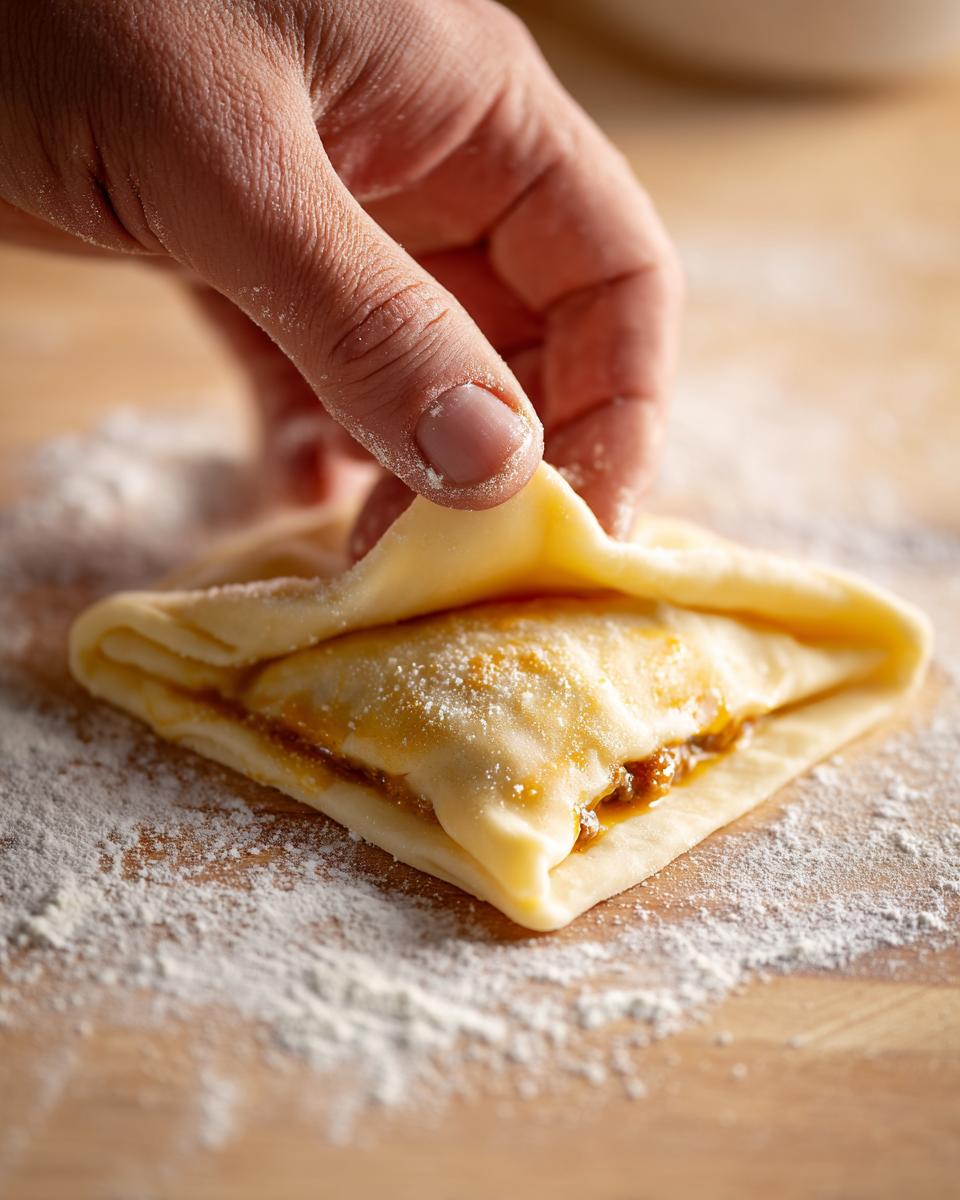
When you fold that square over to make a triangle (that’s my preferred shape!), you need commitment on the edges. Press the edges together really hard with your fingers. Then, take a fork and really smash those edges down. This double-sealing confirms they are locked tight. This step is crucial for success and prevents a major mess when you bake them into perfect Handheld Cheeseburger Bites.
Step-by-Step Instructions for Baked Savory Pastries
Getting these baked is simple, provided you’ve set yourself up for success with the prep. Remember, we are baking these at a high temperature to encourage that pastry to rise up beautifully. These Baked Savory Pastries bake fast!
Preparing the Beef Filling for Your Puff Pastry Cheeseburger Pockets
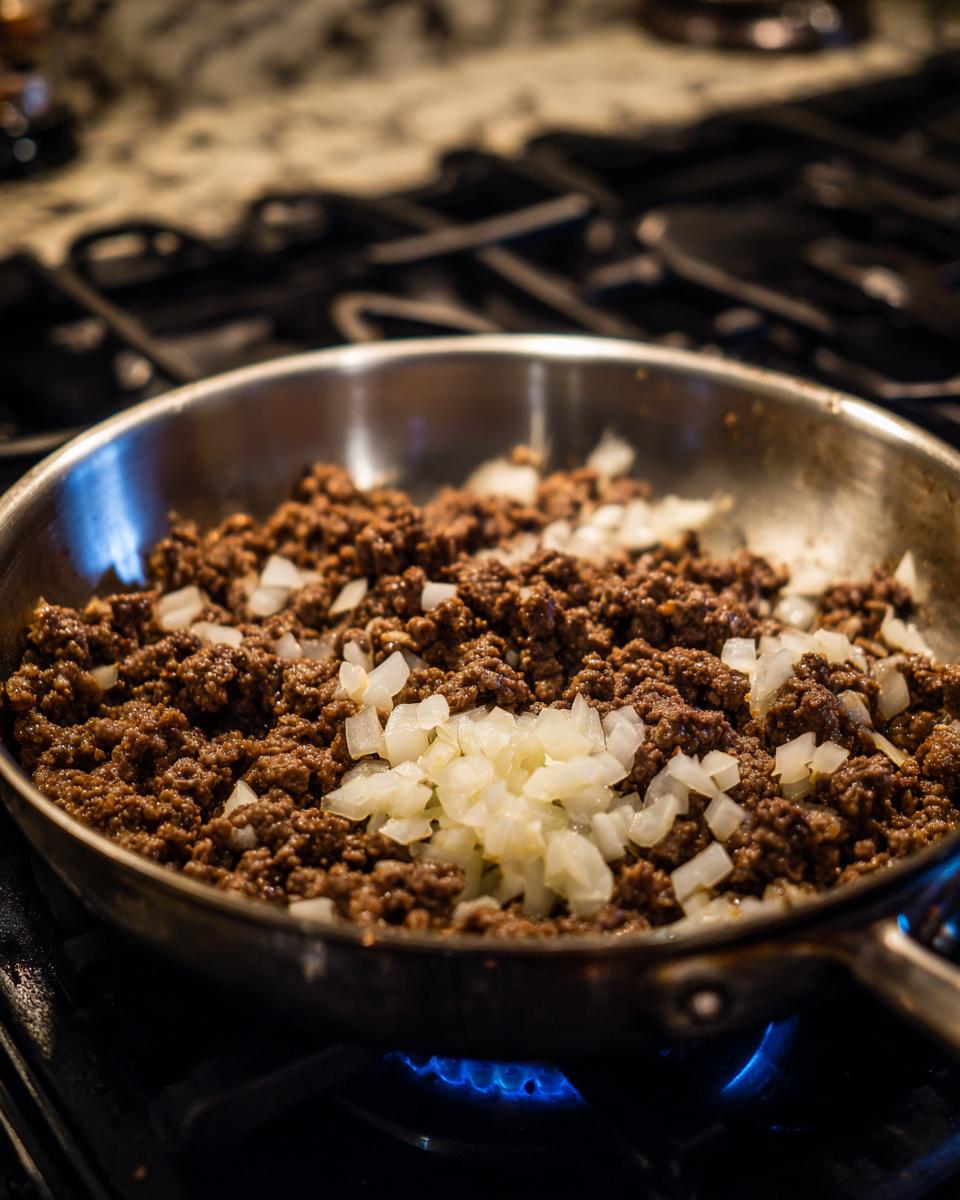
Get a skillet hot and brown that beef with your finely chopped onions. Once it looks done, you want to drain every last bit of grease—seriously, tilt that pan and use a slotted spoon because fat is the enemy of flaky pastry! Once drained, take the whole pan OFF the heat before you stir in the ketchup, mustard, and relish. Adding the cold condiments off the heat helps cool the entire mixture down a bit faster, which is key for our Puff Pastry Cheeseburger Pockets.
Baking Time and Temperature for Flaky Pastry Meals
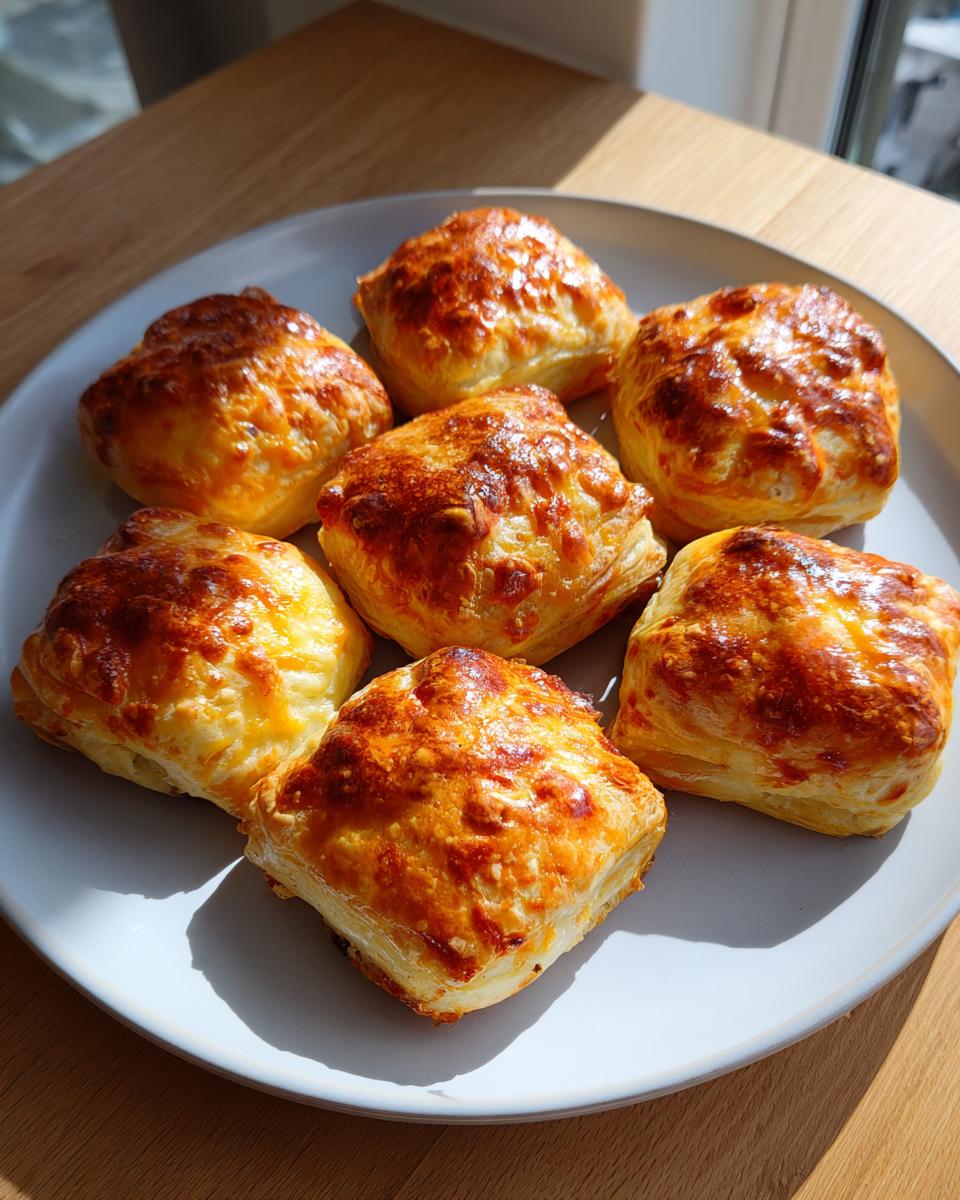
Preheat your oven to 400°F—you need that blast of heat! Lay out your 12 sealed pockets on parchment-lined sheets. Brush them gently with that egg wash; this is what gives them that deep, crackly brown shine we all want. Poke two little steam vents on top of each pocket so they don’t explode! Bake them for about 18 to 20 minutes. You’ll know they are done when they are dramatically puffed up and gorgeously golden brown all over. These turn into fantastic Flaky Pastry Meals when paired with a side salad!
Making Puff Pastry Appetizers: Storage and Freezing Tips
The beauty of these is they are fantastic right out of the oven, but they’re even better because they keep so well! I rely on these for make-ahead parties, so these Freezer Friendly Appetizers are always ready.
If you want to freeze them, assemble them completely, seal them perfectly, and lay them on a baking sheet. Pop that sheet right into the freezer until the pockets are rock solid—this flash freeze prevents them from sticking together later. Then, transfer them to a big freezer bag. When you want to bake them later, just pull them out of the freezer, brush them with the egg wash, and add about five to seven extra minutes to the bake time. No thawing required, which is a lifesaver!
Serving Suggestions for Quick Dinner Pockets
While they are perfectly delicious all on their own (seriously, the cheese and beef combo is fantastic), serving them up hot with a little something extra makes them really special. They transition seamlessly from a perfect Game Day Snack to a fun weeknight treat.
Since we already put the burger condiments inside, dipping them is almost optional, but never say no! They are amazing with a side of those homemade dipping sauces, like my famous Cowboy Caviar dip if you want something fresh, or just straight-up extra Big Mac sauce. For a Quick Dinner Pocket setup, serve two or three of these alongside some simple oven fries.
Frequently Asked Questions About Cheeseburger Pockets
Can I substitute the ground beef in these puff pastry cheeseburger pockets?
You absolutely can! While this recipe is built around beef flavor, ground turkey or even Italian sausage (just skip the mustard/ketchup mix in that case) works wonderfully. If you use sausage, maybe skip the pickle relish too. The structural elements of the puff pastry cheeseburger pockets recipe—cooling the filling and sealing well—remain the same no matter the protein!
What is the best cheese to use for these Easy Beef Turnovers?
Sharp cheddar is my go-to because it has the boldest flavor to stand up to the beef, but honestly, any good melting cheese is great. Try a 50/50 mix of sharp cheddar and Monterey Jack—that Jack melts like a dream! We want maximum gooiness inside these Easy Beef Turnovers.
How can I make sure these work for kid friendly lunch ideas?
For the best kid friendly lunch ideas, I recommend making them slightly smaller—maybe cut the pastry squares a little smaller before filling. Also, skip the pickle relish inside, as kids can be picky about that. Pack them cold, and they are great—or if you pack them warm in a thermos-style container, they should stay warm enough for lunch!
Nutritional Estimates for Your Homemade Cheeseburger Pockets
I know many of you track macros, and while I focus more on the “Seventh Flavour” experience, I always run the numbers just to give you a baseline for these Homemade Cheeseburger Pockets. Since we are using pastry, they aren’t exactly feather-light, but they are way better than dropping $10 on a fast-food combo!
Based on 12 servings, my estimates come out right around this:
- Serving Size: 1 pocket
- Calories: Approximately 320
- Protein: About 16g
- Fat: Around 20g (Be mindful of that saturated fat content!)
- Carbohydrates: Roughly 20g
Share Your Experience Making Puff Pastry Cheeseburger Pockets
Seriously, I want to see them! Did you stick with the triangles or try making little rectangles? Were they the hit of your party? I built this recipe for real home cooks, and nothing makes me happier than hearing how it worked in your kitchen. Please leave a star rating after you try this Puff Pastry Cheeseburger Pockets recipe below, and definitely send me photos or tell me all about it in the comments using the contact page!
- Why You'll Love These Puff Pastry Cheeseburger Pockets
- Essential Ingredients for Perfect Puff Pastry Cheeseburger Pockets
- Expert Tips for Assembling Your Ground Beef Pockets Recipe
- Step-by-Step Instructions for Baked Savory Pastries
- Making Puff Pastry Appetizers: Storage and Freezing Tips
- Serving Suggestions for Quick Dinner Pockets
- Frequently Asked Questions About Cheeseburger Pockets
- Nutritional Estimates for Your Homemade Cheeseburger Pockets
- Share Your Experience Making Puff Pastry Cheeseburger Pockets
Why You’ll Love These Puff Pastry Cheeseburger Pockets
We’re talking about pure comfort food tucked into a ready-made crust. It’s the ultimate blend of convenience and incredible flavor. Here’s the quick breakdown of why every busy cook needs this in their rotation:
- They taste exactly like your favorite cheeseburger, but without ever needing a grill or a slightly messy bun.
- The puff pastry provides that beautiful, golden, flaky texture that just melts in your mouth—it’s worth buying the sheets!
- These puff pastry cheeseburger pockets are completely portable, making them perfect for lunchboxes or parties.
- Prep is shockingly fast once the beef is cooked. Check out some other quick ideas over on my healthy snacks page if you need more inspiration!
Essential Ingredients for Perfect Puff Pastry Cheeseburger Pockets
I don’t mess around with the classics here. To get that authentic, savory cheeseburger flavor wrapped snugly in pastry, you need the right components. I tested versions with fancy mustard and fancy cheese, but honestly, keeping it simple with good quality basics is what makes this such a reliable Ground Beef Pockets Recipe.
Here’s what you’ll need to gather up:
- One pound of good quality ground beef.
- Half a cup of onion, chopped really fine—we want flavor, not big chunks!
- A splash of Worcestershire sauce and simple seasonings: garlic powder, salt, and pepper.
- One cup of cheddar cheese, shredded—make sure it’s real cheese that melts nicely! I really stress using sharp cheddar here for that robust flavor we associate with a great burger.
- For that classic tang: yellow mustard, ketchup, and a little pickle relish.
- Two sheets of frozen puff pastry, thawed, of course. Don’t try to rush thawing them, please!
- One beaten egg, just for brushing the top to get that beautiful, deep golden color.
If you are looking for a killer homemade version of that salty/tangy topping sauce, you might want to save my easy burger sauce recipe for dipping later!
Expert Tips for Assembling Your Ground Beef Pockets Recipe
Assembling these is almost the fun part, but a few tricks I learned from ruining batches early on will save you a lot of hassle. We are aiming for crispy pastry, not soggy bottoms filled with molten cheese lava everywhere. When you bake something delicate like puff pastry, the little steps make a huge difference. This is where the real learning happens in any Ground Beef Pockets Recipe. I actually tested these pockets late one night when I needed a fast dinner for the next day’s lunch, and I found that by prepping the filling early, I could pull everything together in under 15 minutes the next day! If you like simple cooking like this, check out my collection of quick weeknight dinners for more easy ideas.
Cooling the Filling: The Secret to Crisp Puff Pastry Cheeseburger Pockets
This is my number one, non-negotiable rule for any savory pastry filling. If you put hot, steamy filling onto cold puff pastry, you are essentially steaming the bottom layer of dough. That means it won’t puff, and you’ll get heavy, doughy bottoms on your otherwise perfect puff pastry cheeseburger pockets. Seriously, let that cooked beef cool for at least ten minutes until it’s just warm, not hot. It doesn’t need to be fridge cold, but it shouldn’t be steaming!
Sealing and Crimping for Handheld Cheeseburger Bites
When you fold that square over to make a triangle (that’s my preferred shape!), you need commitment on the edges. Press the edges together really hard with your fingers. Then, take a fork and use the tines to really smash those edges down all the way around. This double-sealing confirms they are locked tight, especially because that cheese wants to escape! This step is crucial for success and prevents a major mess when you bake them into perfect Handheld Cheeseburger Bites.
Step-by-Step Instructions for Baked Savory Pastries
Getting these baked is simple, provided you’ve set yourself up for success with the prep—especially making sure that filling is cool! The temperature of the oven is key here. We need that blast of high heat to make the puff pastry layers spring up instantly before the filling gets a chance to break down the dough structure. Following these steps precisely ensures you get those gorgeous, flaky Baked Savory Pastries we are aiming for.
Preparing the Beef Filling for Your Puff Pastry Cheeseburger Pockets
First things first, you need to cook the meat. Get a skillet screaming hot over medium heat and brown that beef right along with your finely diced onions. Once the beef is fully cooked through, you must drain off every drop of grease. I mean it—tilt that pan, use tongs to fish out the beef, or blot it with paper towels. Fat equals sogginess! Once the beef is drained, take the whole pan OFF the heat. This is our little temperature check. Only then should you stir in your Worcestershire sauce, garlic powder, salt, and pepper. Let it sit for a few minutes to cool slightly before stirring in the mustard, ketchup, and relish. This little bit of cooling time is so important for the structure of your Puff Pastry Cheeseburger Pockets!
Baking Time and Temperature for Flaky Pastry Meals
You need to preheat your oven to a solid 400 degrees Fahrenheit before you even start cutting the pastry. Once you have your 12 sealed pockets lined up on parchment paper, it’s time for the finishing touches. Brush every pocket generously but lightly with your beaten egg wash across the entire surface. Then, take a sharp knife and put two small slits right in the very top center of each pocket. These are vital steam vents—if you skip them, the steam might push open your sealed edges! Bake them for 18 to 20 minutes. You’ll know they’re done when they are dramatically puffed up, gorgeously golden brown, and you can smell that toasted butter scent everywhere. These turn into fantastic Flaky Pastry Meals when they come out looking this good. If you’re looking for something different in the morning, you can check out my easy breakfast recipes for some inspiration there!
Making Puff Pastry Appetizers: Storage and Freezing Tips
The beauty of these is they are fantastic right out of the oven, but honestly, they’re even better because they keep so well! I rely on having things ready to go for unexpected guests or just when I realize I forgot to plan dinner, so these Freezer Friendly Appetizers are always ready when I need them most. You can totally make these ahead of time, and they taste almost as good reheated.
If you want that ultimate convenience, you should definitely be freezing them before baking. Do everything exactly as the recipe says—cook the beef, mix in the cheese and condiments, seal your squares—but here is the major difference: DO NOT brush them with egg wash yet! The egg wash goes on right before baking to give you that shine, and it gets weird if you freeze it.
Line up all your unbaked, sealed pockets on wax or parchment paper on a baking sheet. Just slide that whole sheet into the freezer until every little pocket is rock hard—this usually takes an hour or two depending on your freezer. Once they are solid little frozen bricks, you can dump them all into one zip-top bag. This is the only way to keep them from sticking together in one giant, beefy lump!
When the craving hits, just pull out as many Puff Pastry Cheeseburger Pockets as you need, place them on a lined baking sheet, and brush them with the egg wash then. Because they are starting frozen, you’ll need a little extra time in the oven—I usually add five to seven minutes to the bake time. You’ll still get that incredible flakiness! For more tips on keeping things prepped and ready, check out my full section on freezer friendly appetizers.
Serving Suggestions for Quick Dinner Pockets
While they are perfectly delicious all on their own—seriously, the beef, cheese, and burger zing we packed inside is fantastic—serving them up hot with a little something extra makes them really special. These transition seamlessly from a perfect, easy appetizer to a satisfying main course! They are exactly what you need when you’re hungry but don’t want to commit to a whole sit-down burger experience, making them a fantastic Quick Dinner Pocket.
For game days, I find that easy dipping sauces are the key to keeping everyone happy and their hands clean. Because we already put mustard, ketchup, and relish inside the pocket, you don’t have to replicate those flavors on the side. Instead, I love offering something unexpected! You can check out my recipe for Cowboy Caviar dip if you want to offer your Game Day Snacks something fresh and vibrant to cut through the richness of the pastry!
If you’re serving these for a casual dinner, keep it simple! Two of these folded pastry pockets alongside a big, crisp green salad dressed with only lemon juice and olive oil, or maybe some classic baked sweet potato fries, feels like a complete, easy meal. No fuss, maximum flavor. That, my friends, is the essence of a great Quick Dinner Pocket.
Frequently Asked Questions About Cheeseburger Pockets
I always get asked the same questions when I bring these handheld beauties to a potluck, and that’s okay! It just proves how many people are looking for a simple, delicious appetizer. I’ve pulled together some of the most common things I hear about making these cheeseburger delights.
Can I substitute the ground beef in these puff pastry cheeseburger pockets?
You absolutely can! While this recipe is built around that classic, savory beef flavor, ground turkey or even a good seasoned ground sausage works wonderfully inside the pastry. If you switch to something like Italian sausage, you might want to skip mixing in the ketchup and relish, as those flavors can clash a bit. But the structural magic of the puff pastry cheeseburger pockets—making sure that filling is cool and sealing those edges tight—remains the same no matter what meat you choose!
What is the best cheese to use for these Easy Beef Turnovers?
This choice really dictates how gooey your pockets become! Sharp cheddar is my absolute favorite because it packs the boldest flavor to cut through the richness of the beef and the pastry dough. However, if you are making these specifically for someone who likes it milder, or just really loves melt factor, you can’t go wrong mixing half sharp cheddar with Monterey Jack. That Jack melts like silk, ensuring your Easy Beef Turnovers are perfectly oozy!
How can I make sure these work for kid friendly lunch ideas?
For making the absolute best kid friendly lunch ideas from this recipe, I have two quick tips. First, when you cut your pastry squares, cut them just a little smaller—say, 3 inches instead of 4 inches—so the resulting pockets are easier for little hands to manage! Second, and this is important for the pickiest eaters, you should absolutely leave the pickle relish out of the filling for the kids. You can always serve that on the side in a little dipping cup. If you pack them warm in a quality thermos, they’ll stay warm enough for lunchtime goodness. For more lunch inspiration, you can always check out my full section on healthy lunch recipes for more great ideas!
Nutritional Estimates for Your Homemade Cheeseburger Pockets
I know many of you track macros, and while I focus more on that overall ‘Seventh Flavour’ experience—that amazing feeling a great meal gives you—I always run the numbers just to give you a baseline for these Homemade Cheeseburger Pockets. Look, slapping meat inside pastry isn’t exactly a salad, but they are certainly a fantastic, comforting treat! Remember, these estimates are based on dividing the total recipe yield (12 pockets) evenly across every ingredient listed, so use them as a guide!
When everything is baked up and you get one perfect, flaky pocket, here is roughly what you’re looking at. I try to keep things balanced, but the puff pastry does bring that buttery goodness!
- Serving Size: 1 delicious pocket
- Calories: Approximately 320—perfect for a hearty snack or light lunch!
- Protein: About 16g—that beef really delivers!
- Fat: Around 20g (Be mindful of that saturated fat content, that’s where the pastry and cheese really jump up!)
- Carbohydrates: Roughly 20g
- Fiber: Just 1g (It’s mostly savory meat and flaky crust, not veggies, ha!)
It’s always a trade-off, right? You get incredible texture and flavor from the puff pastry, and that means the fat content goes up a bit. But trust me, taking the time to make these Homemade Cheeseburger Pockets yourself tastes a million times better than anything pre-made!
Share Your Experience Making Puff Pastry Cheeseburger Pockets
Well, that’s it! We’ve gone from simple frozen sheets to amazing, warm, handheld comfort food. Now comes my favorite part: hearing from you! I really, truly love knowing that something I spent hours perfecting in my own kitchen is making its way onto your dinner table or being the star of your next party.
When you try this recipe, please don’t be shy! Head right over to the ratings section—I really want to know what you thought. Did they flare up nicely? Did the seal hold? Your feedback helps me keep refining and making sure this Puff Pastry Cheeseburger Pockets recipe is perfect for everyone.
If you snapped a photo while they were still hot and golden coming out of the oven, please share it! You can send them my way through the contact page. Seeing your results and reading your stories about how these Speedy Beef Turnovers fit into your life is honestly the Seventh Flavour of it all for me. Happy baking, everyone!
PrintUltimate Flaky Puff Pastry Cheeseburger Pockets: Easy Game Day Appetizer
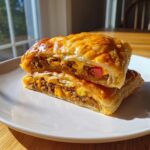
Make handheld cheeseburger bites using ground beef, cheese, and flaky puff pastry. These baked savory pastries are simple to assemble and perfect for quick dinners or game day snacks.
- Prep Time: 20 min
- Cook Time: 20 min
- Total Time: 40 min
- Yield: 12 pockets 1x
- Category: Appetizer
- Method: Baking
- Cuisine: American
- Diet: Low Fat
Ingredients
- 1 pound ground beef
- 1/2 cup finely chopped onion
- 1 teaspoon Worcestershire sauce
- 1/2 teaspoon garlic powder
- 1/4 teaspoon salt
- 1/8 teaspoon black pepper
- 1 cup shredded cheddar cheese
- 1 tablespoon yellow mustard
- 1 tablespoon ketchup
- 1 teaspoon pickle relish
- 2 sheets frozen puff pastry, thawed according to package directions
- 1 large egg, beaten (for egg wash)
Instructions
- Preheat your oven to 400 degrees Fahrenheit. Line two baking sheets with parchment paper.
- In a skillet over medium heat, cook the ground beef and chopped onion until the beef is fully browned. Drain off any excess grease.
- Stir in the Worcestershire sauce, garlic powder, salt, and pepper. Cook for one minute more. Remove the skillet from the heat and let the mixture cool slightly for about 10 minutes.
- Once cooled, stir the mustard, ketchup, and pickle relish into the beef mixture.
- Unfold the thawed puff pastry sheets onto a lightly floured surface. Cut each sheet into six equal squares, yielding 12 squares total.
- Place about 1 to 1.5 tablespoons of the beef mixture onto one half of each pastry square, leaving a 1/2-inch border around the edges. Sprinkle about 1 tablespoon of shredded cheddar cheese over the beef mixture on each square.
- Fold the empty half of the pastry over the filling to create a triangle or rectangle pocket. Press the edges firmly together with your fingers to seal. Crimp the edges with a fork to secure the seal and prevent cheese leakage.
- Place the sealed pockets onto the prepared baking sheets. Brush the tops of each pocket lightly with the beaten egg wash. Cut two small slits in the top of each pocket to allow steam to escape.
- Bake for 18 to 20 minutes, or until the puff pastry is golden brown and fully puffed.
- Remove from the oven and let cool on the baking sheet for 5 minutes before serving.
Notes
- For best results and to prevent soggy bottoms, make sure the beef filling is cool before placing it on the pastry.
- If you plan to freeze these, assemble them completely, but do not egg wash. Freeze on a baking sheet until solid, then transfer to a freezer bag. Bake from frozen, adding 5-7 minutes to the bake time.
- Use sharp cheddar or a blend of cheddar and Monterey Jack for good melting quality.
Nutrition
- Serving Size: 1 pocket
- Calories: 320
- Sugar: 2
- Sodium: 450
- Fat: 20
- Saturated Fat: 9
- Unsaturated Fat: 11
- Trans Fat: 0.5
- Carbohydrates: 20
- Fiber: 1
- Protein: 16
- Cholesterol: 55